Why Summer Is My Favorite Season for Nail Design
")
There’s something magical about summer. It’s the season of sunsets, beach waves, fruity drinks — and yes, bold nail art! Summer gives us permission to experiment, to go vibrant and loud, or soft and dreamy. Whether it’s a juicy orange chrome, playful daisies, or ocean-inspired glitter, summer nail designs are where imagination meets polish.
No rules. No limits. Just pure color therapy on ten tiny canvases.
If you’re searching for summer nail inspiration, this guide is bursting with Pinterest-worthy nail ideas, trendy shapes, and color combos that will keep your feed — and fingers — glowing all season long.
Table of Contents
Reader Favorites: 9 Summer Nail Designs to Save Right Now
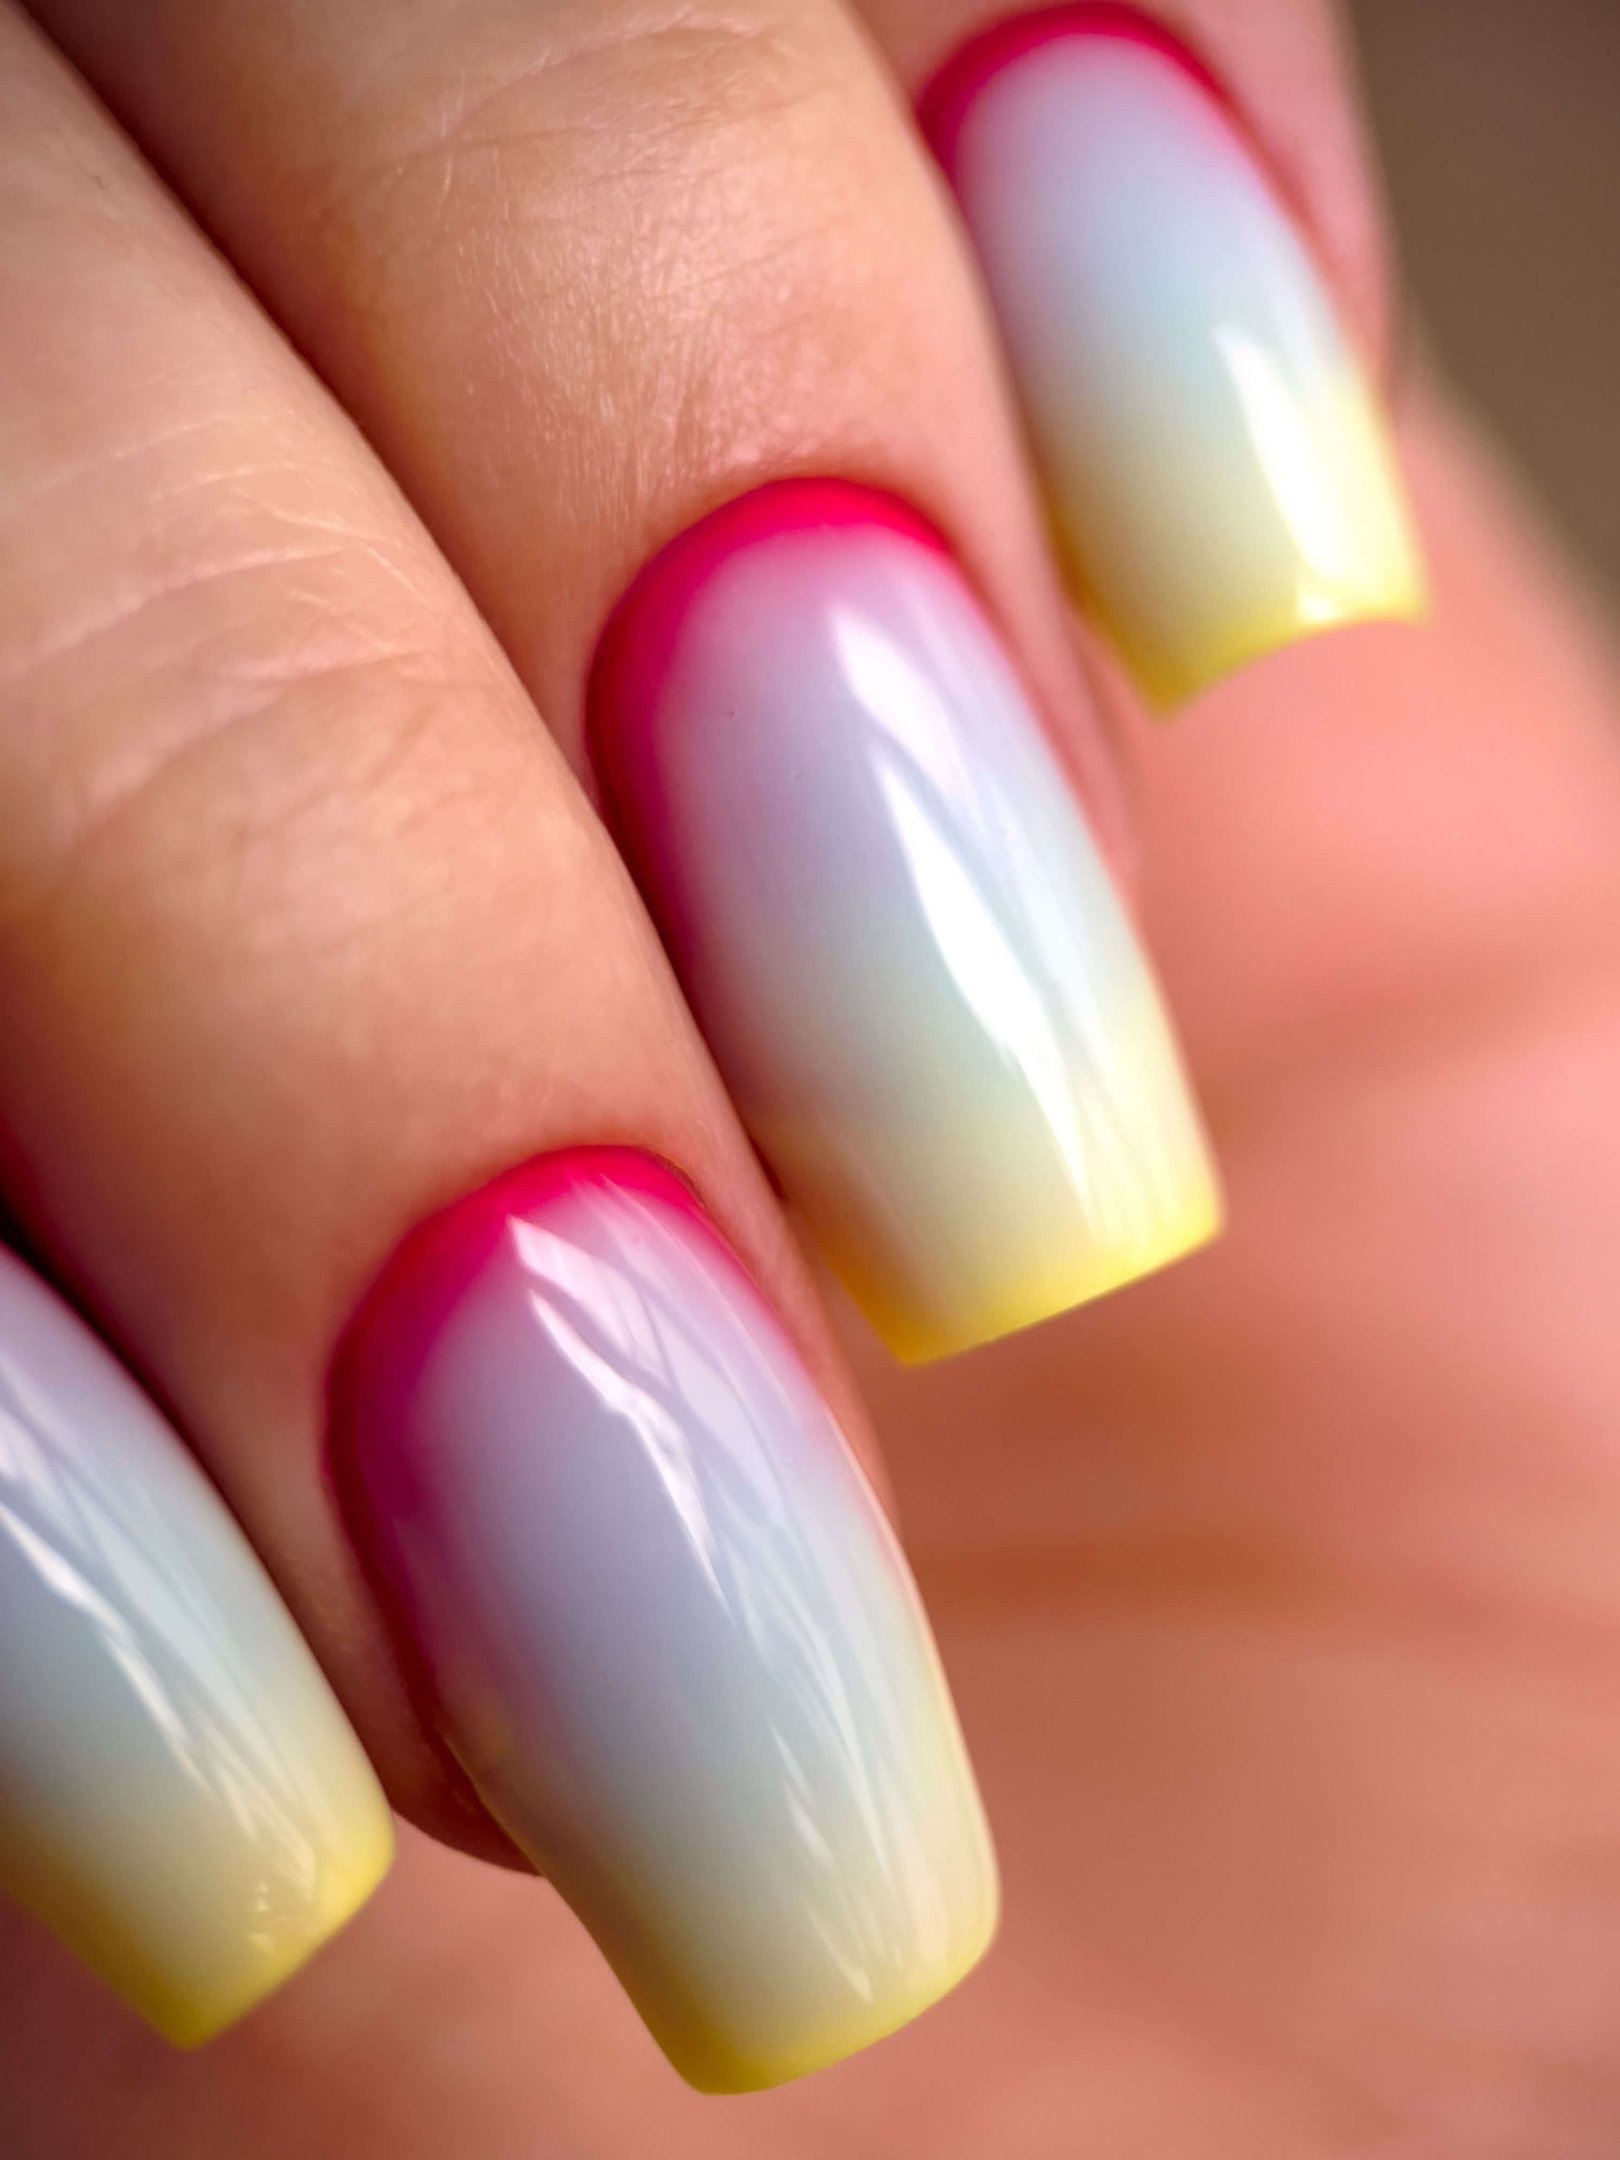
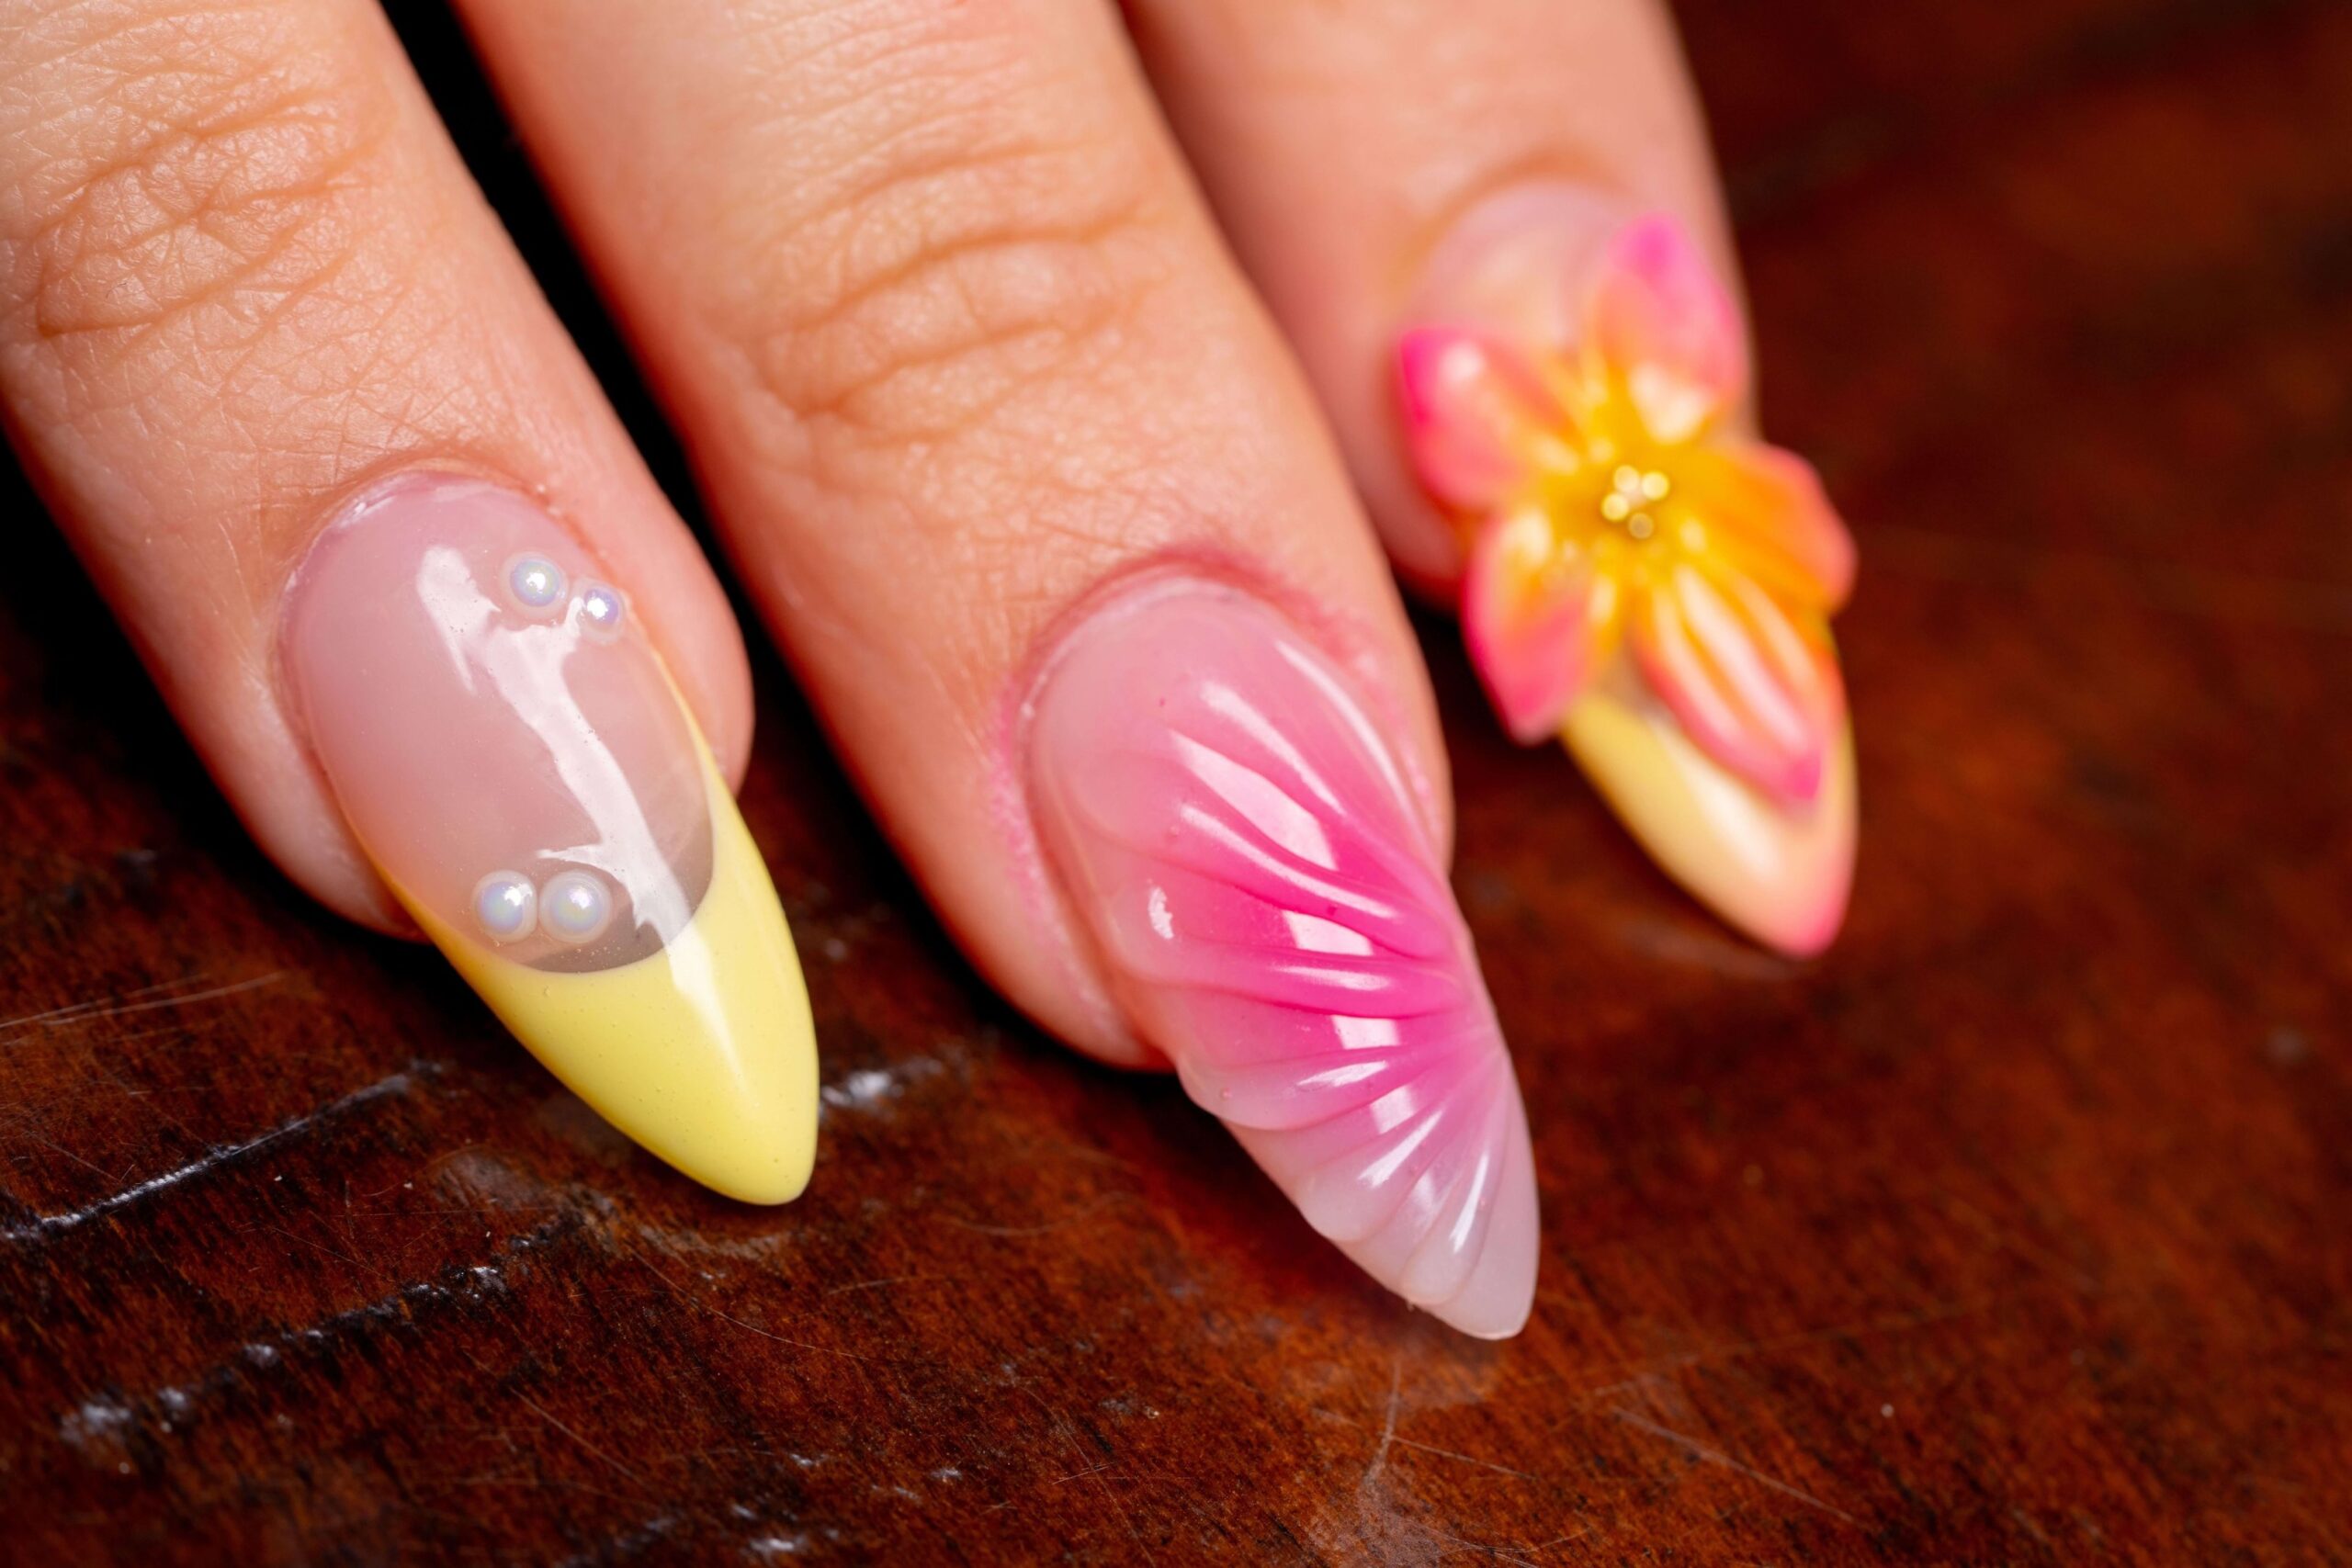
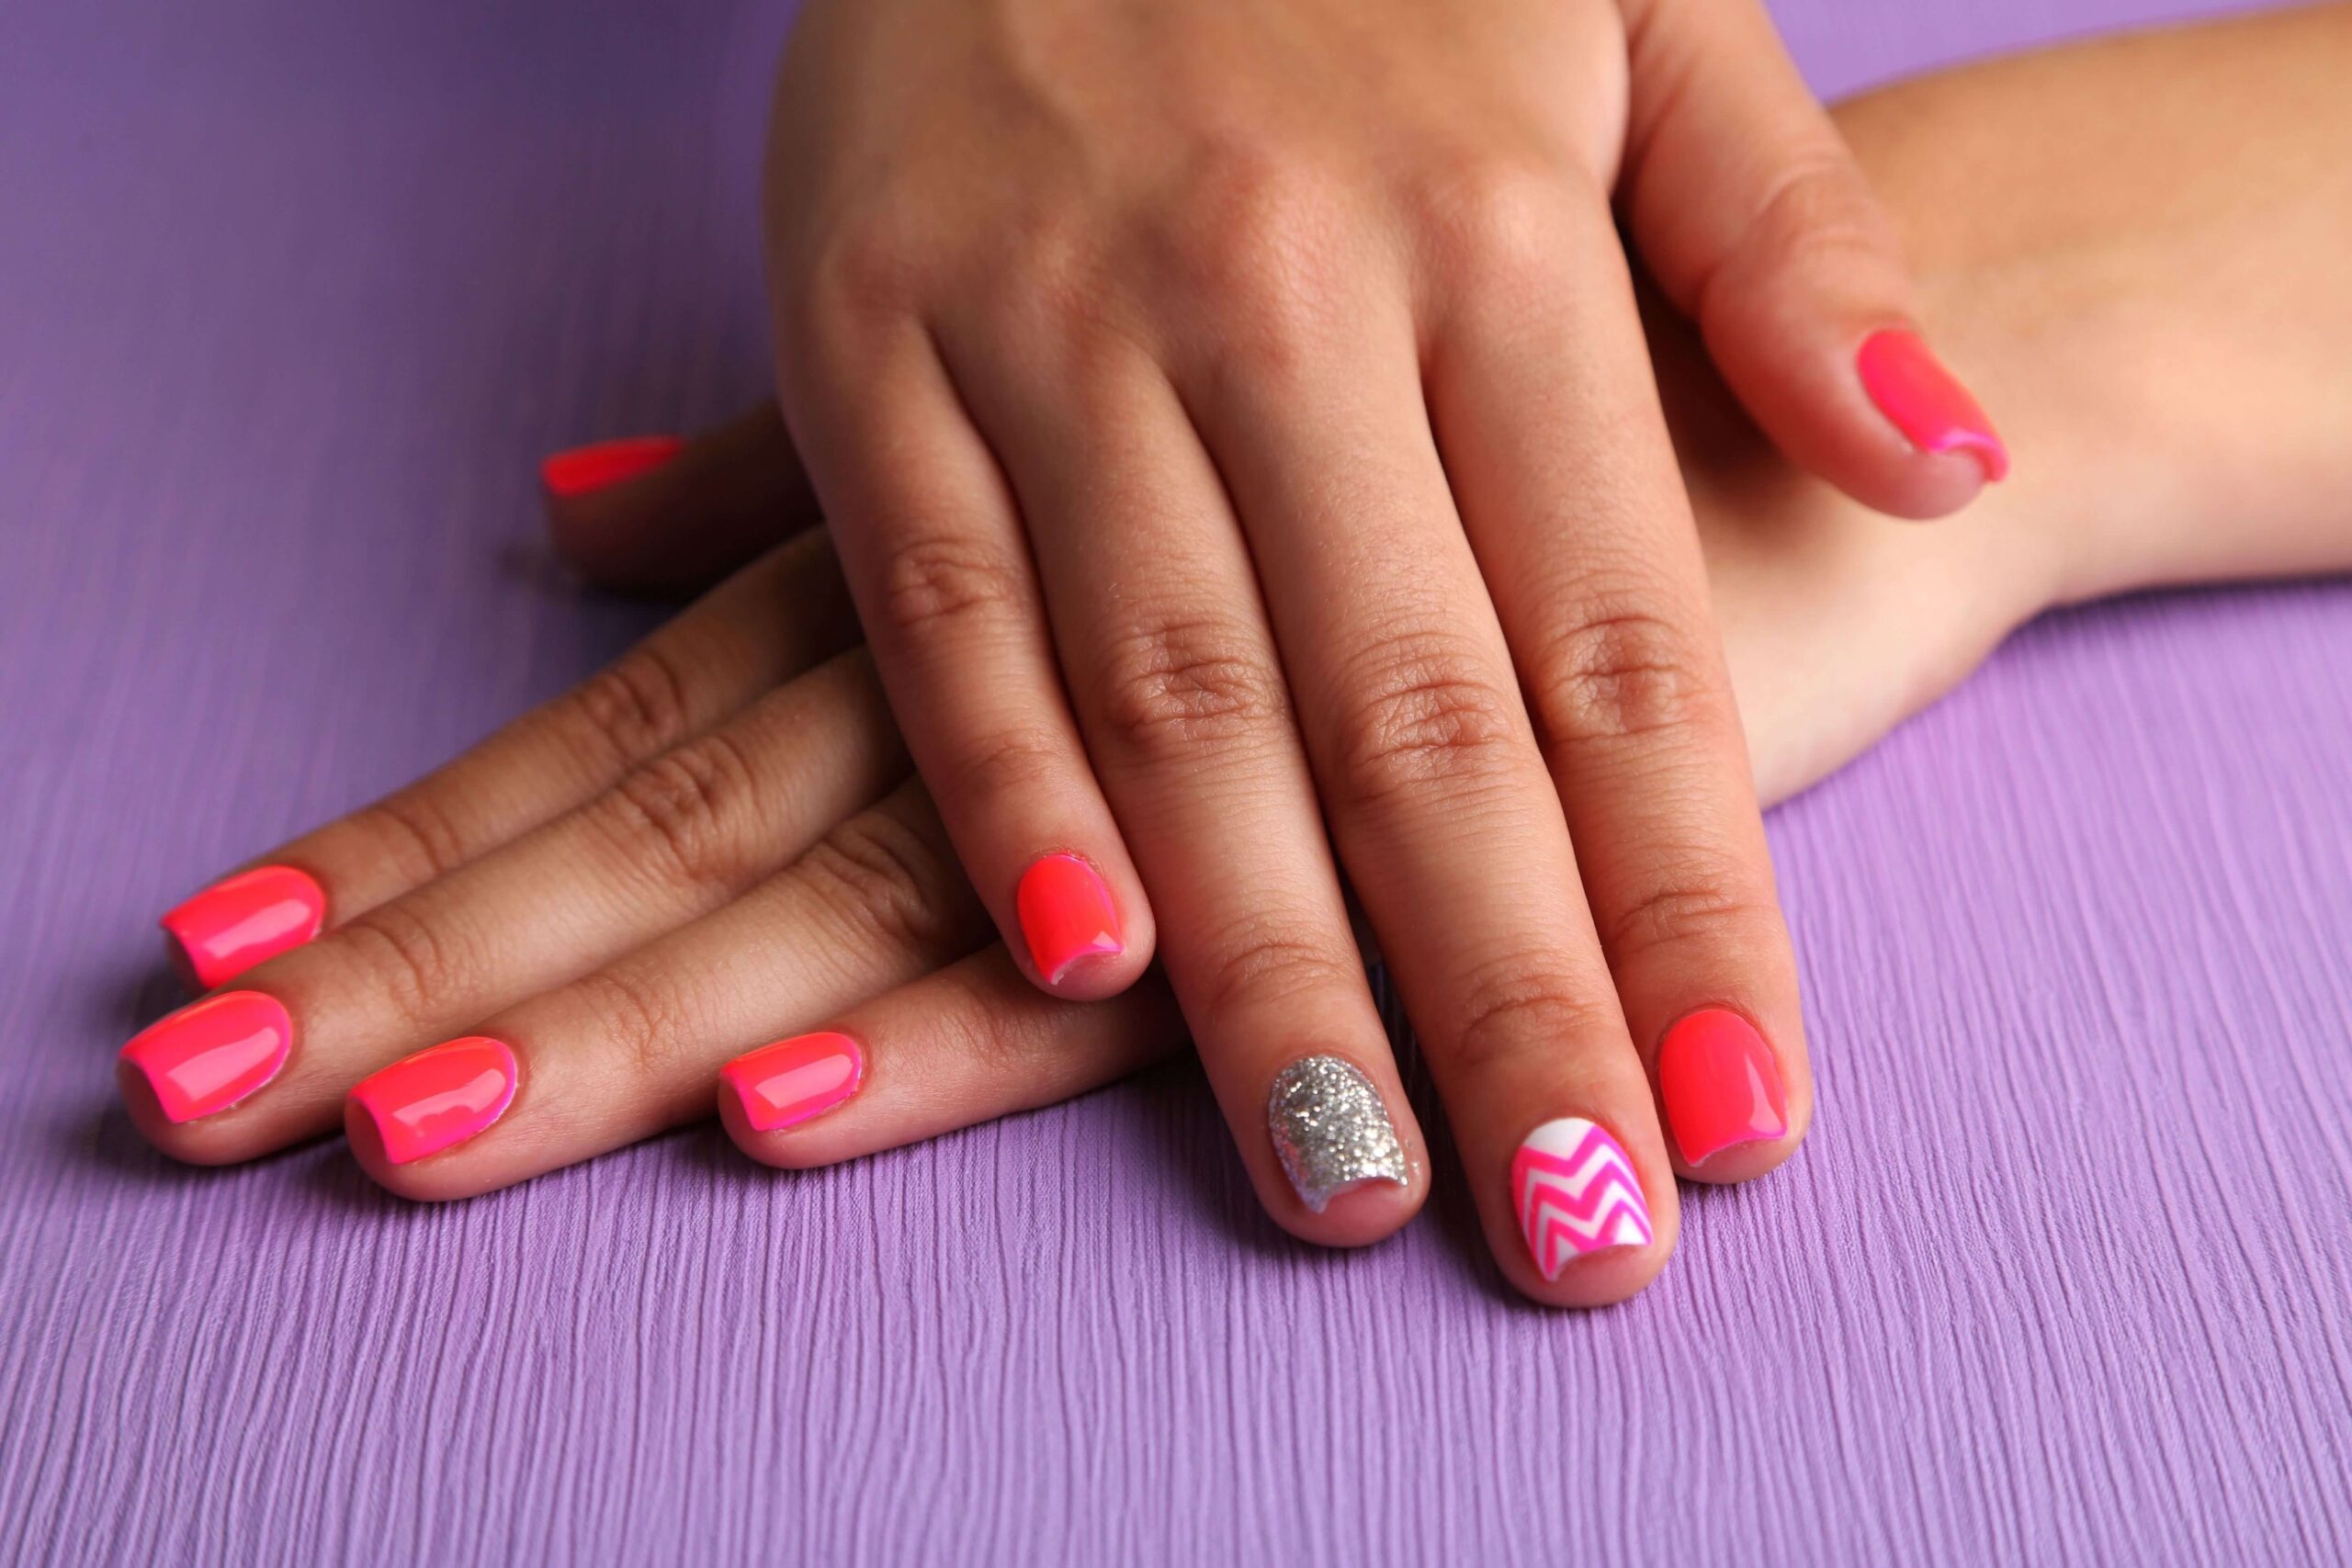
1. Tropical Ombre Sunset Nails

With a hot pink and orange chrome gradient, this nail set is everything a summer sunset should be. The short square shape adds modern flair while the glossy finish gives it mirror shine.
Perfect for: Tropical vacations, summer parties, and every sunset chaser.
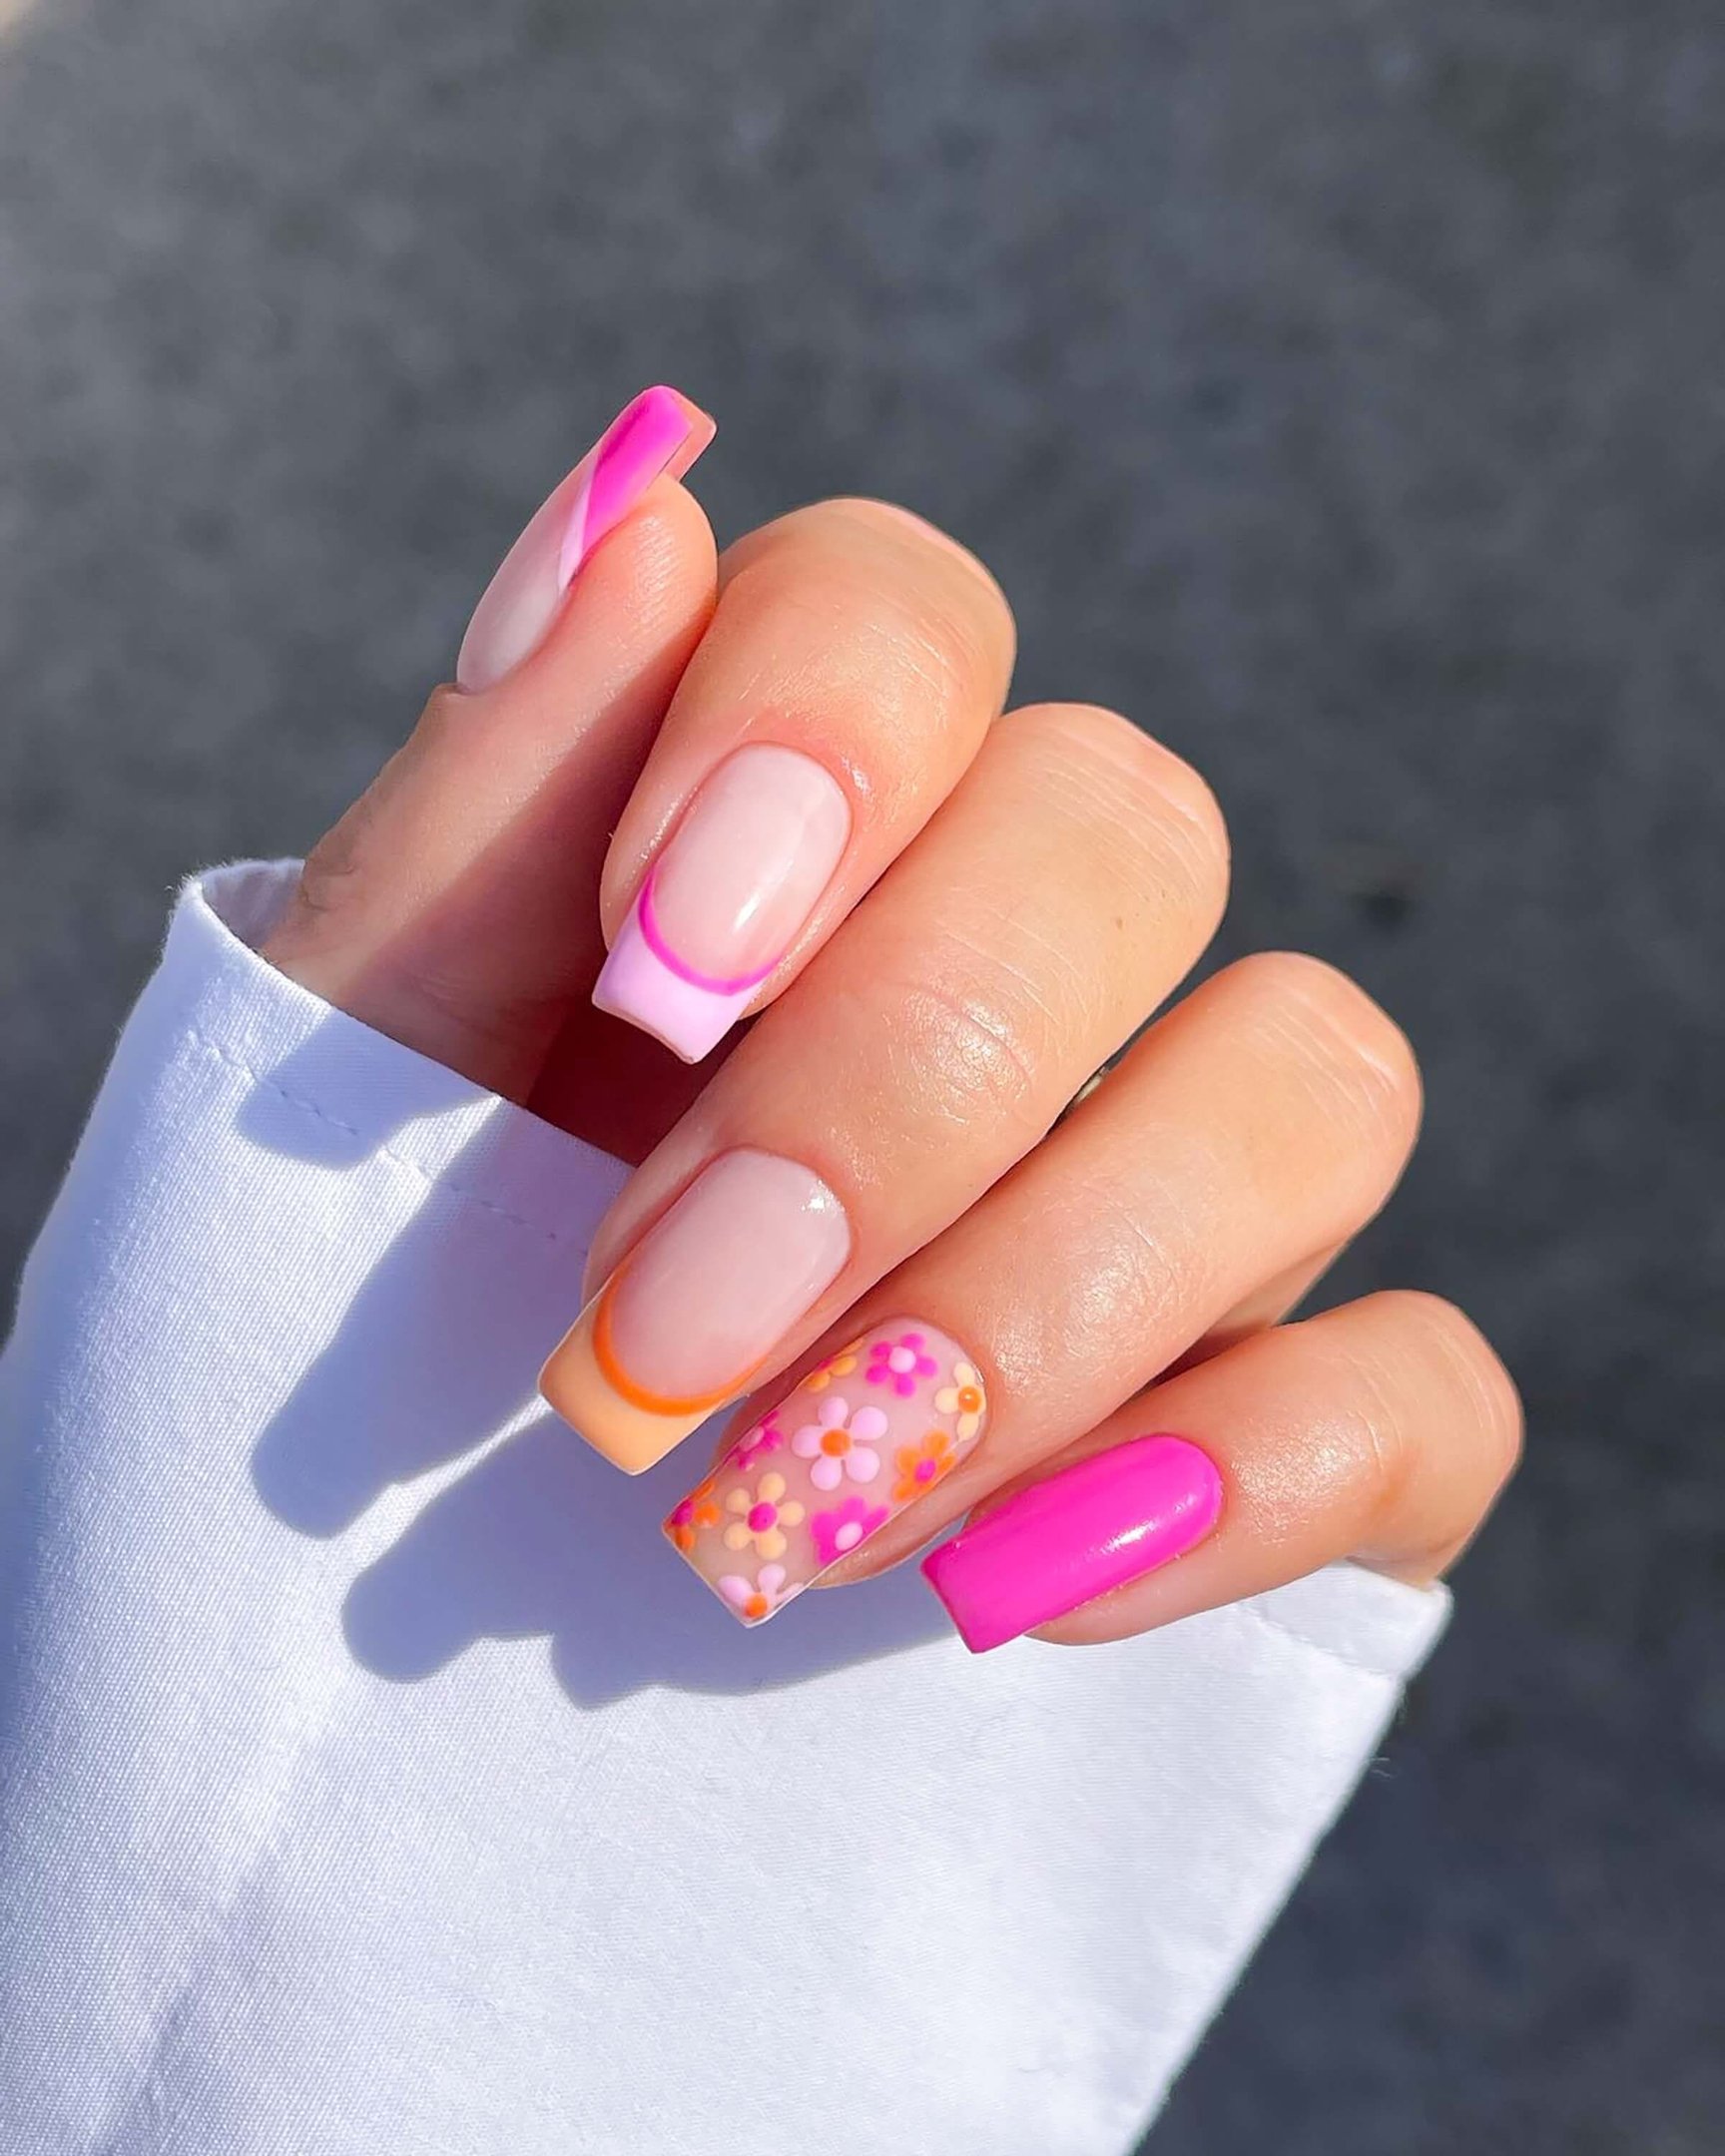
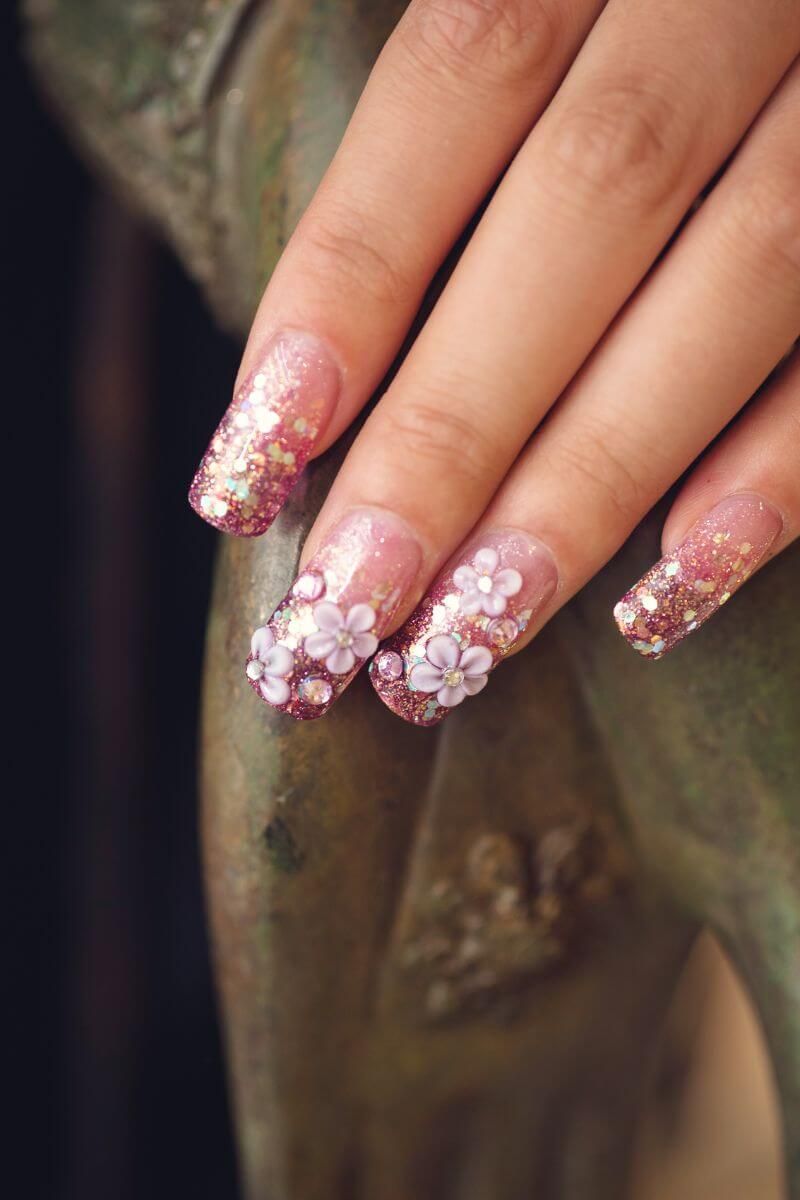
2. Pink Daisy Dream Nails

If sunshine had a nail look, this would be it. Nude bases with hand-painted white daisies and hot pink accents make this manicure playful and Pinterest-perfect.
Perfect for: Flower lovers, soft girl aesthetic, daisy nail design fans.
3. Mermaid Shell Sparkle Nails

Calling all mermaids! These pastel blue nails combine chunky ocean glitter with a seashell accent, surrounded by rhinestones. It’s an under-the-sea fantasy brought to life.
Perfect for: Beach trips, summer festivals, mermaidcore fans.
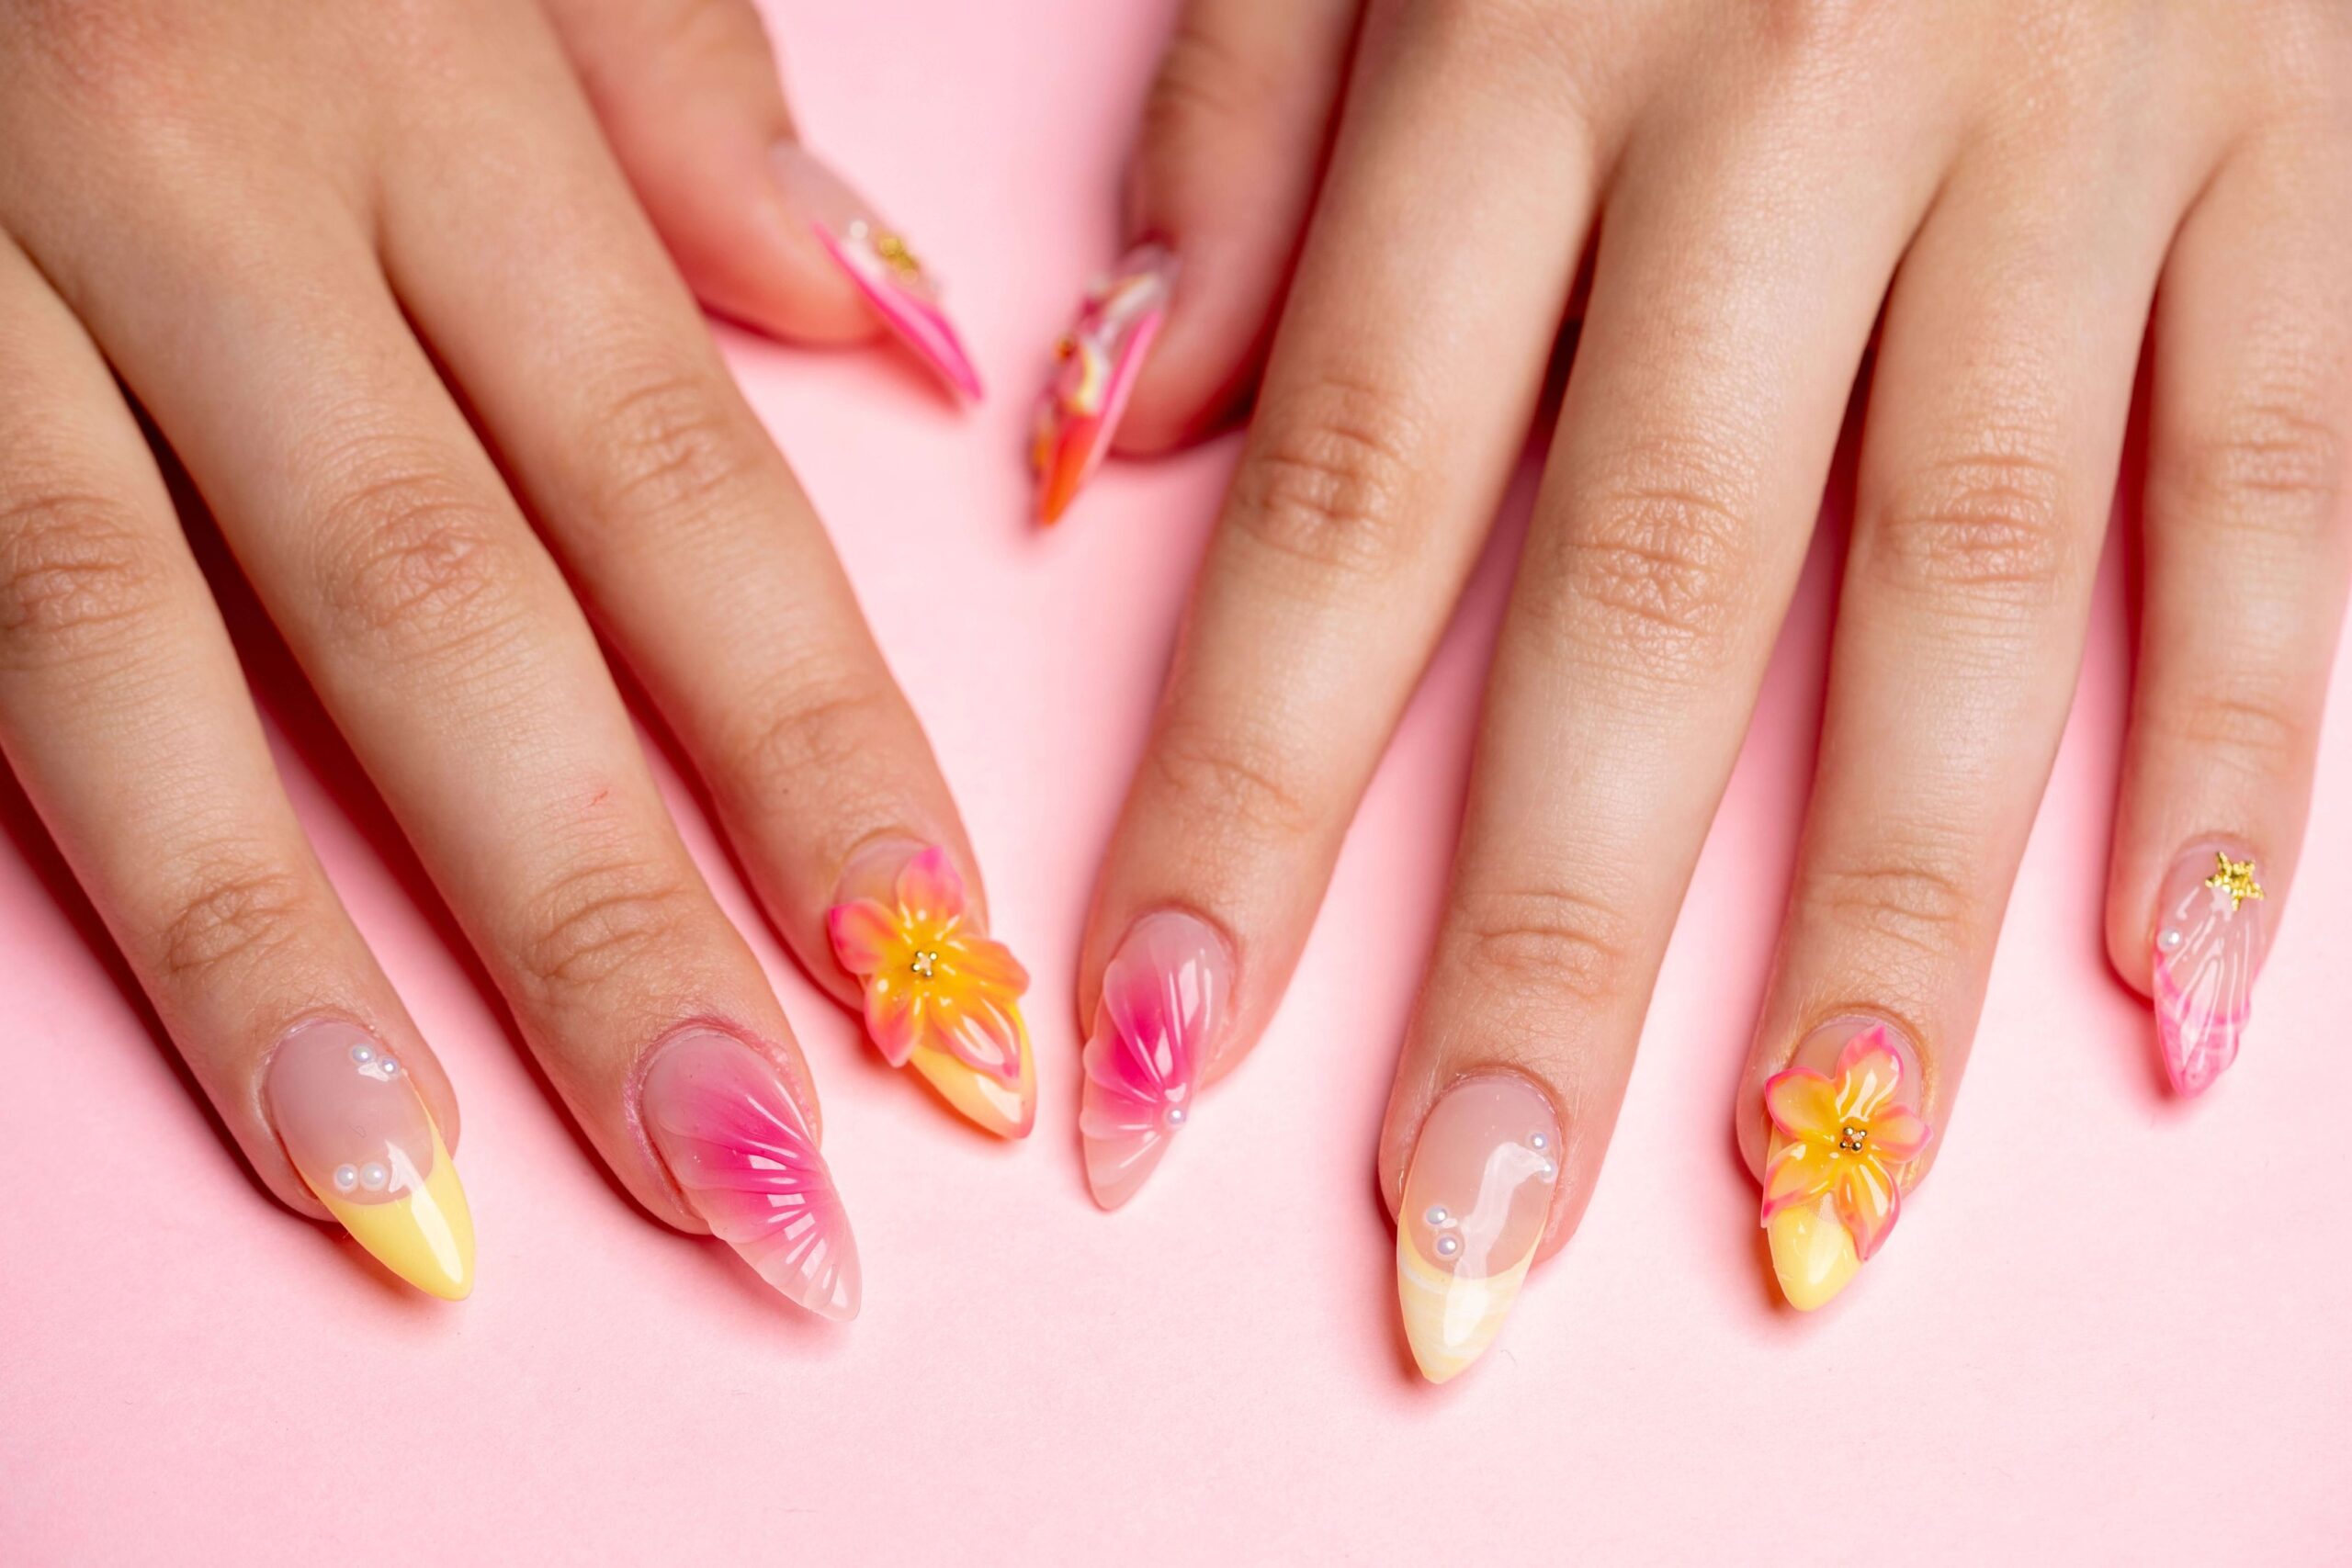
4. Neon Daisy Garden Nails

A bouquet of color! These nails feature a mix of neon orange base polish and 3D matte daisies in every shade from lilac to sunshine yellow.
Perfect for: Garden parties, spring-summer transitions, bold floral lovers.
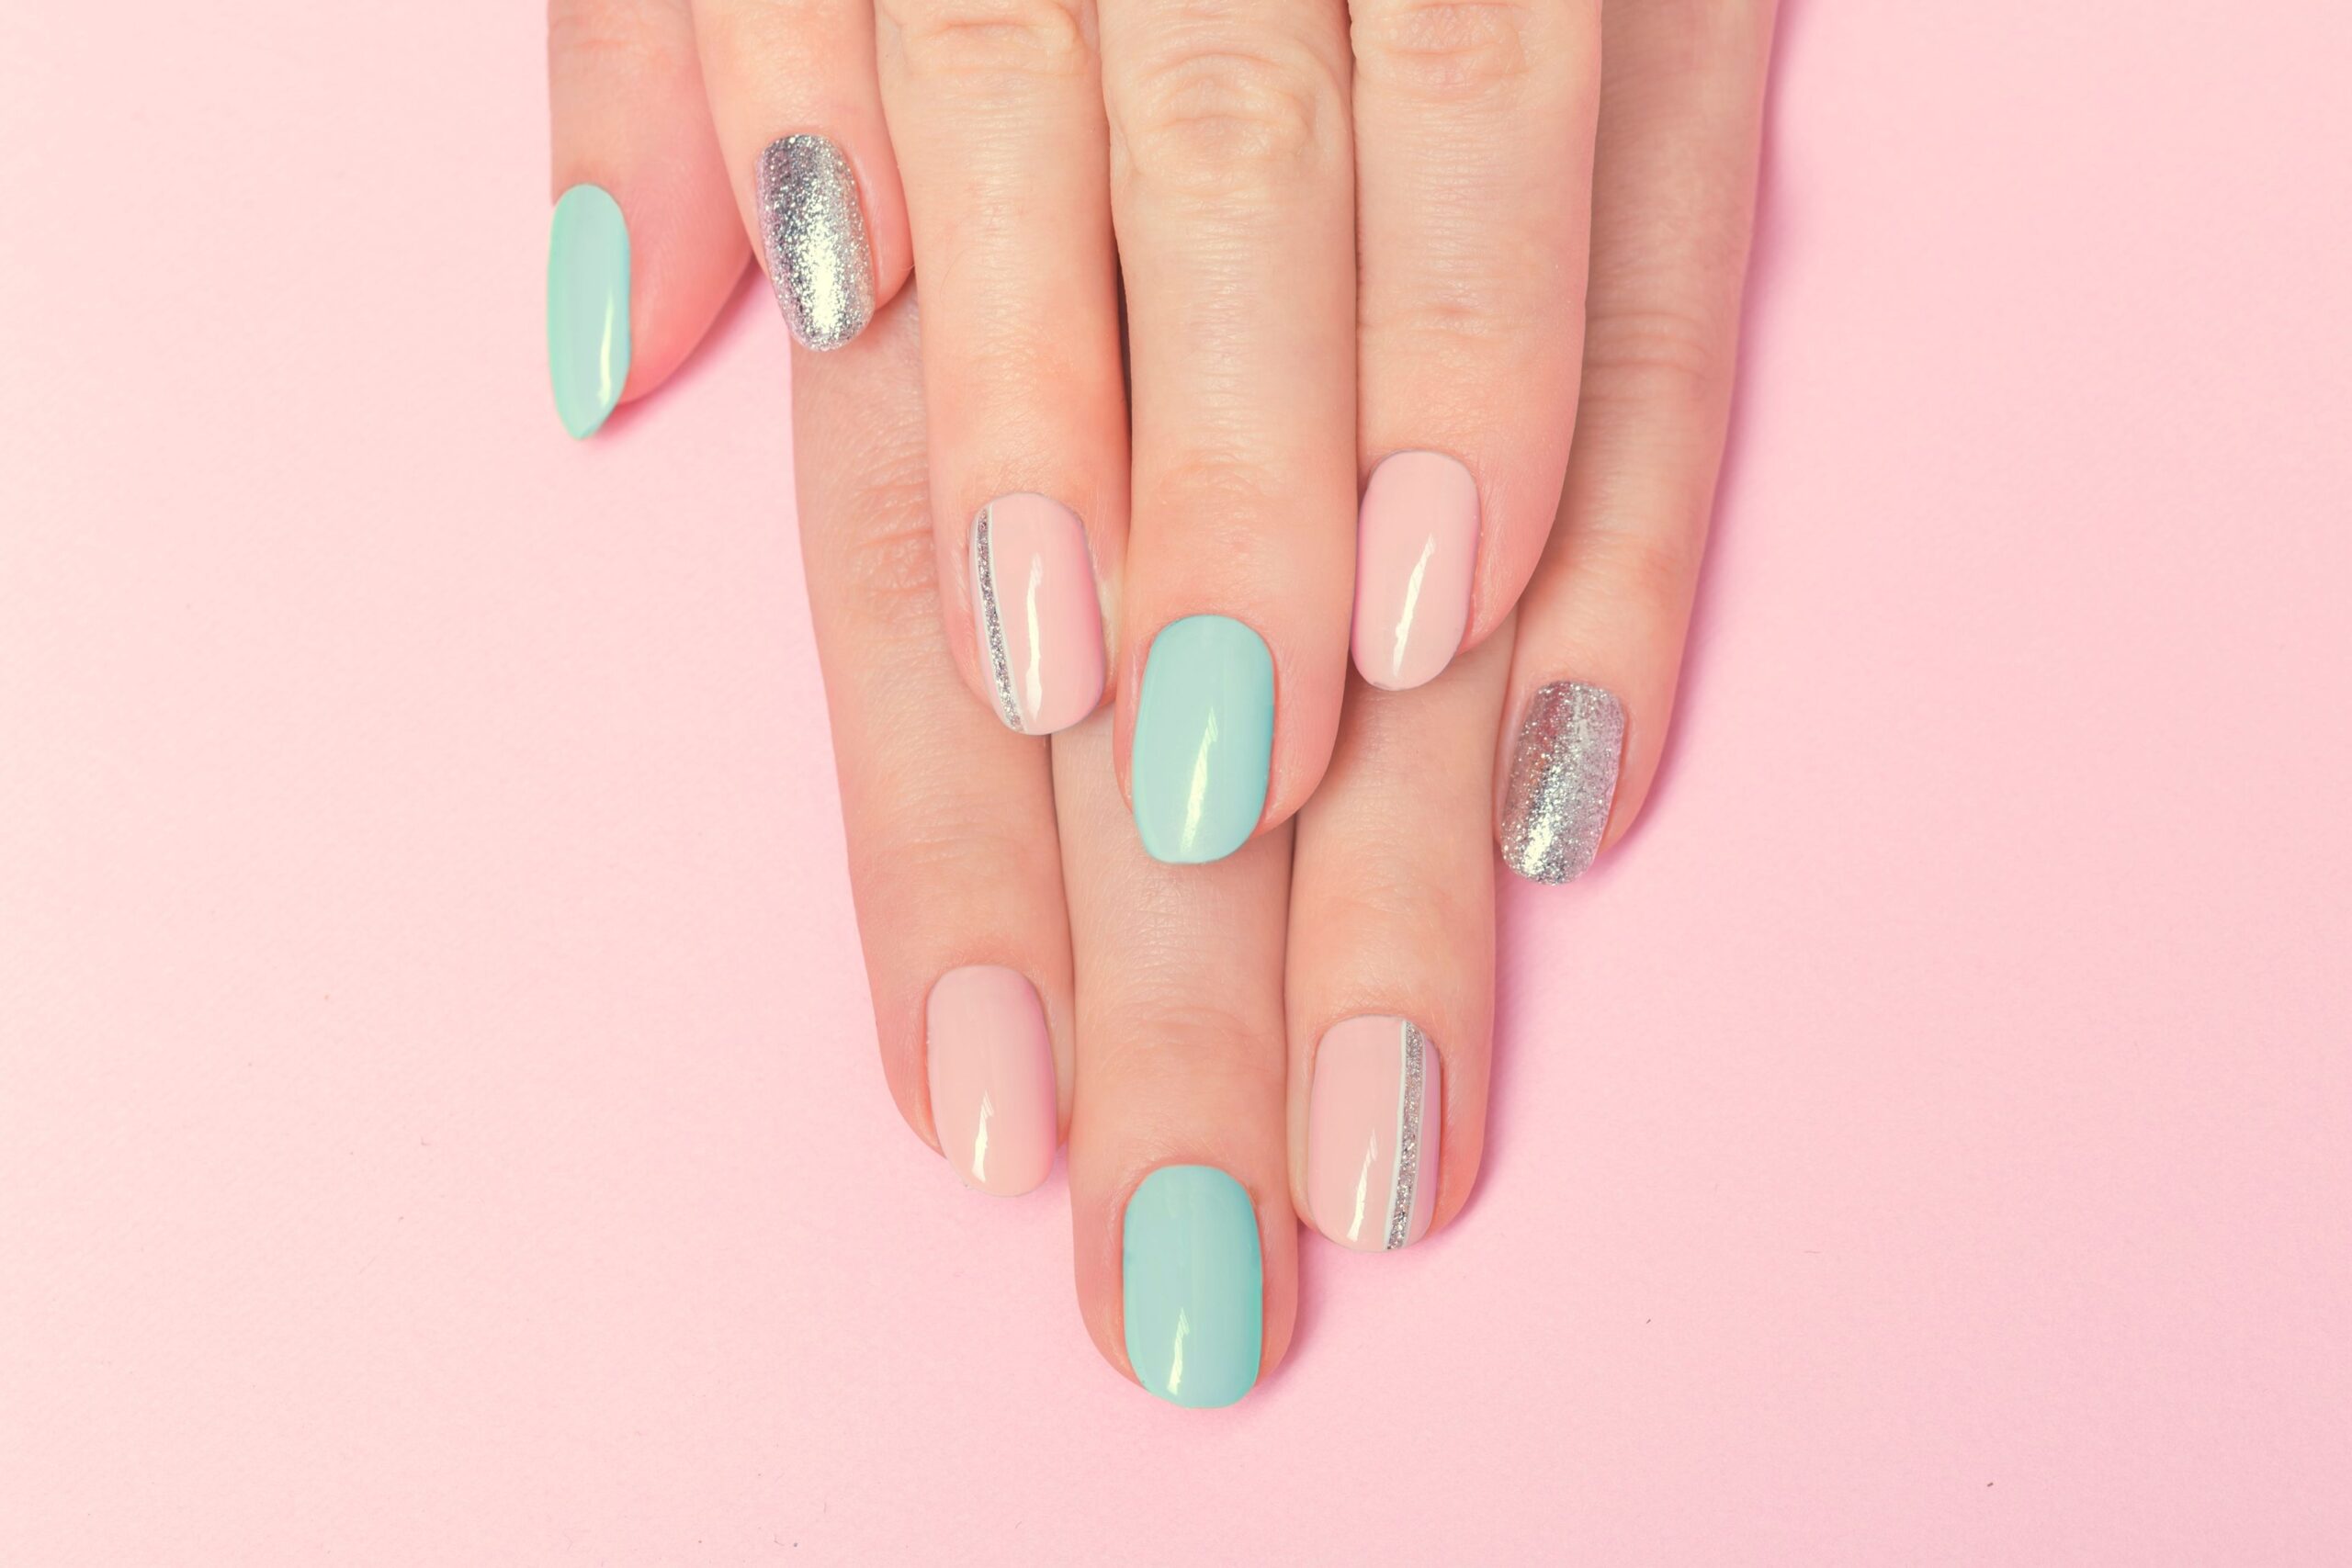
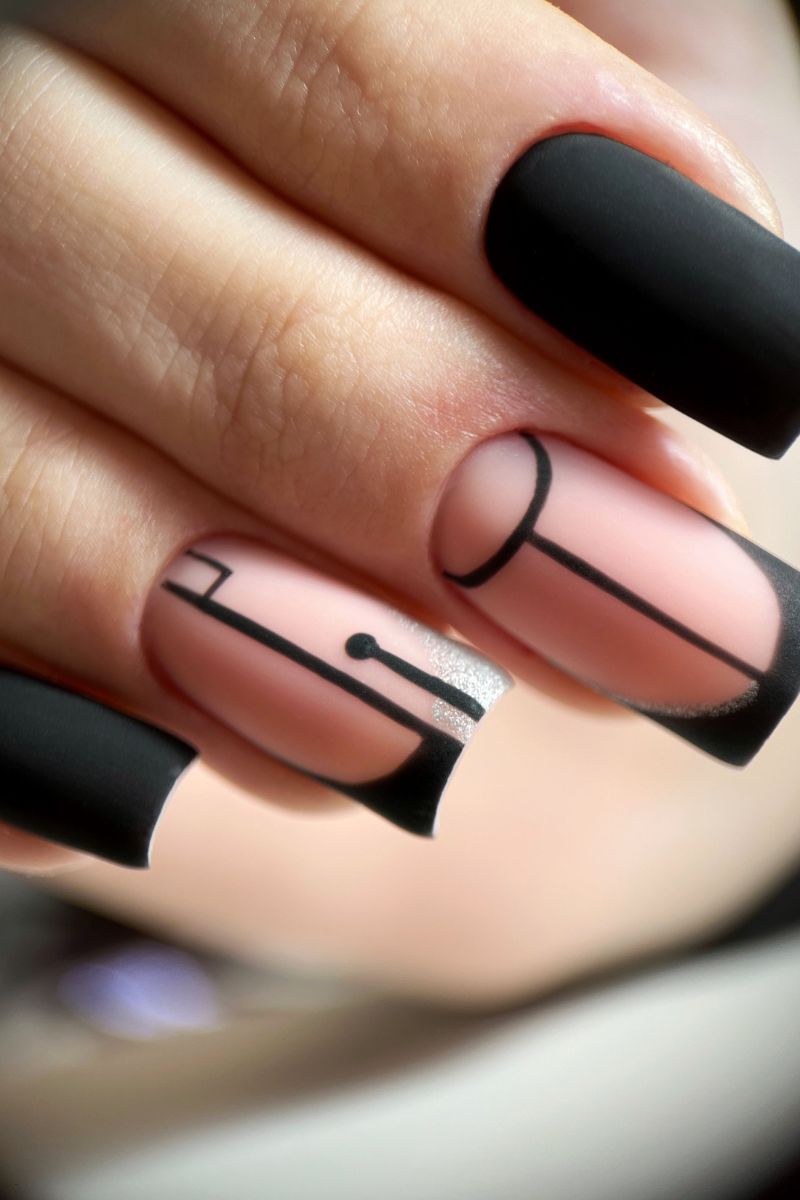
5. Mint & Blush Luxe Nails

Elegant, minimal, and totally chic. Mint green and blush pink are split diagonally with a golden stripe — a nail design that screams modern femininity.
Perfect for: Weddings, minimal chic lovers, classy summer brunches.
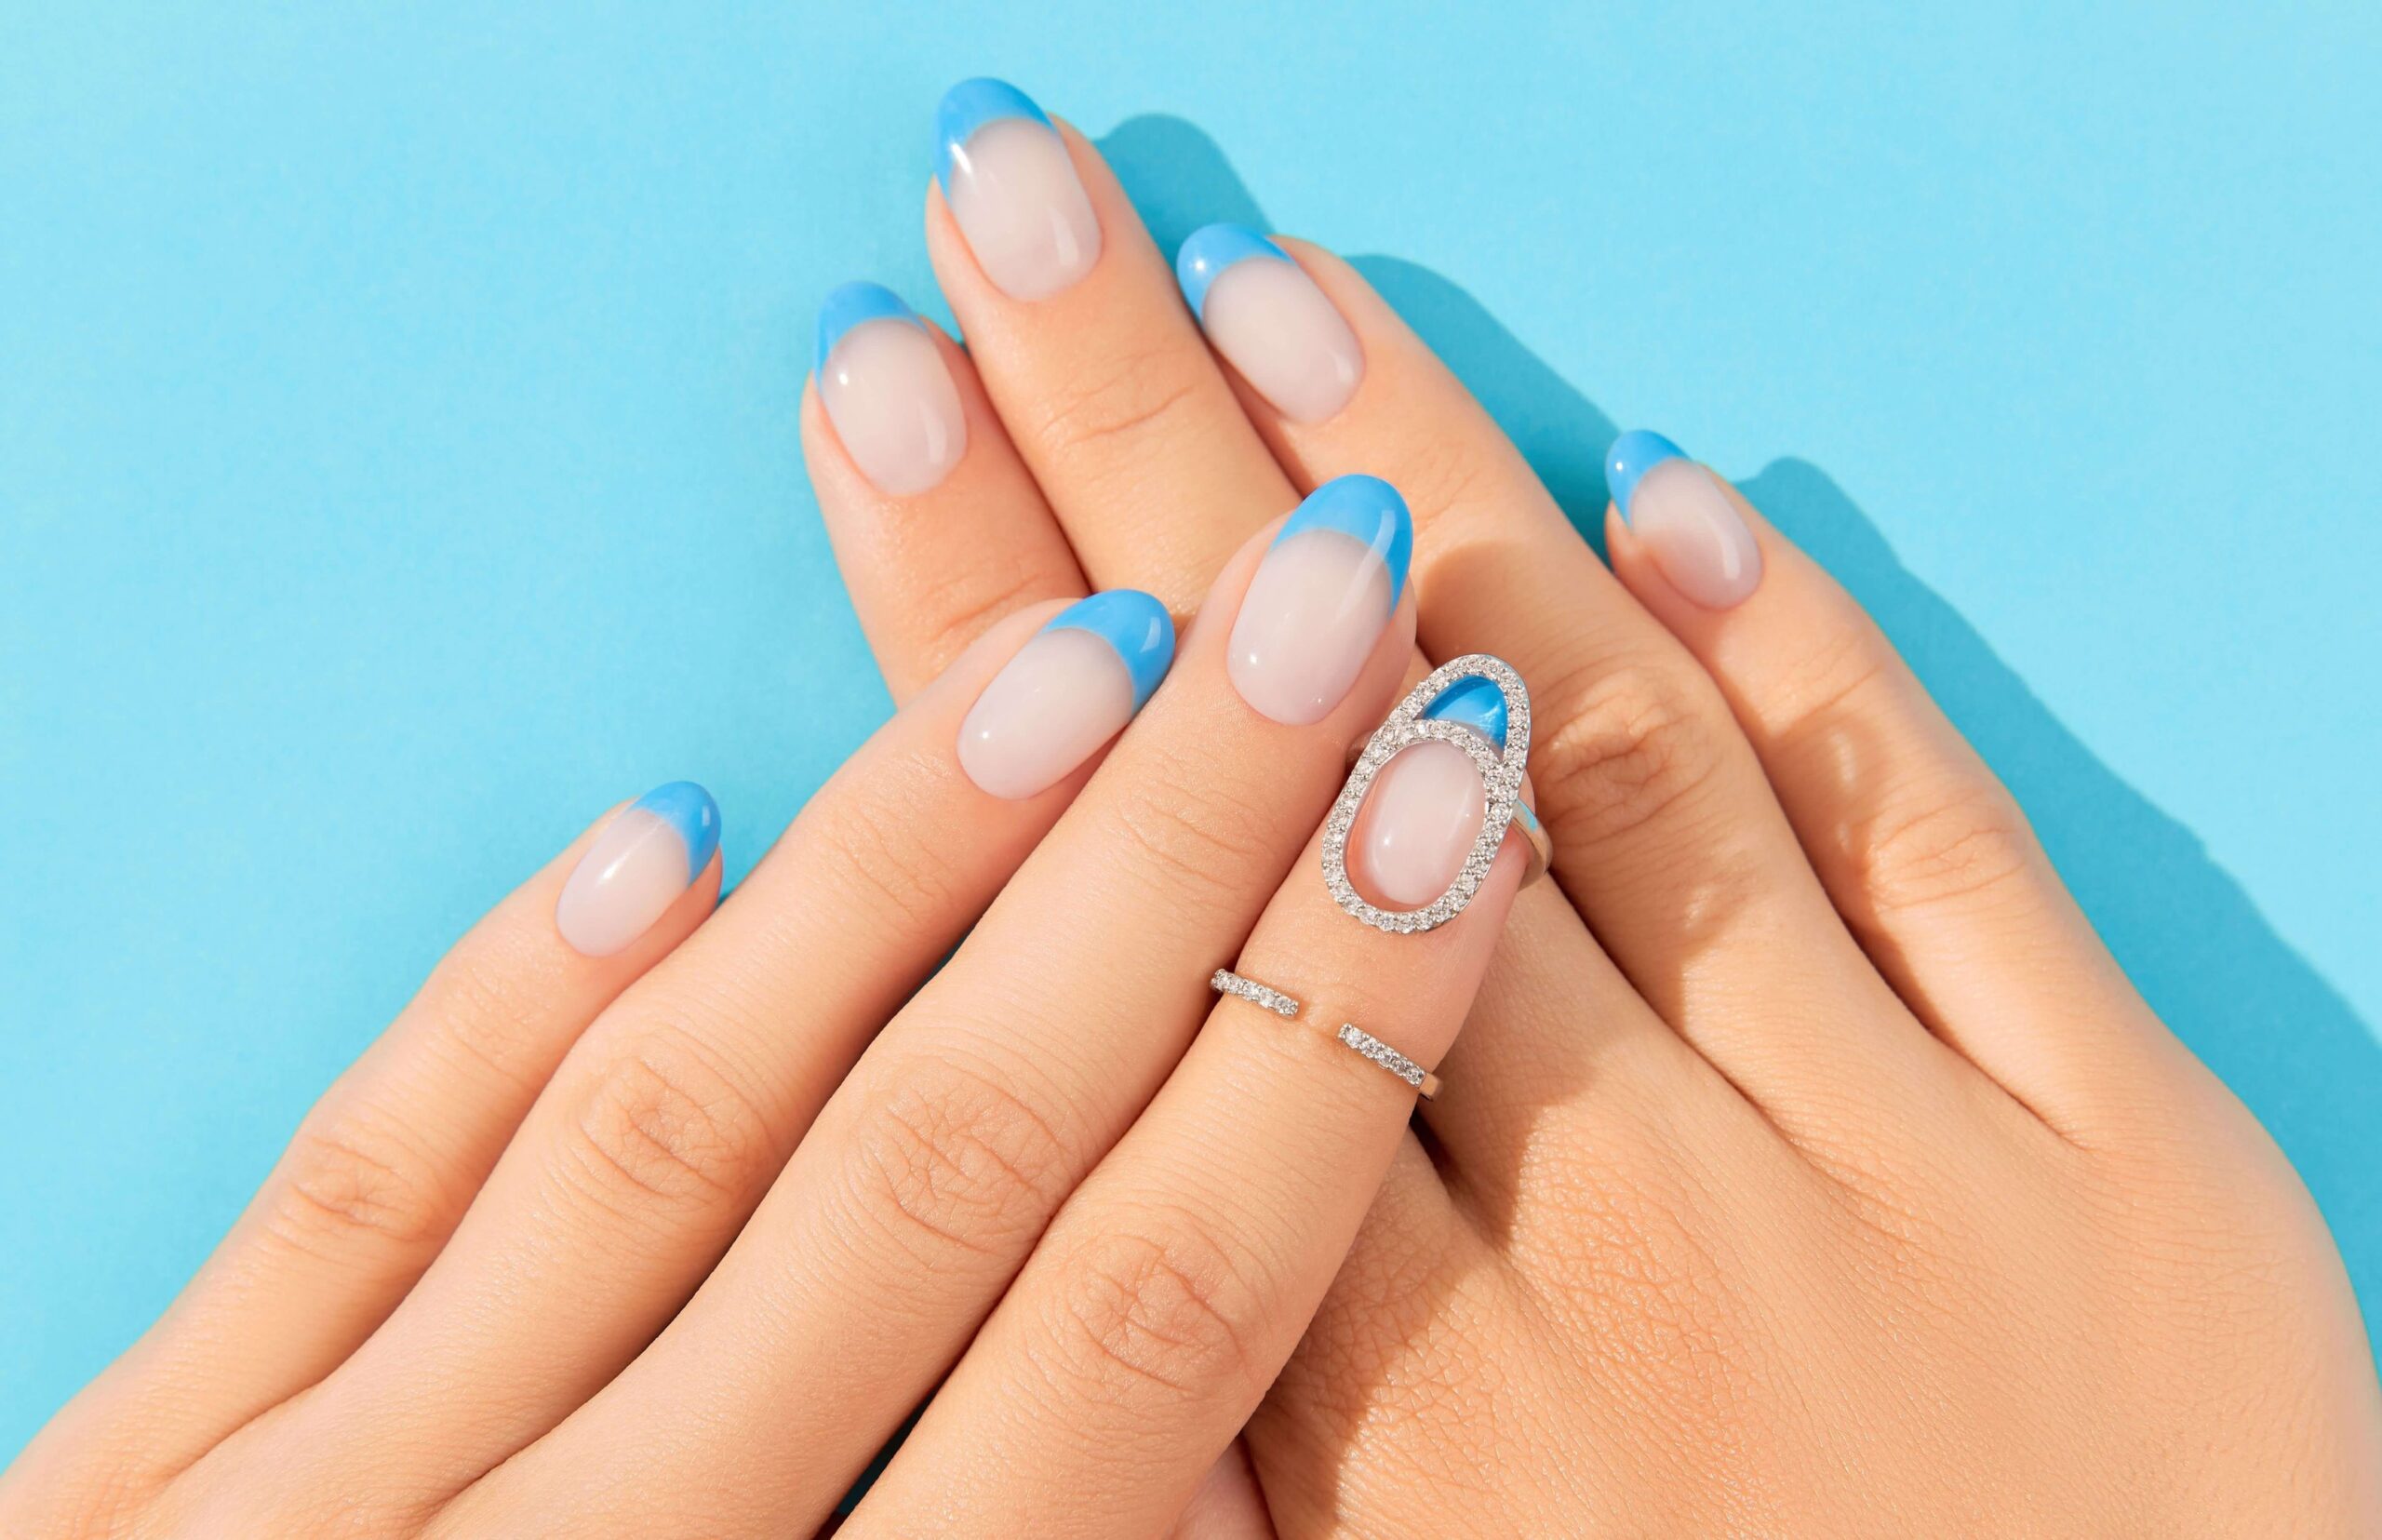
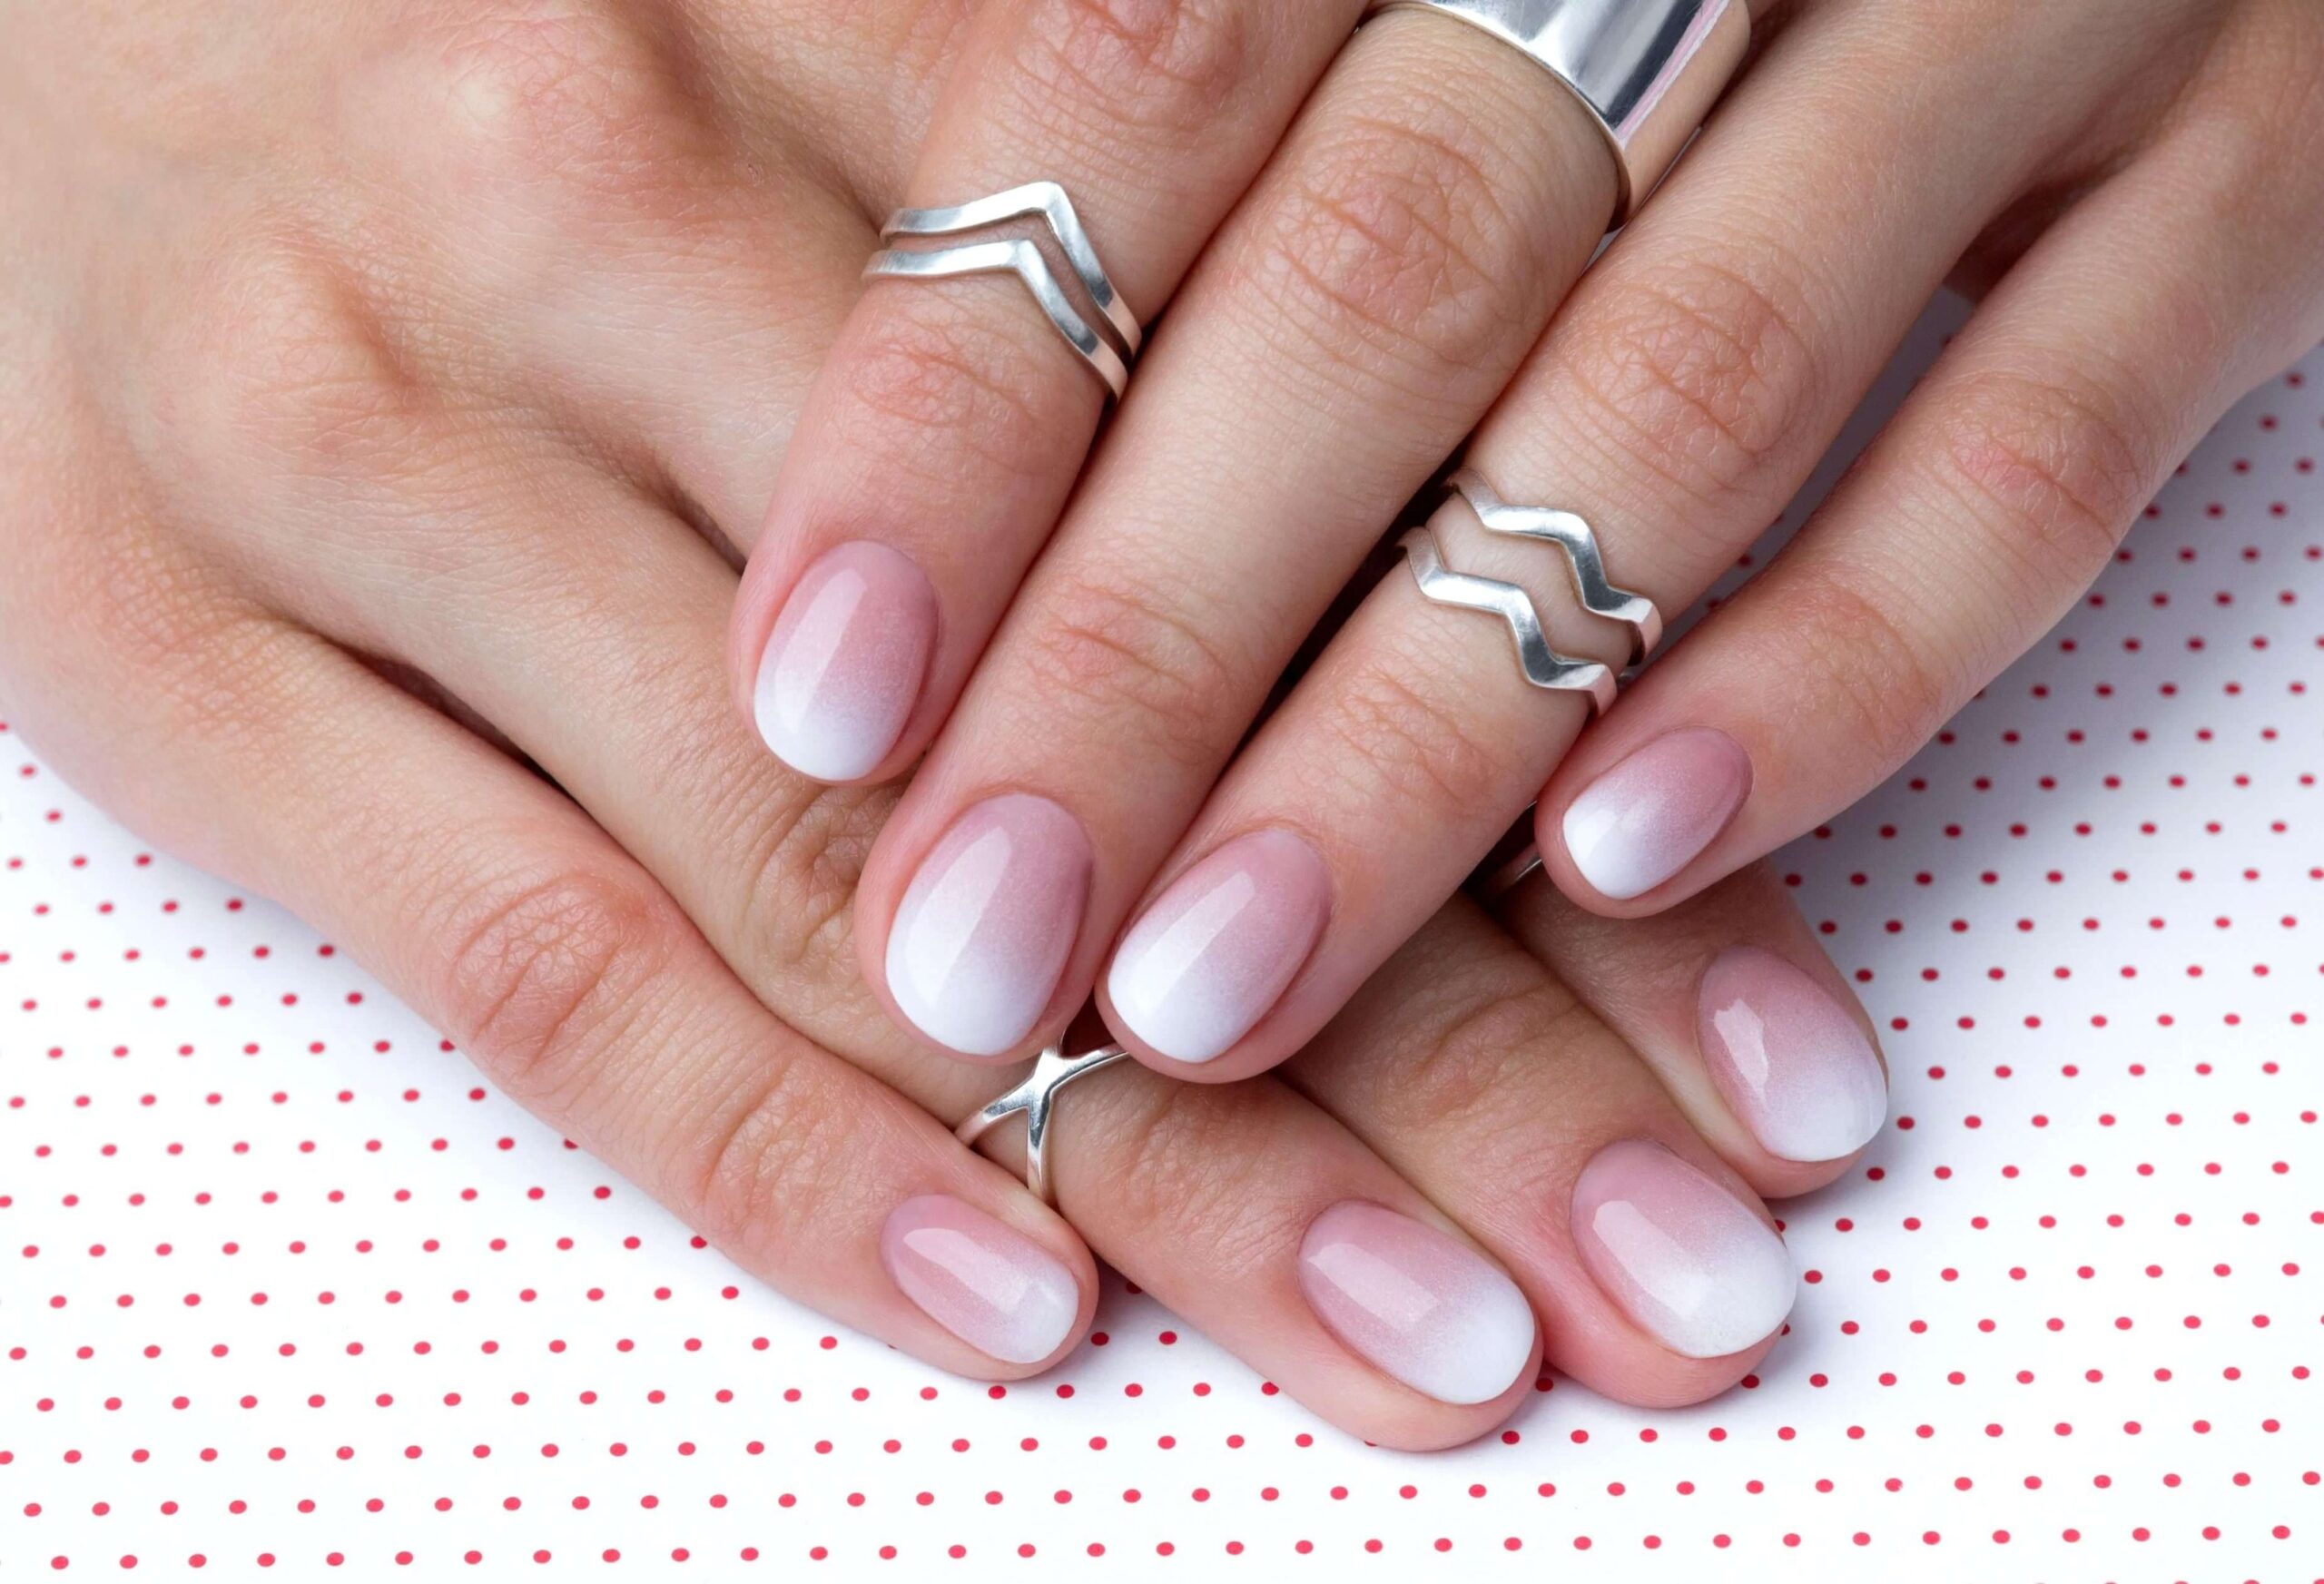
6. Ocean Fade Blue Ombré Nails

A soft gradient from nude to deep ocean blue, this almond-shaped nail set is calming and cool. Paired with minimalist gold rings, the vibe is effortlessly elevated.
Perfect for: Coastal getaways, ocean lovers, minimalist trendsetters.
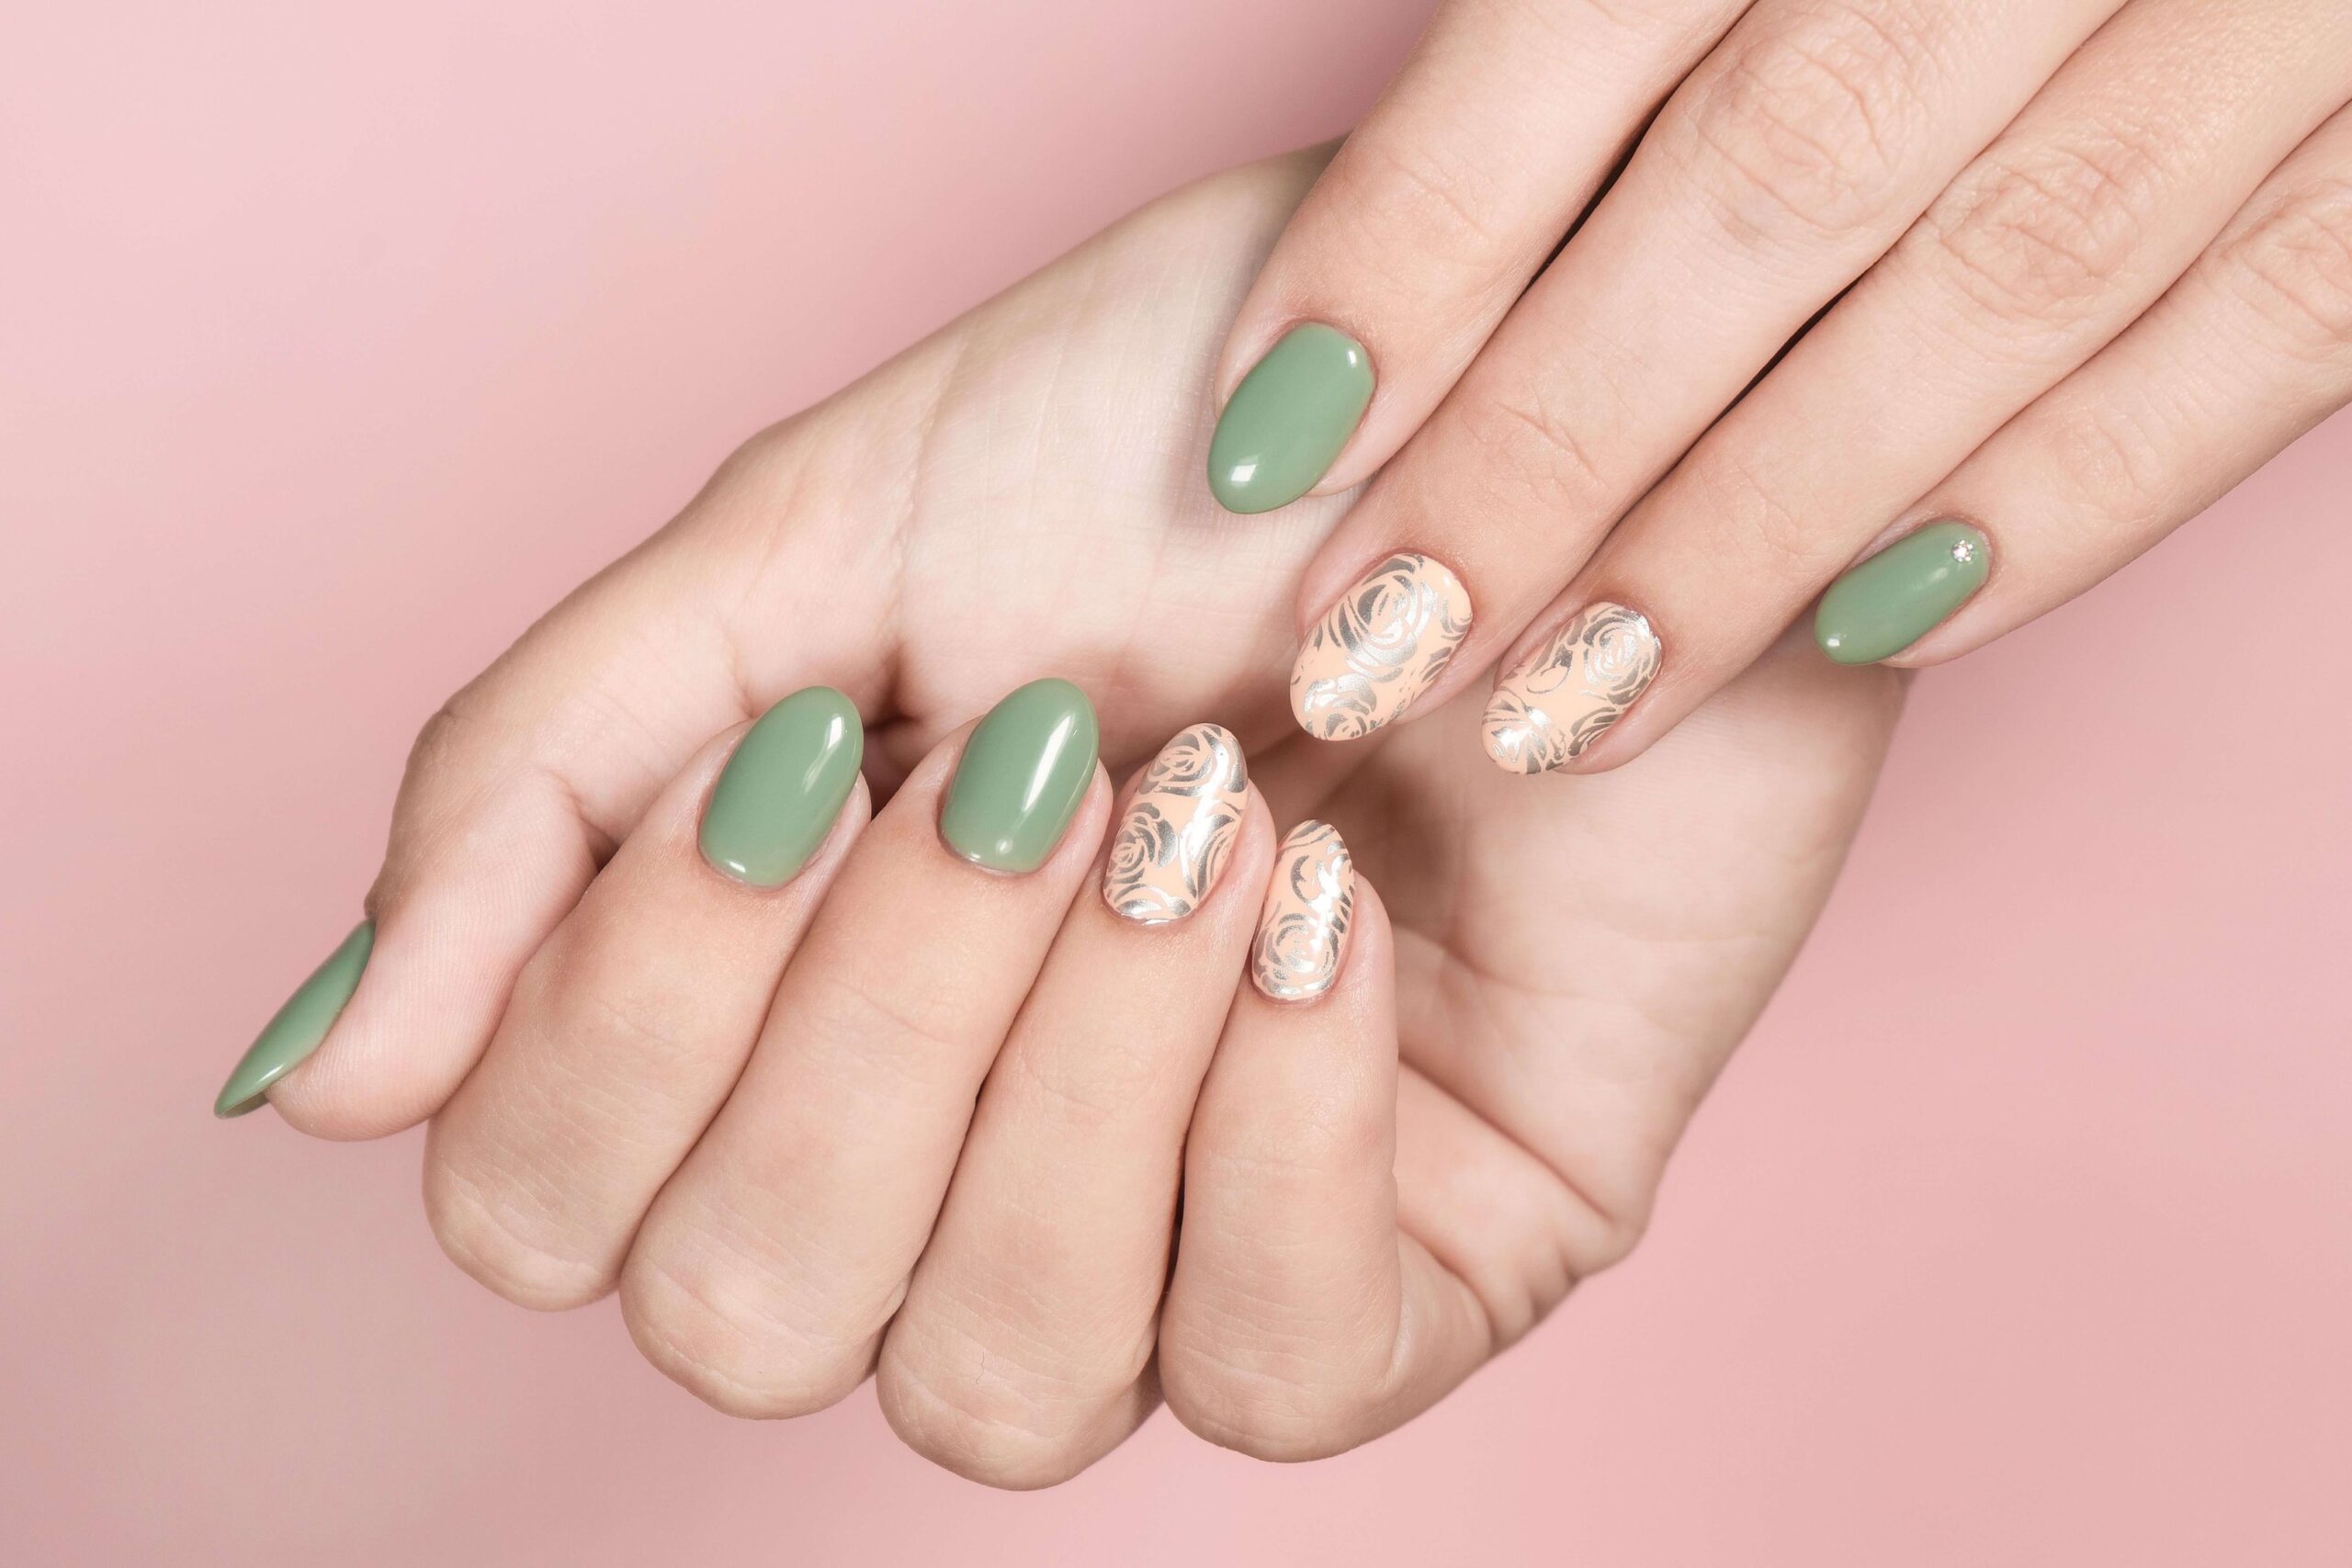
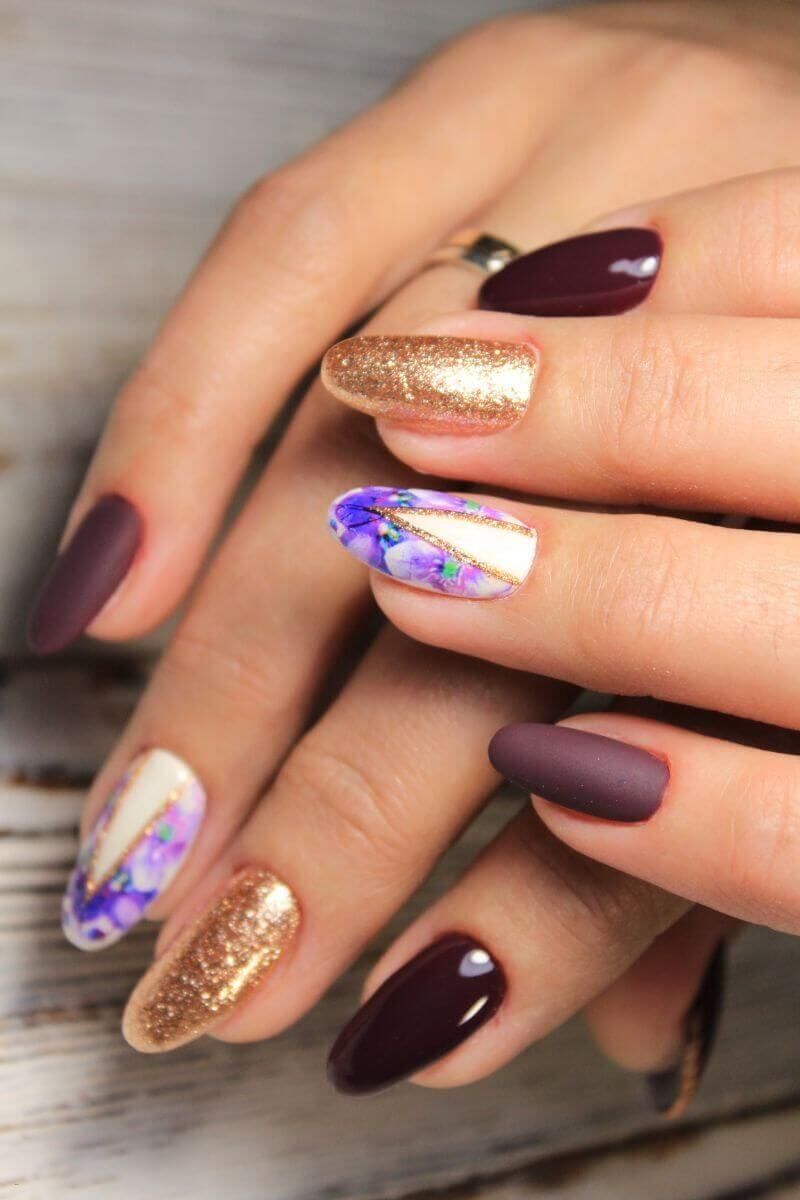
7. Emerald Marble Nails

Combining solid greens with marble accents and gold detailing, this look is rich, bold, and timeless. The gemstone rings elevate the aesthetic to a whole new level.
Perfect for: Luxury vibes, gemstone nail trends, modern Pinterest boards.
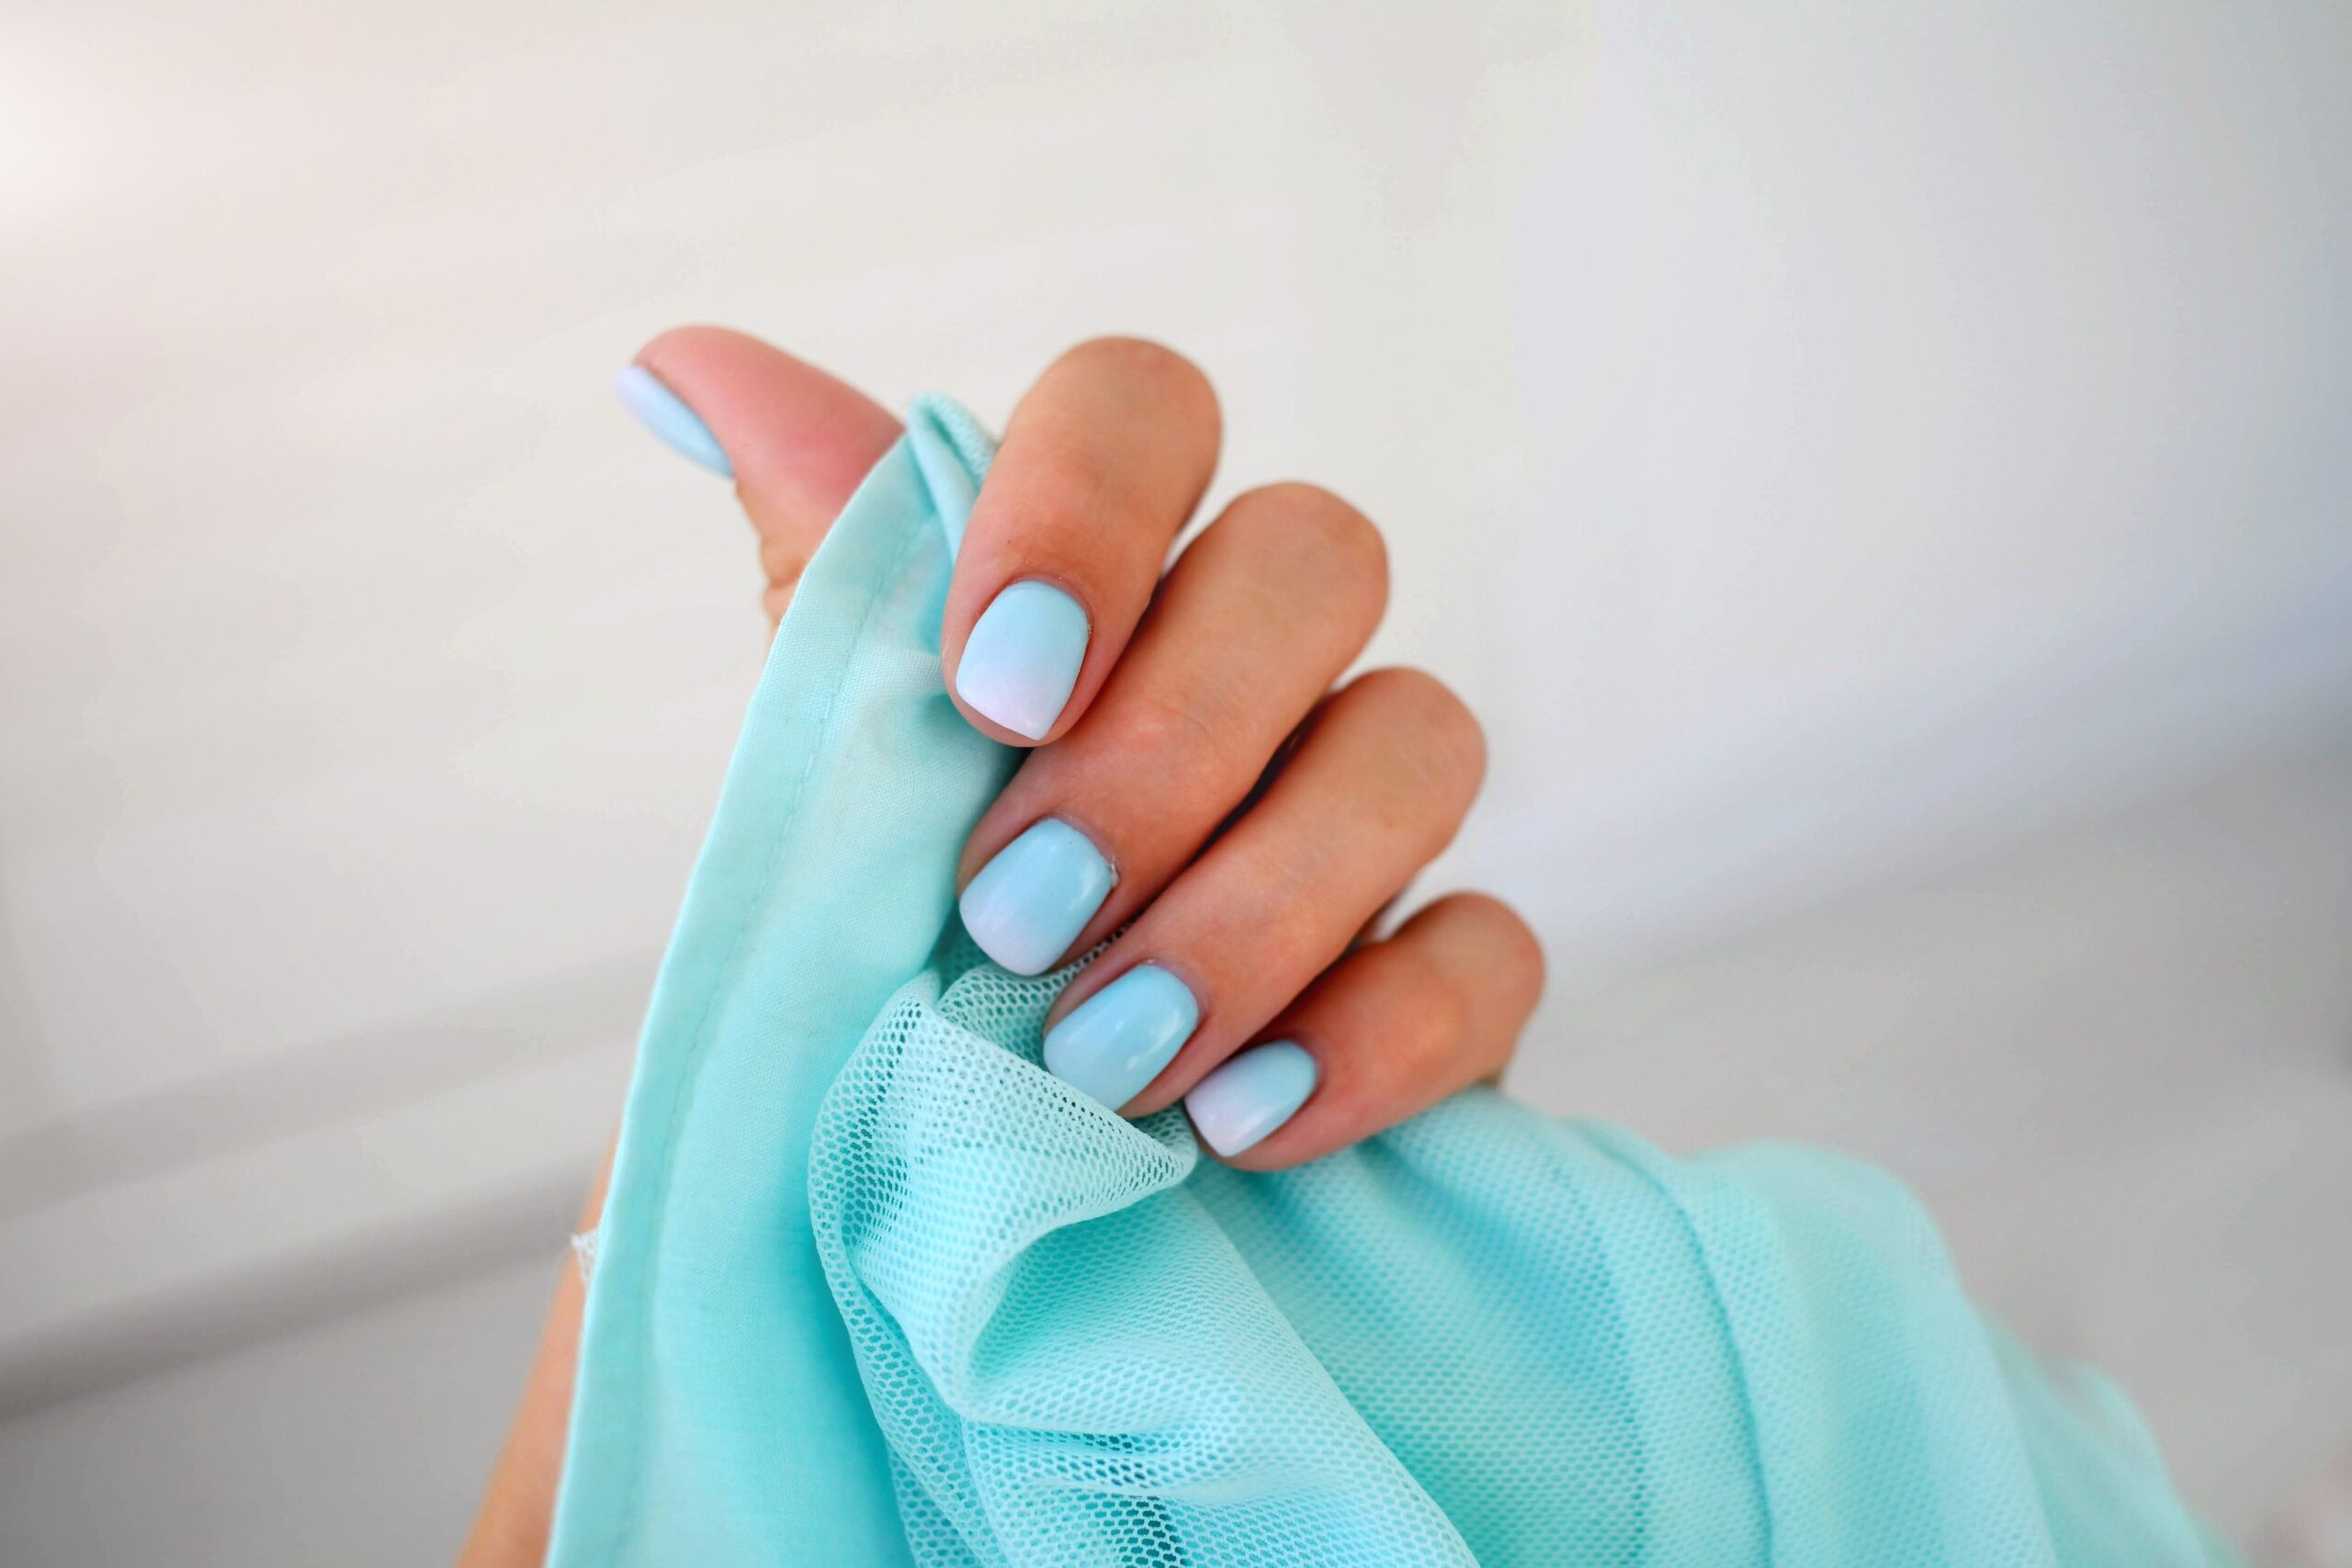
8. Fresh Lime & Sky Duo Nails

Short square nails get a juicy makeover with lime green and sky blue ombré. It’s fresh, clean, and super trendy — a go-to for casual Pinterest summer boards.
Perfect for: Trendy TikTok-inspired looks, Gen Z color palettes.
9. Sun-Kissed Coral & Palm Tree Nails

Orange coral meets soft nude with a white palm tree design — and a golden chrome accent nail to finish it off. It’s basically your next vacation in manicure form.
Perfect for: Beach holidays, tropical nail themes, summer mood boards.
When it comes to summer nails, the only rule is this: Have fun with it. Whether you’re team floral, team glitter, or team ombré — there’s a style here to match your vibe. Use this list to inspire your next appointment or DIY adventure, and don’t forget to pin your favourites for later!
Looking for more nail inspiration? Check out our 23 Summer Nail Ideas, or our Fall Nail Designs
New 2026 Trends: 6 Designs Taking Over Pinterest This Summer
The classics above will never go out of style, but if you want your manicure to feel undeniably 2026, these are the looks you should be screenshotting right now. Each one has been climbing search charts all spring — and pinning at record speed.
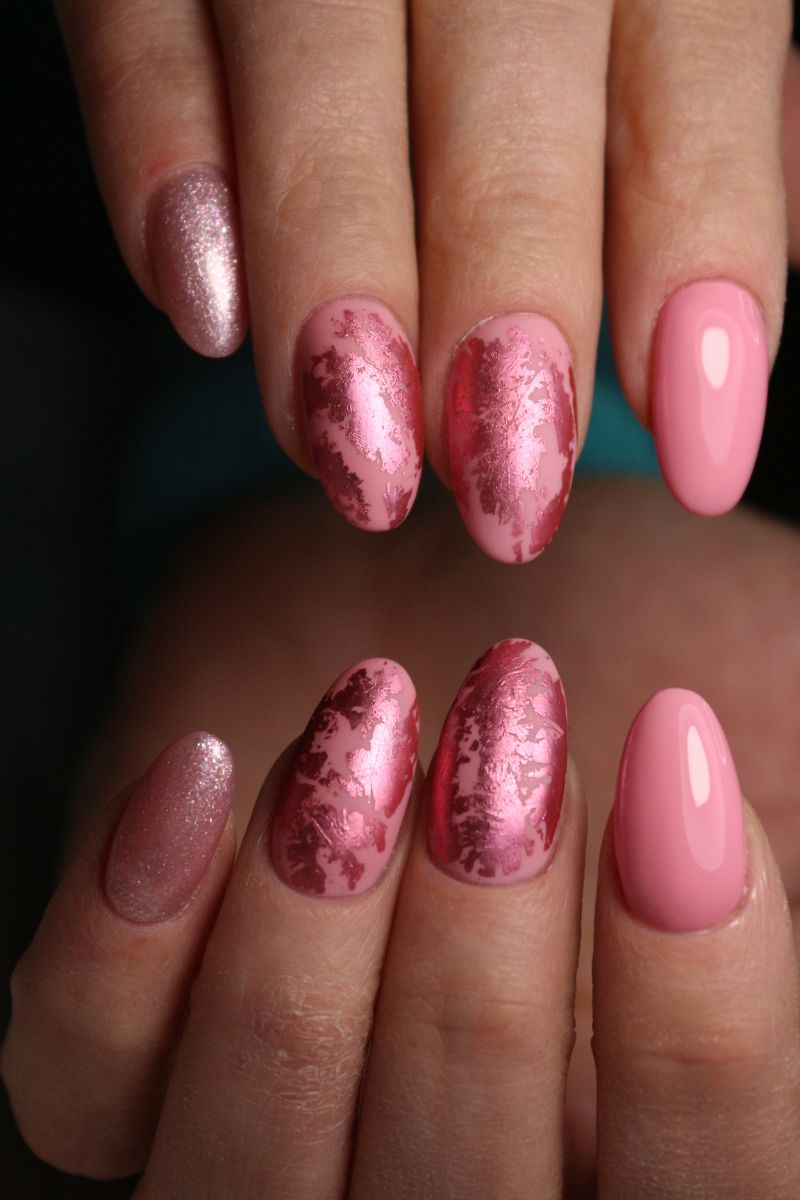
10. Butter Yellow Soft-Glow Nails
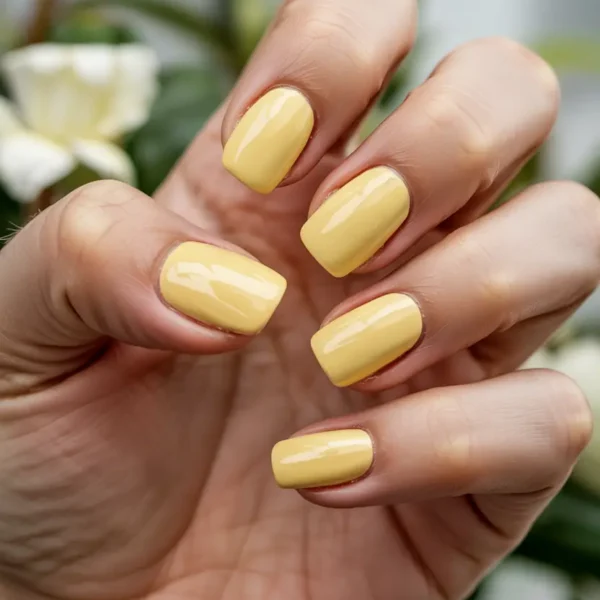
Move over neon — butter yellow is the soft, creamy shade everyone is wearing this summer. It’s warm enough to flatter every skin tone, gentler than a true pastel, and looks impossibly chic on almond or short squoval shapes. Wear it solid for full quiet-luxury energy, or pair it with a single gold-foil accent nail.
Perfect for: Quiet luxury fans, minimalist brides, anyone tired of millennial pink.
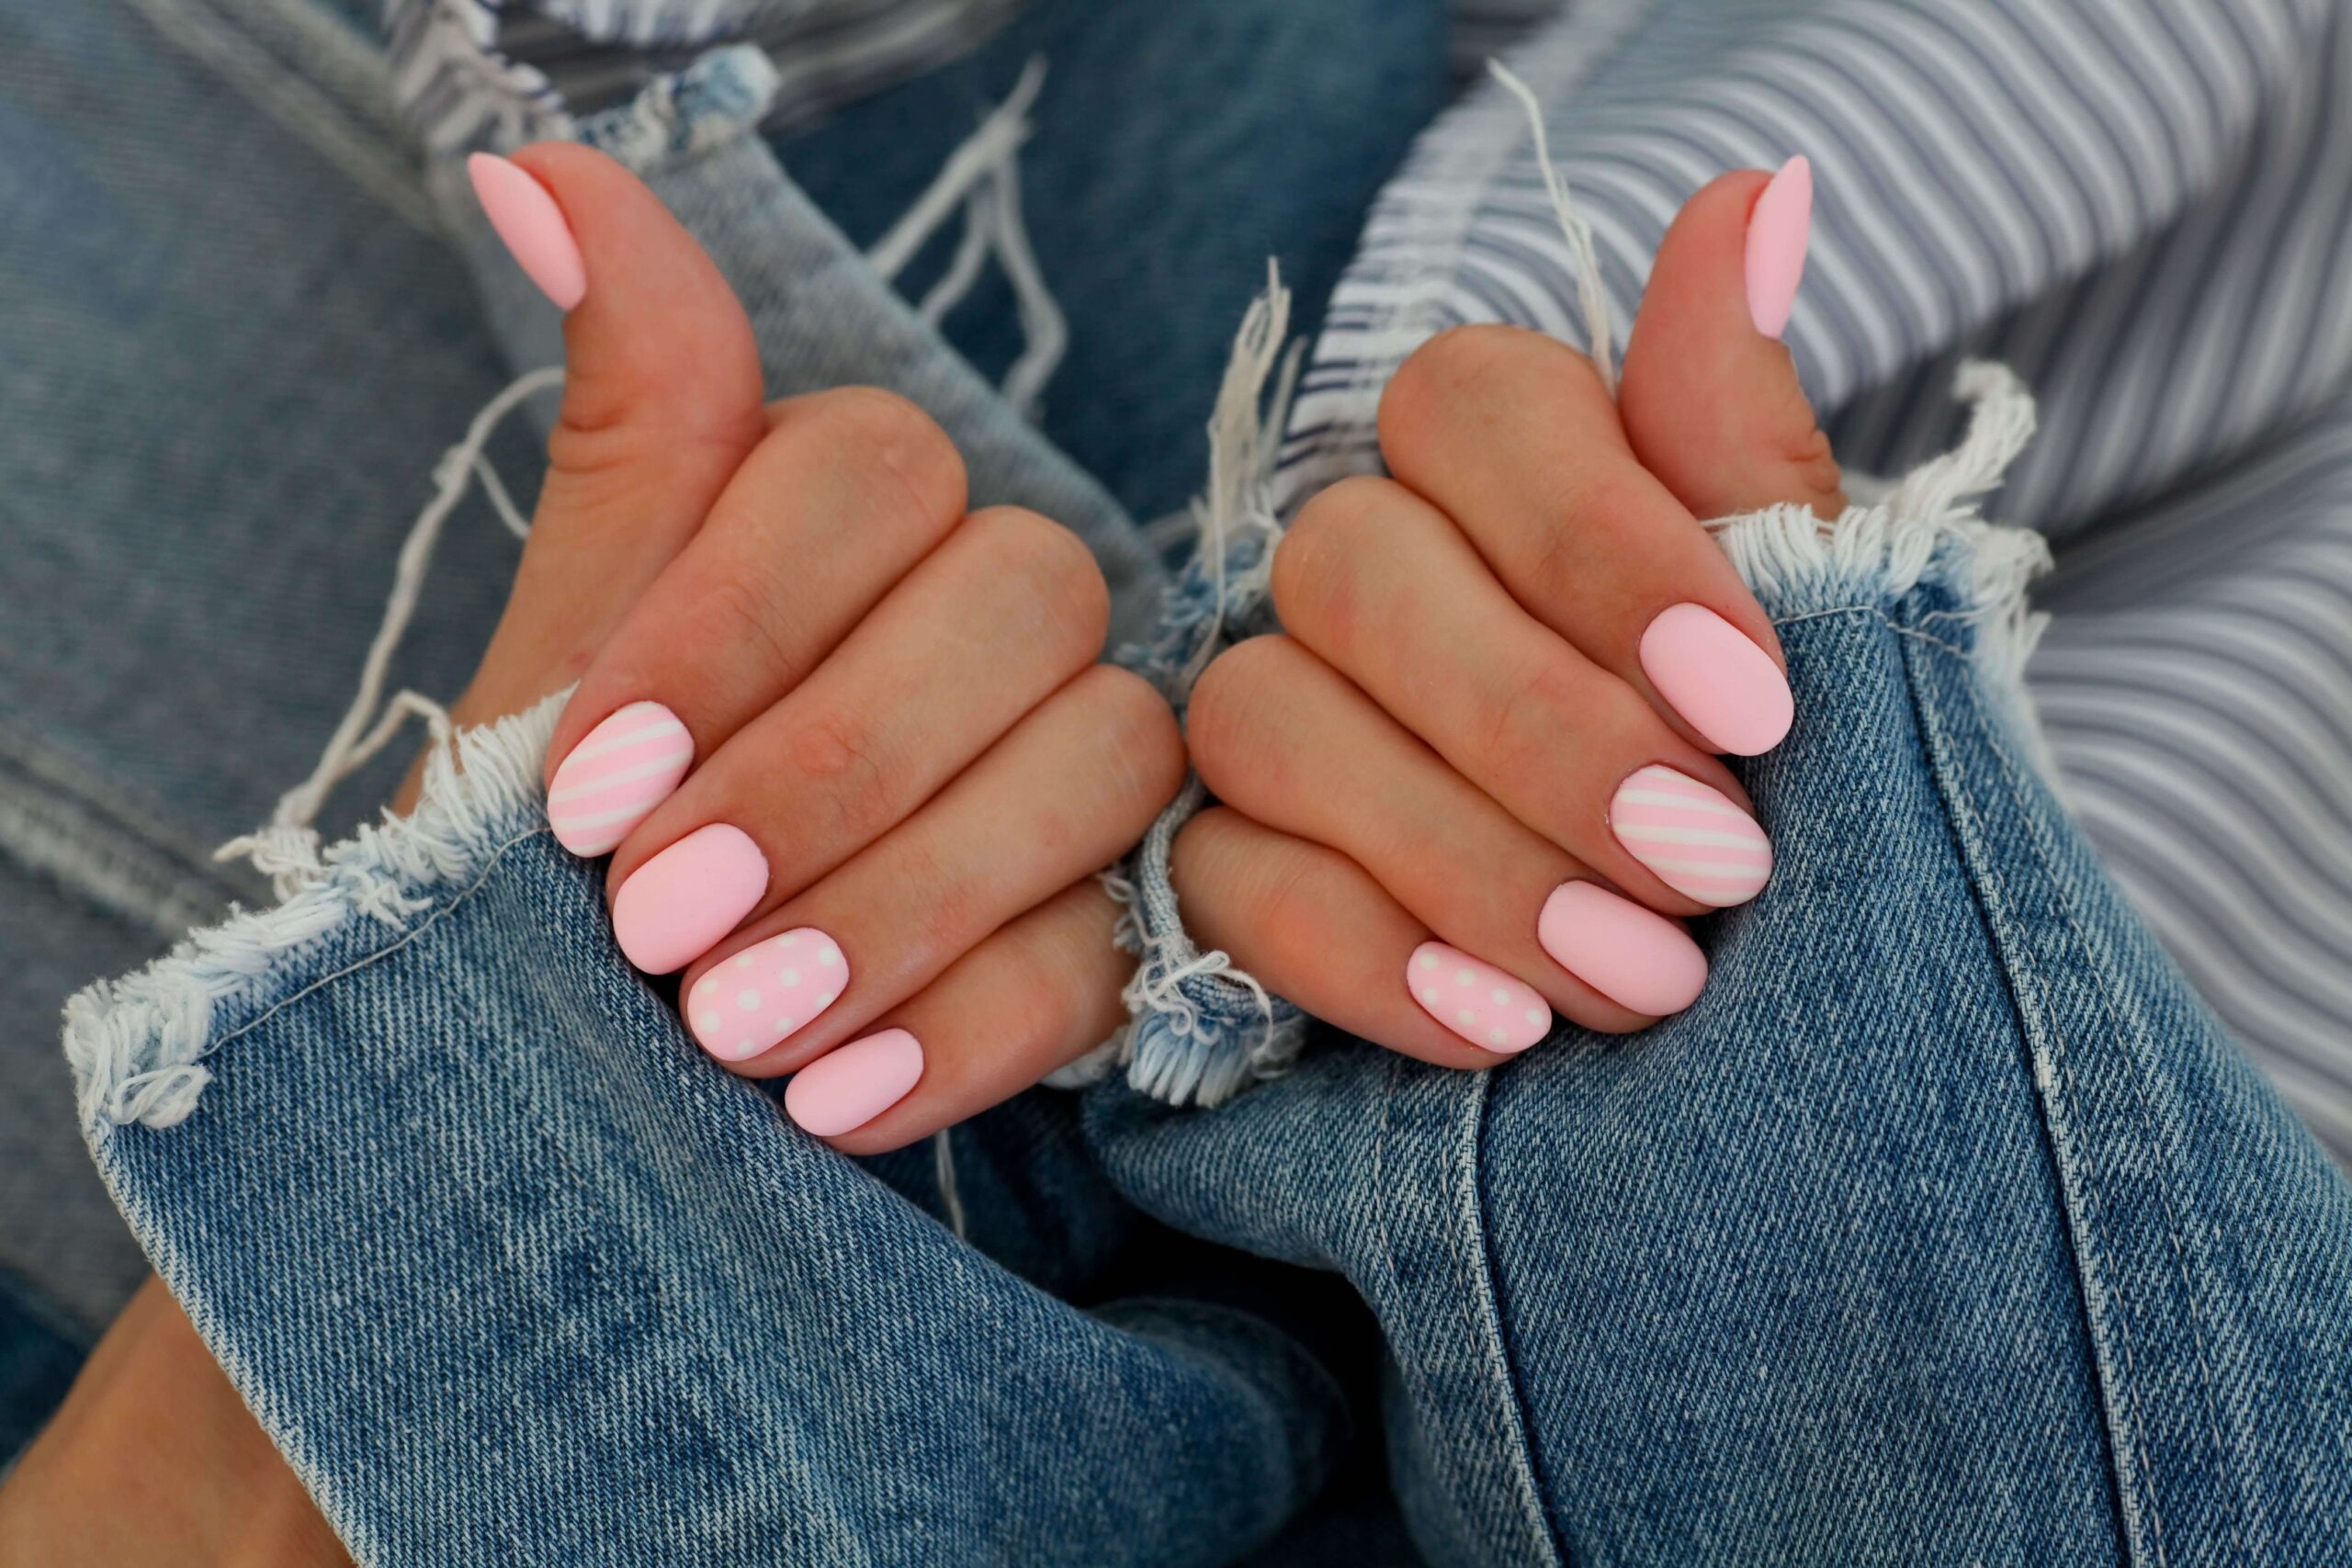
11. Polka Dot Nails (the 2026 Comeback)
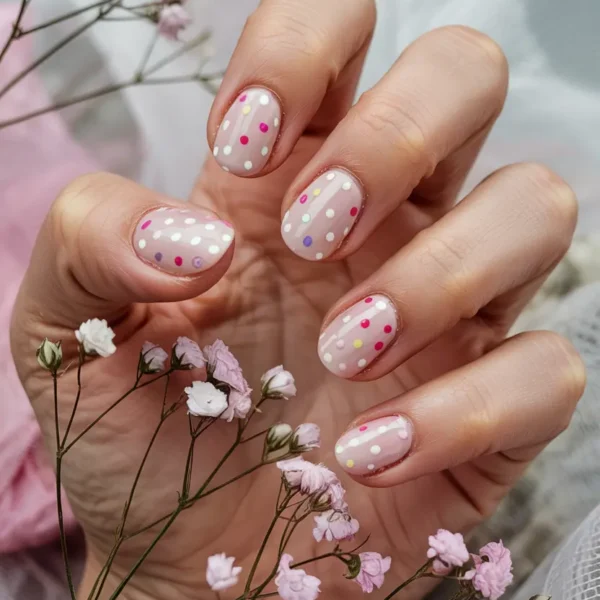
Polka dots are officially back — and they’re not the loud, novelty kind. The 2026 version is small, scattered, and styled on a milky white or soft pink base. Think retro picnic dress, but on your fingertips. The look is incredibly easy to recreate at home with a dotting tool (or even a bobby pin), which is part of why it’s blowing up on Pinterest.
Perfect for: Coquette aesthetic, garden parties, vintage summer weddings.
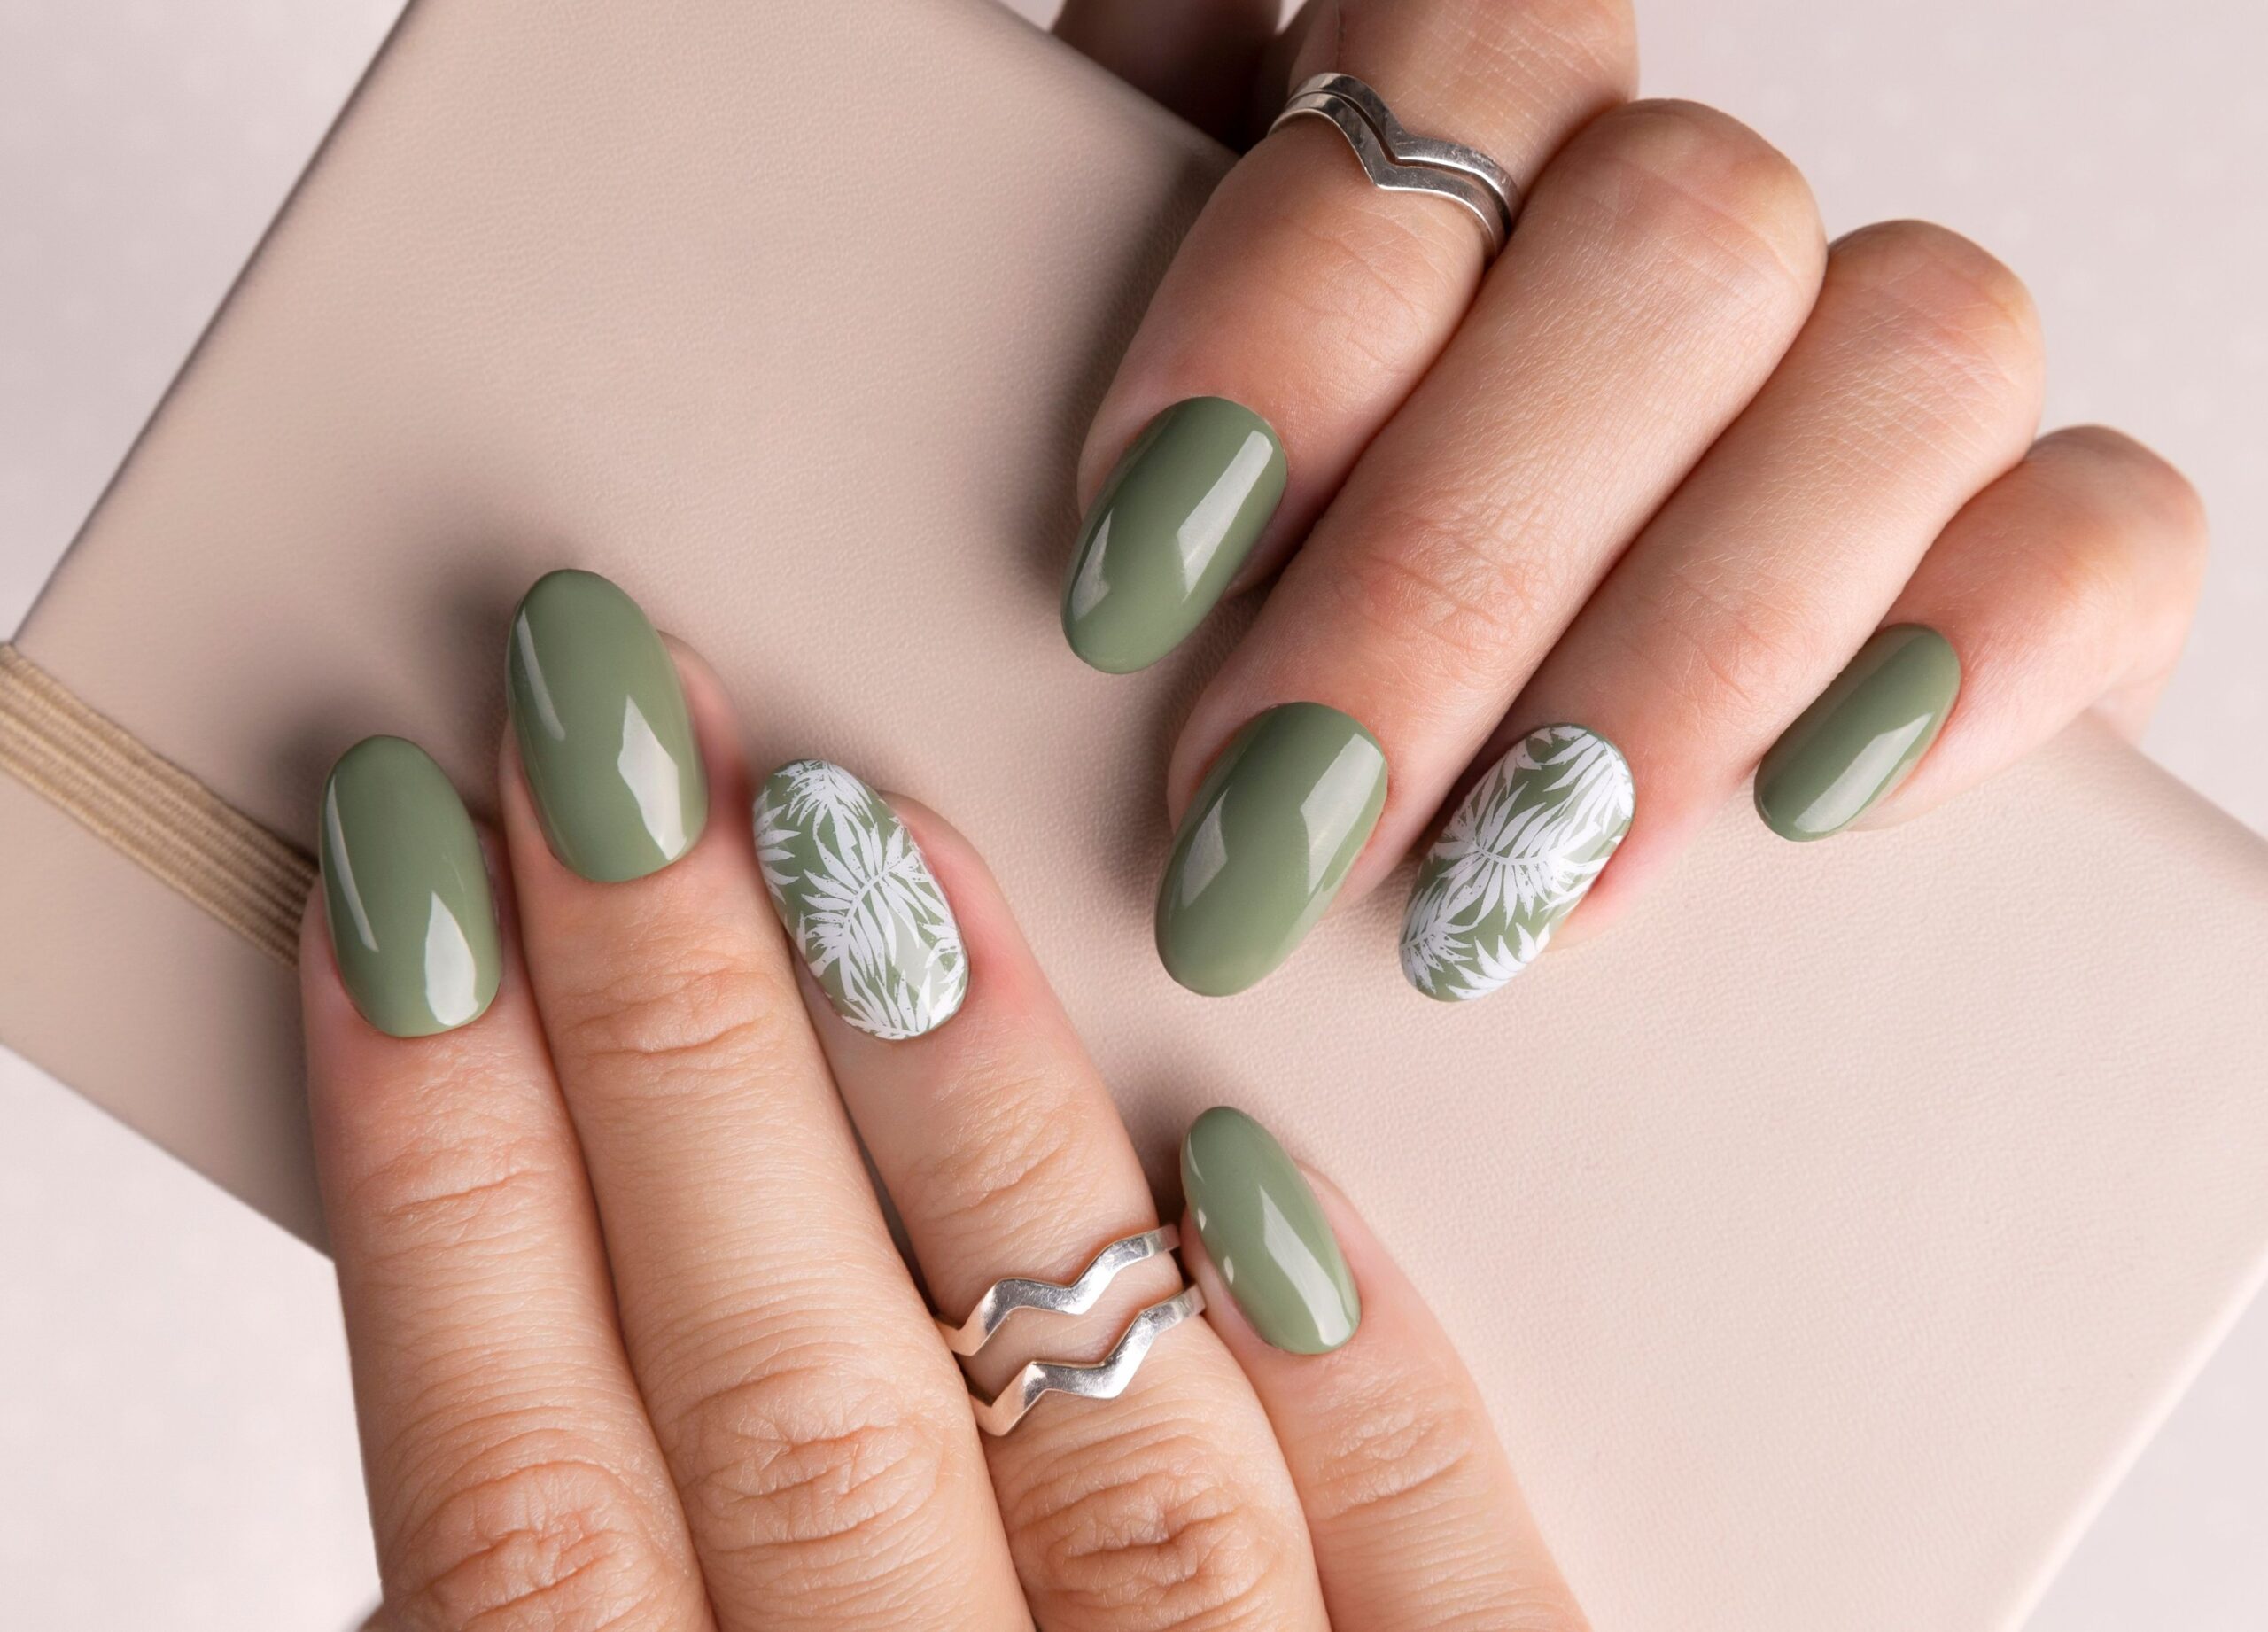
12. Jade Marble Nails
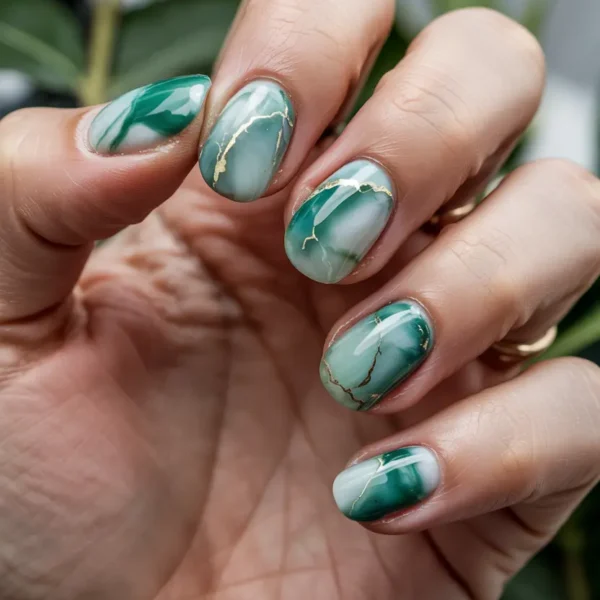
Emerald marble’s softer, dreamier sister. Jade marble nails use a paler, milkier green base with delicate white and gold veining for that luxurious gemstone look — without going full bold. It feels expensive, looks photogenic, and works just as beautifully for a wedding guest manicure as it does for a casual lunch by the pool.
Perfect for: Wedding guests, Pinterest aesthetic boards, fans of timeless design.
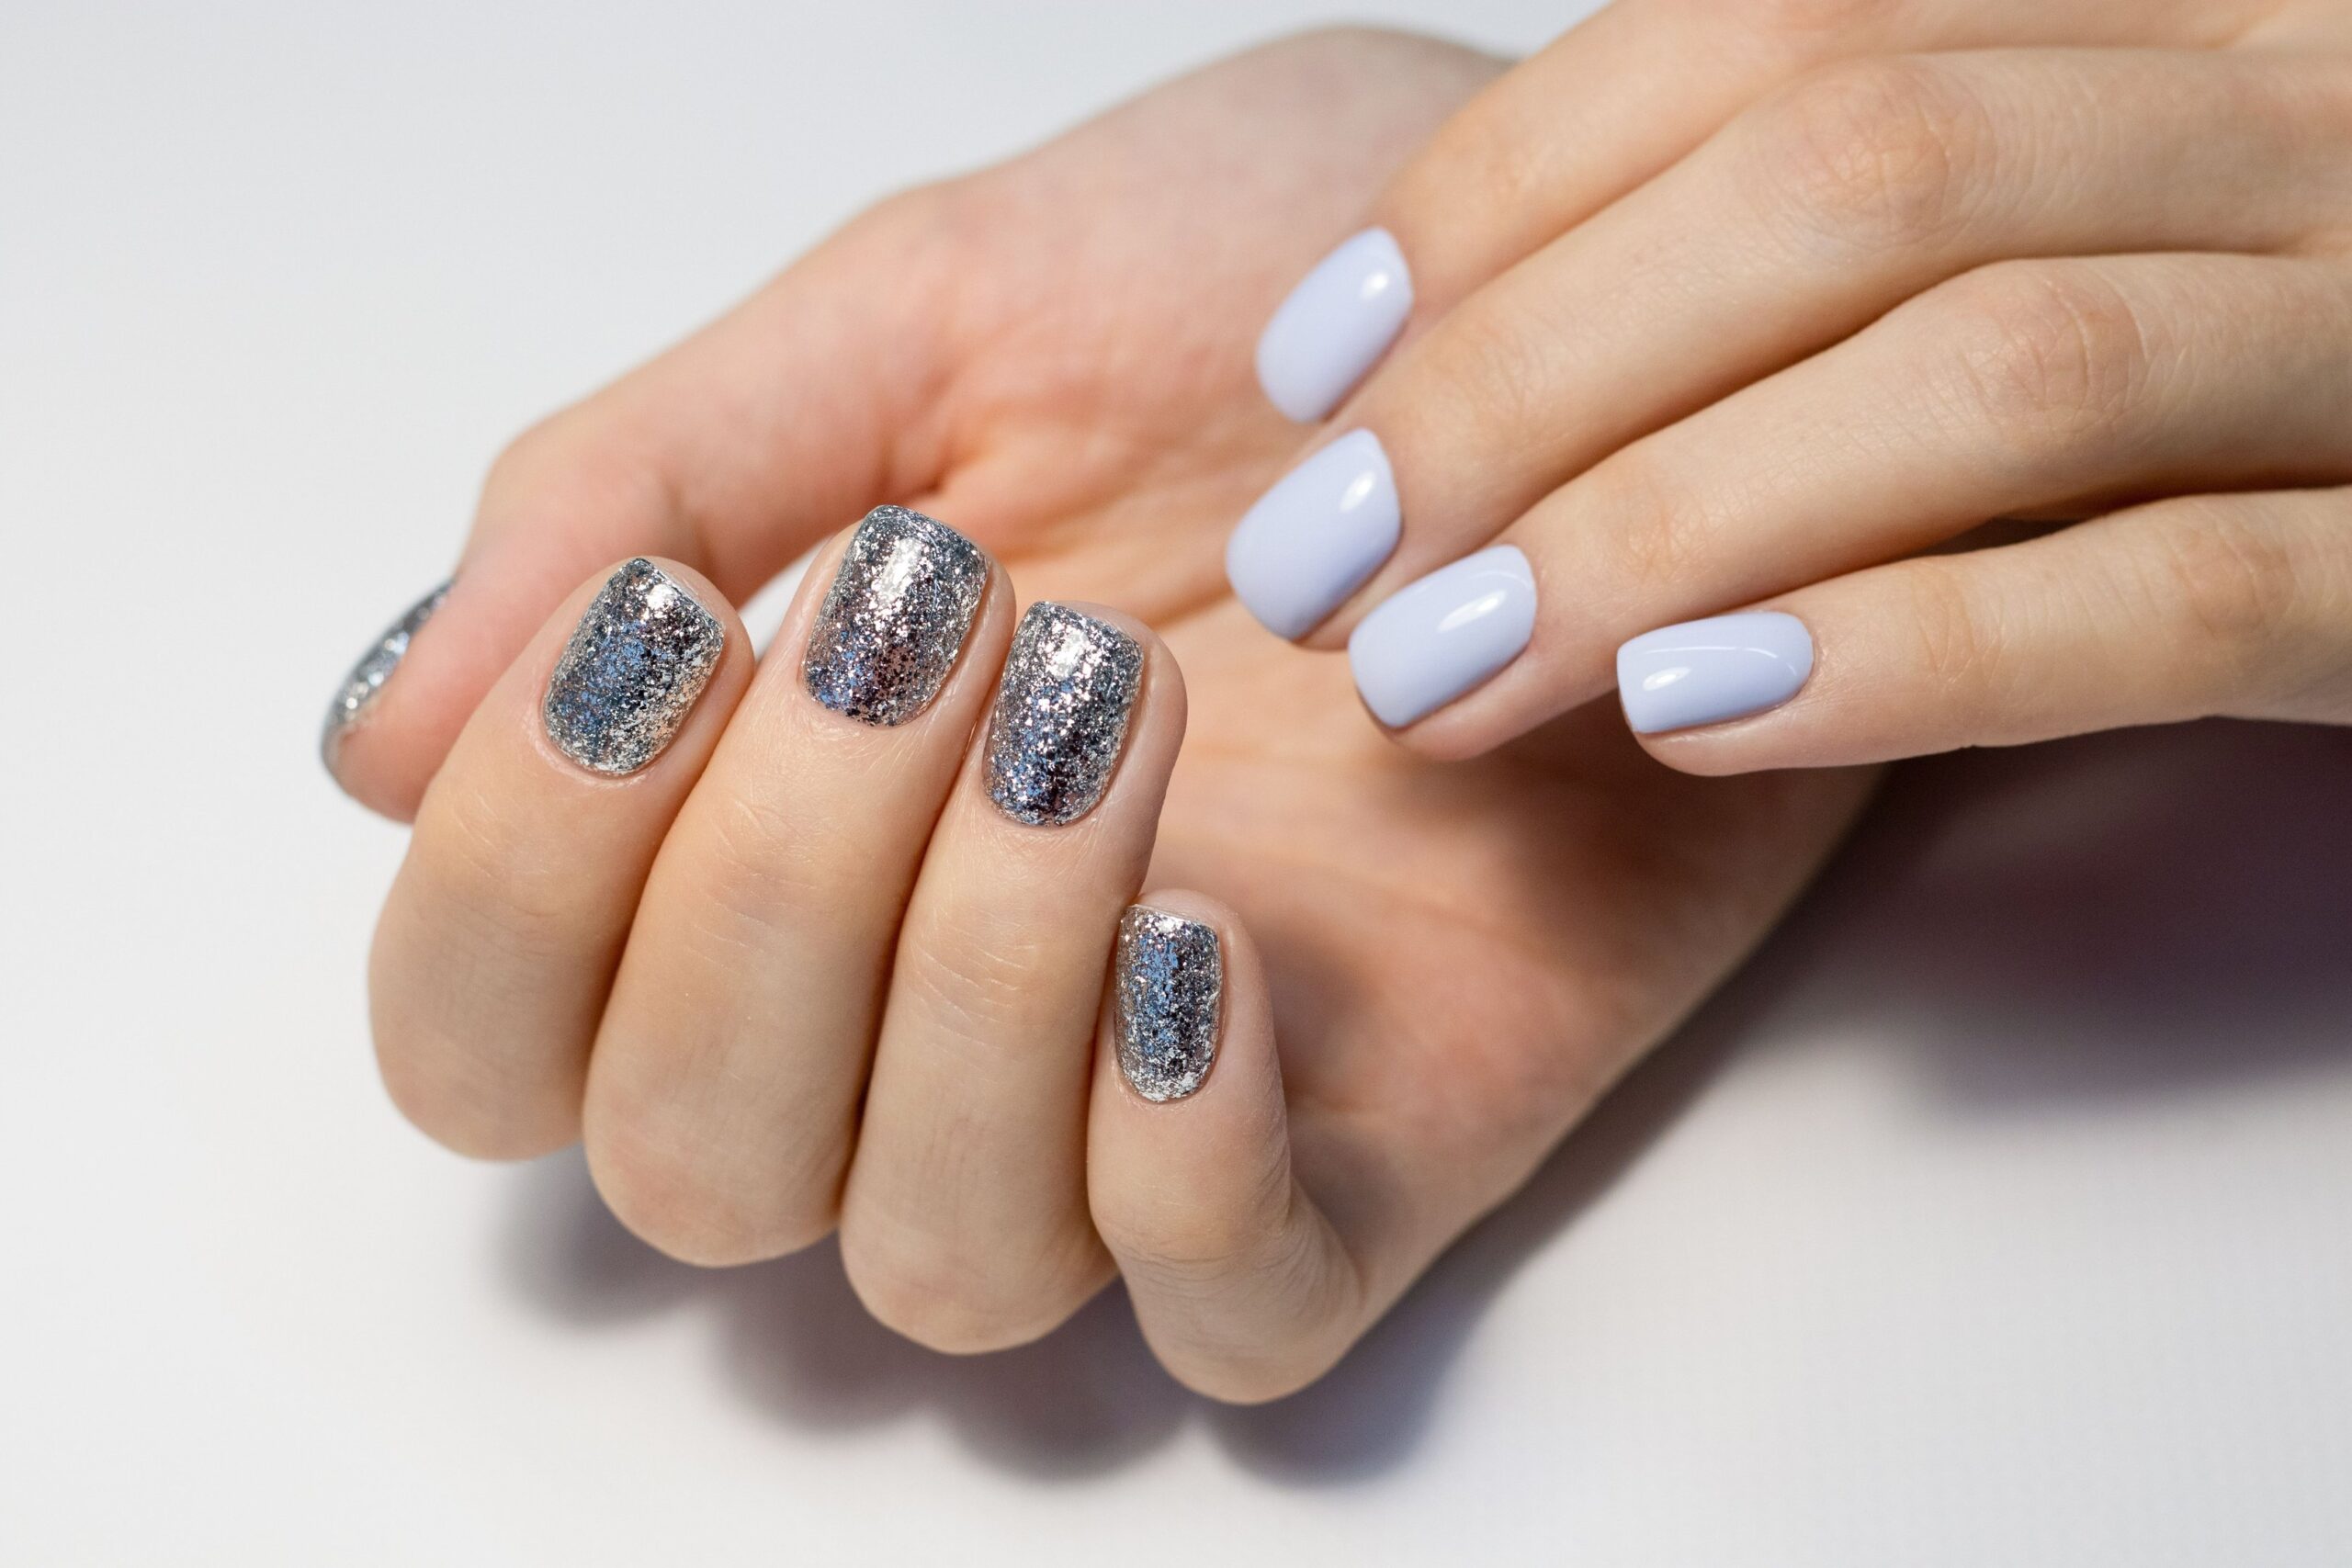
13. Icy Blue Chrome Nails
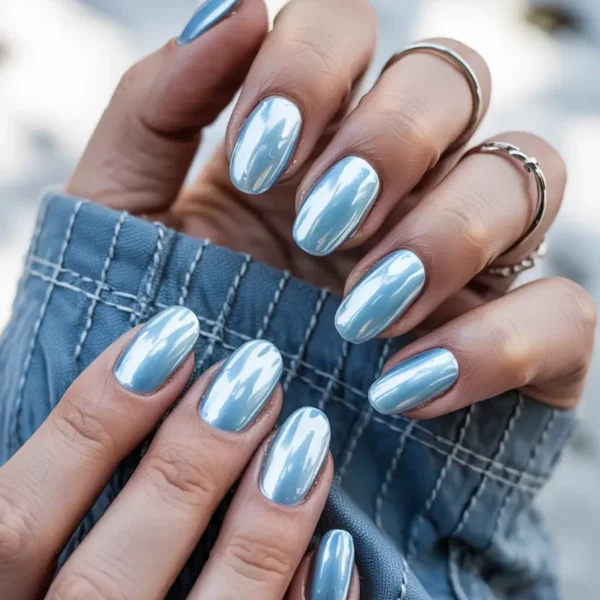
If you loved last year’s mirror chrome trend, the 2026 update is all about that pale, almost-white icy blue. It catches the light like a frozen lake and looks especially stunning on longer almond shapes. It’s a cooling counterpoint to all the warm summer shades — perfect for the days you want your nails to feel like air conditioning.
Perfect for: Heatwave dressing, futuristic looks, beach vacations.
14. Fruit Salad Summer Nails
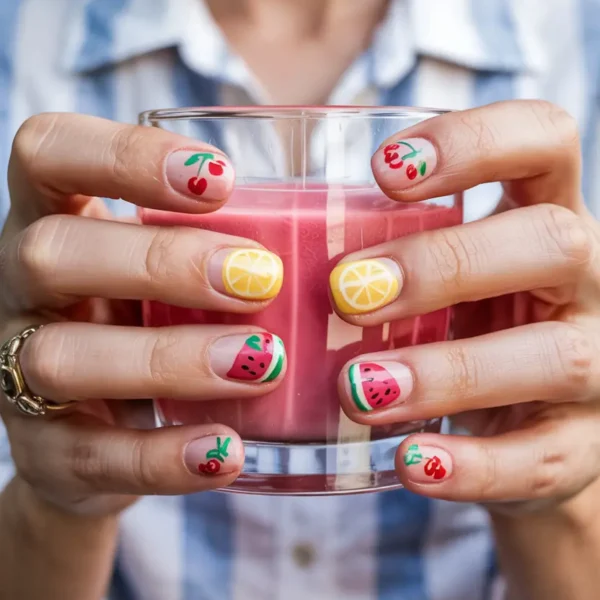
Often called the unofficial manicure of summer 2026, fruit salad nails feature tiny hand-painted cherries, strawberries, lemons, and watermelon slices on a milky base. Each finger gets its own fruit, which sounds chaotic but actually looks adorable. Bonus: they photograph beautifully holding a cocktail glass — which we’re sure has nothing to do with the trend.
Perfect for: Bachelorette weekends, brunch dates, playful summer moods.
15. Milky White Minimalist Nails
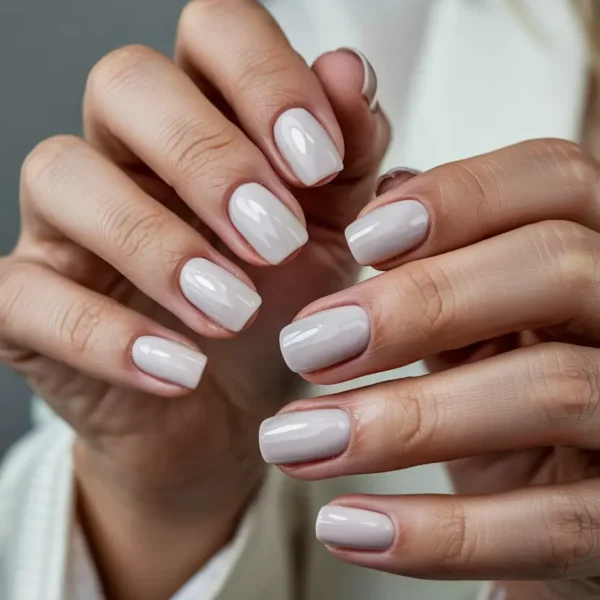
The most-saved nail look of 2026 so far is also the simplest: a glossy, slightly milky white. It’s the classic manicure reimagined — softer than a stark white, more polished than nude, and flattering on every skin tone. If you want something low-maintenance that still feels intentional and modern, this is it.
Perfect for: Office-friendly looks, brides, anyone who likes their nails to go with everything.
How to Choose the Right Summer Nail Design for You
With this many stunning options, picking just one summer manicure can feel impossible. The good news? There’s truly a style for every mood, occasion, and personality. Here’s how to narrow it down without spending an hour scrolling.
- Match the design to your skin tone
Warm undertones (think golden or peachy) glow next to coral, butter yellow, terracotta, and warm browns. Cool undertones (pink or blue tinted) come alive next to icy blues, jade marble, milky whites, and lavender. Neutral undertones can wear almost anything — lucky you.
- Match the design to your week
Heading into the office tomorrow? Stick with milky white, butter yellow, or jade marble — they read as polished, not party. Going to a wedding? The mint and blush luxe look or jade marble both translate beautifully in photos. Heading on holiday? Lean into tropical sunset, palm tree art, or fruit salad nails — these are the looks you’ll want to remember the trip by.
- Match the design to your maintenance level
Detailed designs like 3D daisies, fruit art, or seashell rhinestones look incredible — but they chip more visibly and are harder to fix on the go. If you travel a lot or work with your hands, solid colors (butter yellow, milky white, icy chrome) and ombrés age much more gracefully between salon visits.
Final Thoughts
When it comes to summer nails, the only real rule is this: have fun with it. Whether you’re team floral, team glitter, team chrome, or team minimalist milky white — there’s a style here to match every mood you’ll be in this season.
Use this guide to inspire your next salon appointment, your next DIY adventure, or just your next Pinterest board. Save the looks that catch your eye, screenshot the care tips that surprised you, and don’t be afraid to mix and match — some of the best summer manicures happen when you take a 2026 trend and pair it with a classic shape you already love.
Looking for more nail inspiration? Don’t miss our 23 Summer Nail Ideas roundup or our Fall Nail Designs guide for when the seasons start to shift again.

I’ll be honest with you. My relationship with matcha latte started on shaky ground. For the longest time, I had never tasted it, never even thought of trying it. That vivid green powder felt intimidating and honestly a bit “too trendy” for my liking. It wasn’t until social media began buzzing with matcha lattes, matcha skincare, matcha everything that I started to wonder: is there something I’m missing?
But I wasn’t ready to give up. And then Strawberry Matcha Latte came to my life—a refreshing, slightly sweet, layered drink that’s as beautiful as it is delicious. Let me show you how I make it in just 5 minutes.
Why You’ll Love This Strawberry Matcha Latte
Deliciously Balanced: The sweetness of fresh strawberry puree perfectly complements the earthy tones of matcha.
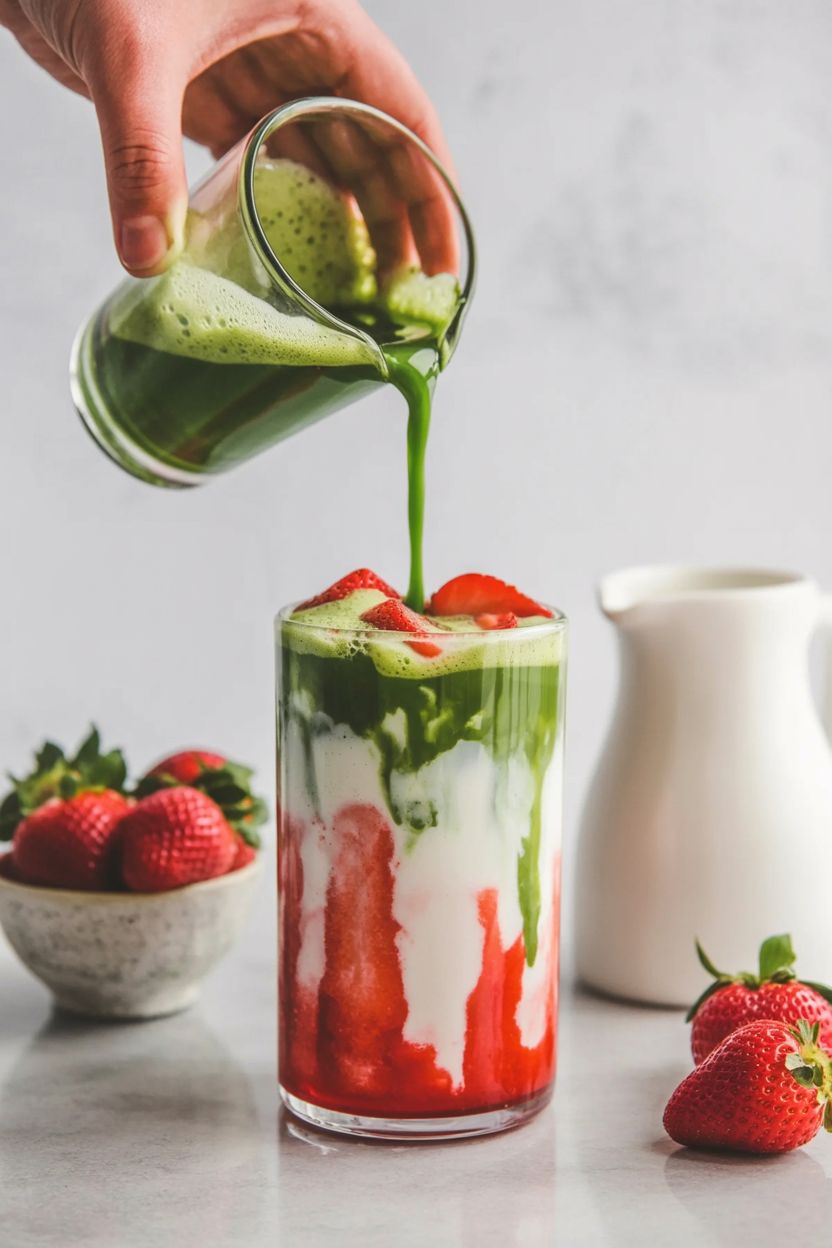
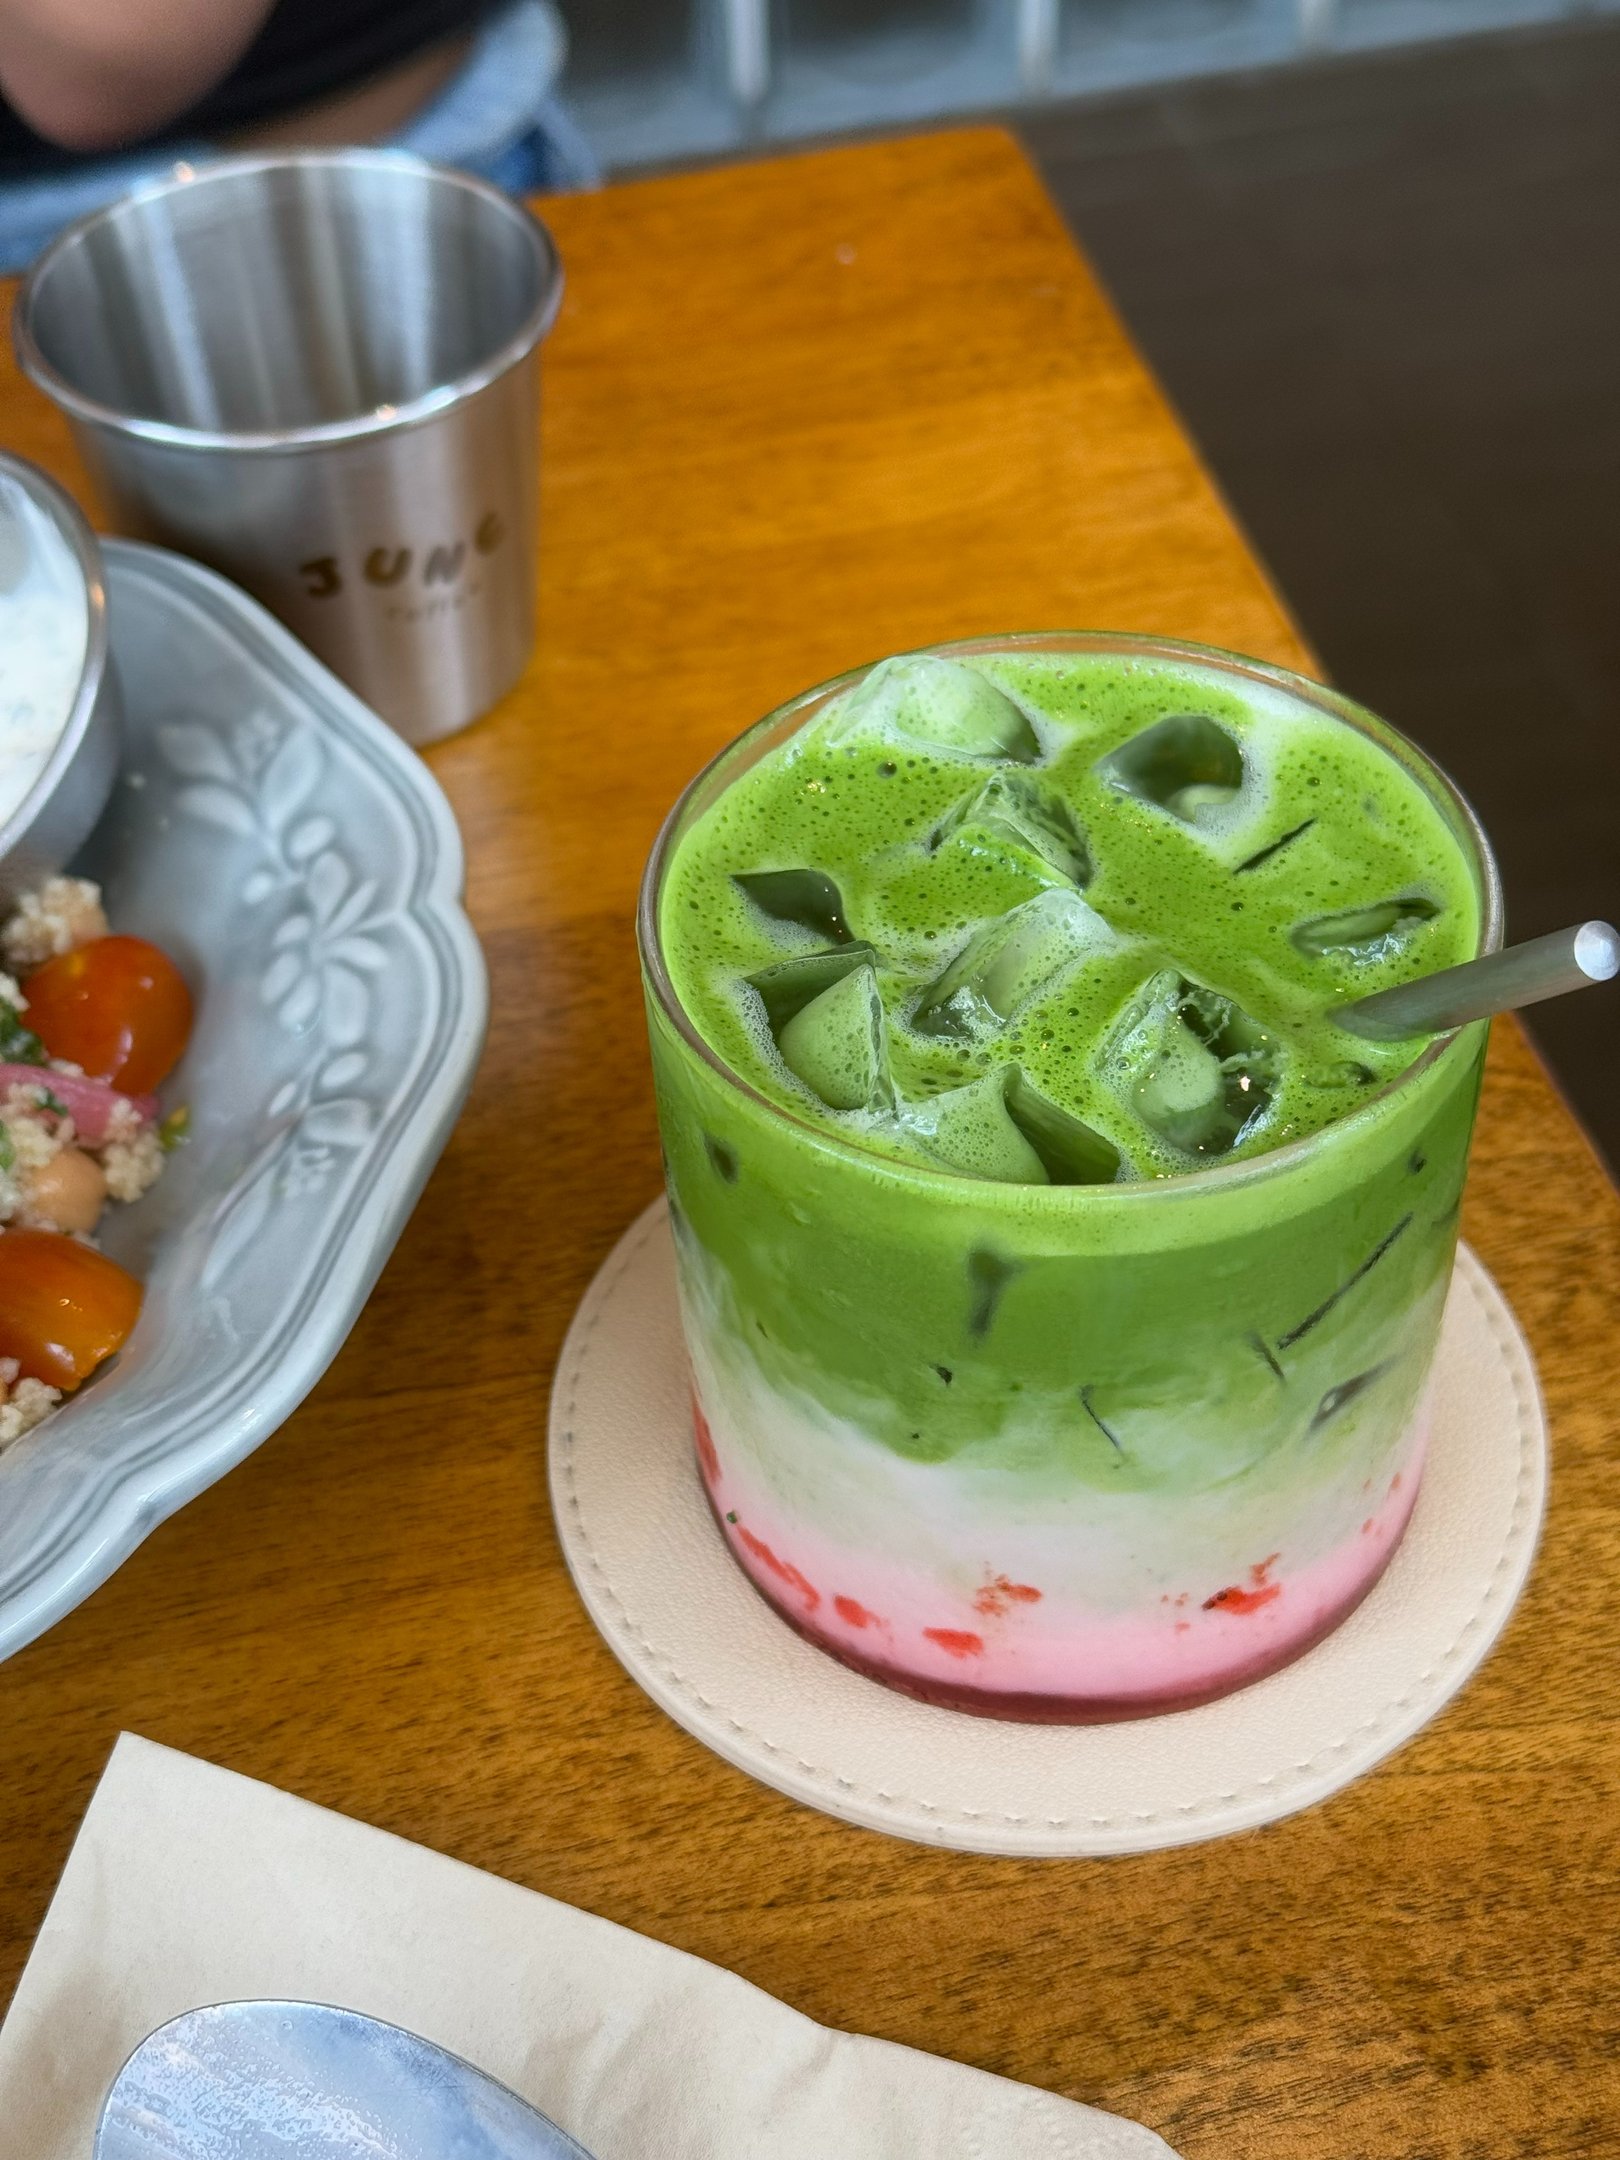
Visually Stunning: The layered look with pink, white, and green makes every glass Instagram-worthy.
Quick & Easy: You only need 5 minutes and a handful of ingredients.
Nutritious & Refreshing: Made from fresh, whole ingredients—no syrups or powders needed.
Ingredients You'll Need
1 tsp matcha powder (preferably ceremonial grade)
1/4 cup hot water (not boiling—around 80°C)
1/2 cup fresh strawberries (or frozen and thawed)
1 tsp maple syrup or honey (optional, to taste)
3/4 cup milk (dairy or plant-based: almond, oat, soy, or coconut)
1/2 tsp vanilla extract (optional but highly recommended)
Ice cubes
This drink is naturally gluten-free and can be made vegan by choosing plant-based milk and maple/agave syrup.
How to Make Strawberry Matcha Latte (Step-by-Step)
Step 1: Make the Matcha
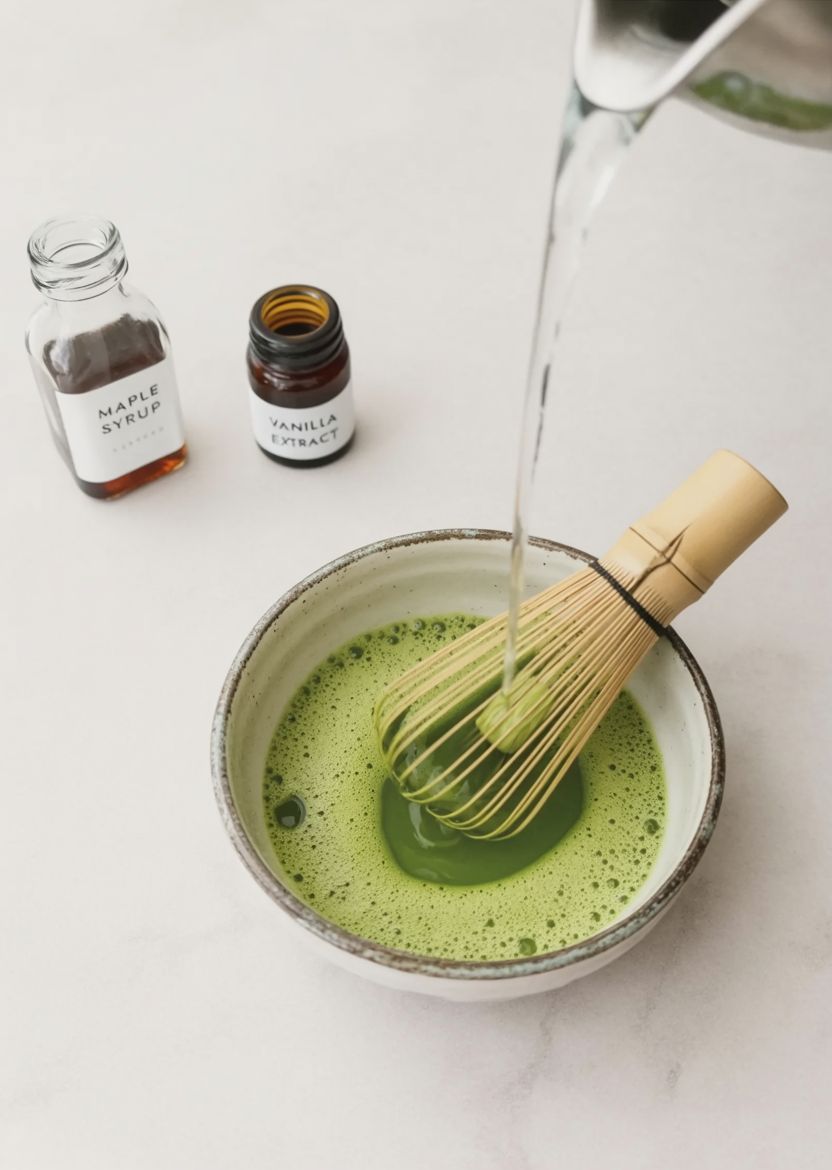
In a small bowl, whisk together 1 tsp matcha powder with 1/4 cup hot water, 1 tsp maple syrup (or sweetener of choice), and 1/2 tsp vanilla extract. Use a bamboo whisk (chasen), milk frother, or even a fork to mix until smooth and lump-free.
Step 2: Prep the Strawberry Puree
In a separate bowl, mash the strawberries with the back of a fork (or use a blender for extra smoothness). If your strawberries aren’t sweet enough, add a tiny bit of honey or maple syrup.
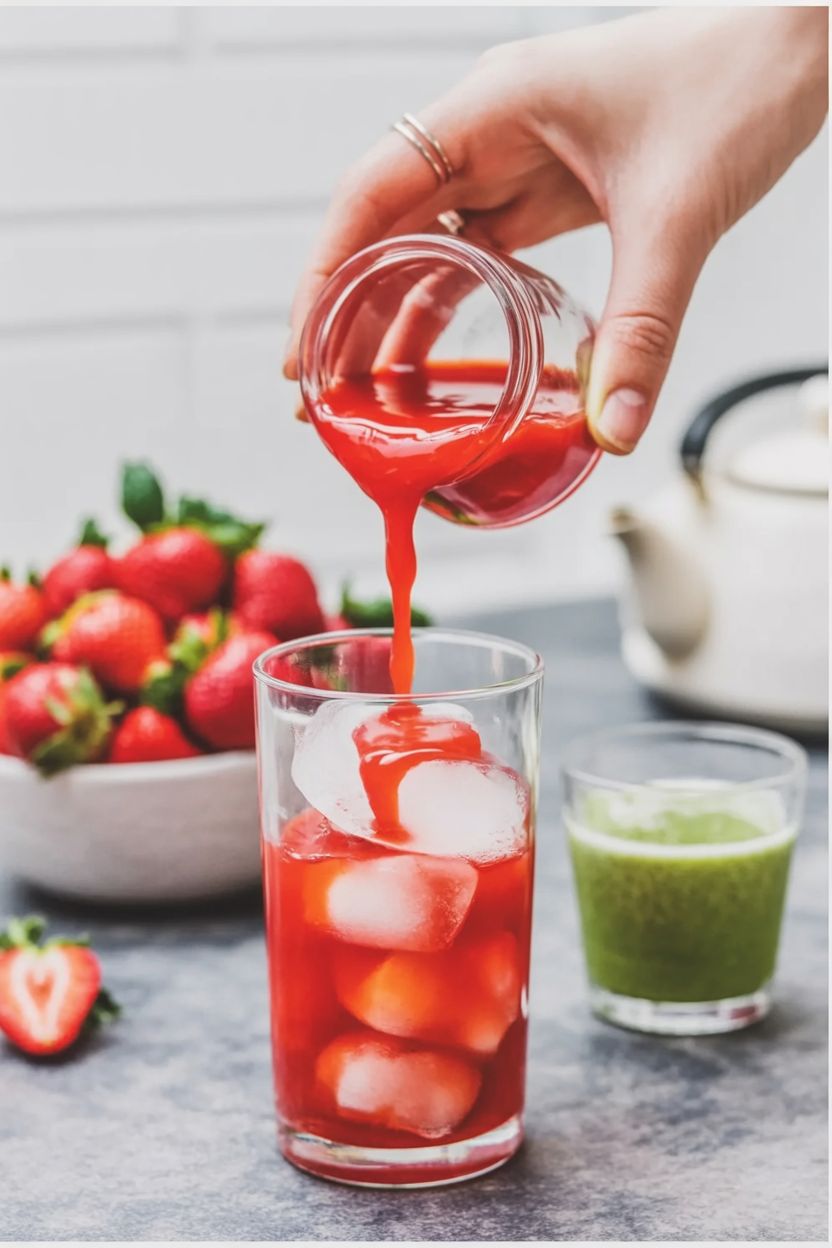
Step 3: Assemble the Drink
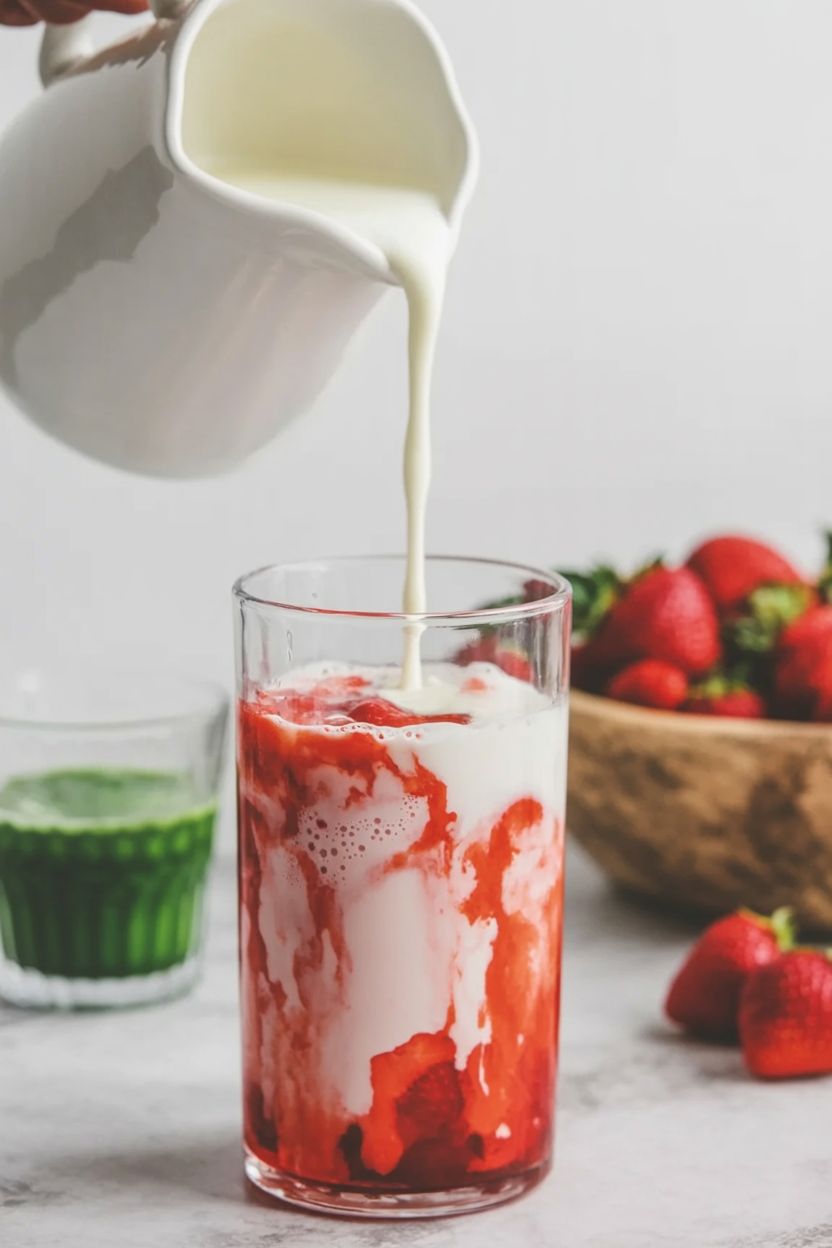
Fill a tall glass with ice cubes. Pour in the strawberry puree first, then slowly add the milk to fill about 3/4 of the glass. Finally, gently pour the matcha mixture over the top to get that beautiful layered effect.
Step 4: Stir & Enjoy
Give it a gentle stir before drinking to combine the flavours—or leave it layered for the aesthetic and stir as you sip.
Tips for the Perfect Strawberry Matcha Latte
Use High-Quality Matcha: Ceremonial grade is best for drinks like this—it’s smoother and less bitter.
Keep It Cold: Always use ice cubes and serve immediately after making for the most refreshing experience.
Try a Milk Frother: It makes the matcha super silky and well-blended.
Layering Trick: Pour slowly over the back of a spoon to keep the layers separate.
Variations You’ll Love
Coconut Strawberry Matcha Latte: Use coconut milk for a tropical twist.
Mint-Infused: Blend a few fresh mint leaves with the strawberry for a cool upgrade.
Berry Mix: Add raspberries or blueberries to the strawberry puree.
Matcha Smoothie: Blend everything with frozen fruit and extra ice for a thicker texture.
Protein Boost: Add a scoop of vanilla protein powder to the matcha.
Matcha Bubble Tea: Add cooked tapioca pearls for a fun Boba-style drink.
FAQ: Your Questions Answered
Can I make it ahead of time?
You can prep the strawberry puree and matcha mixture ahead of time and store them separately in the fridge. Assemble right before serving.
Can I use frozen strawberries?
Absolutely! Just thaw them a bit before mashing or blending.
Can I make it sugar-free?
Yes! Leave out the sweetener or use monk fruit/stevia to keep it low-sugar.
Can kids drink it?
Due to the caffeine in matcha, it’s better suited for teens and adults. For kids, make a caffeine-free version with green tea alternatives or just strawberries and milk.
Does matcha have caffeine?
Yes, it contains about 60–70 mg per teaspoon—roughly the same as a small cup of coffee.
Pin It, Save It, Sip It
Whether you’re a seasoned matcha lover or a curious beginner, this Strawberry Matcha Latte is a must-try. It’s easy, wholesome, and just plain fun. Let me know if you give it a go—tag me @stylicia and share your layered creations!
Stay refreshed!
")
Do You Love Boho Style But Want to Keep It Budget-Friendly?
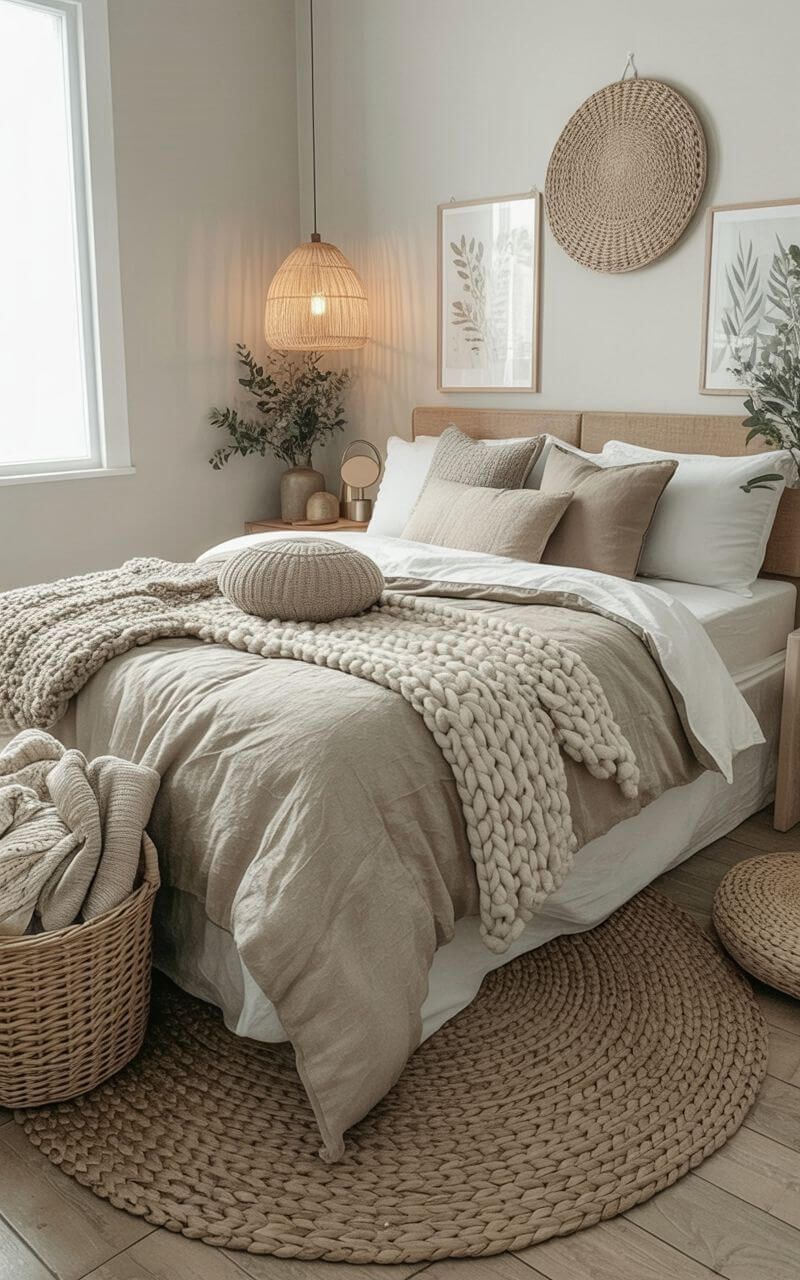
Maybe you dream of a modern bedroom infused with bohemian charm. If you’ve been saving dreamy Pinterest inspo boards, searching for the perfect budget-friendly grey boho bedroom ideas filled with pampas grass , chunky knit throws, and that layered bedding look—then you’re not alone. But the real question is: how do I actually recreate this vibe without spending a fortune?
We’ve got you covered.
Let’s dive into the most stunning, budget-friendly grey boho bedroom ideas that will transform your space into a peaceful retreat filled with texture, warmth, and personality—without breaking the bank.
1. Warm Neutrals for Your Grey Boho Bedroom

Start with a soft, earthy palette. Think warm greys, taupes, and beiges—the kind of colours that instantly calm the mind. Look at the images we’ve included: these bedrooms use muted, natural hues as a base, which makes every added texture or detail pop.
This look works beautifully with budget-friendly finds: cotton or linen-blend bedding, DIY wall art, or even a thrifted vase with dried florals like pampas grass or eucalyptus.
2. Add Texture to Your Grey Boho Bedroom with Knit Throws
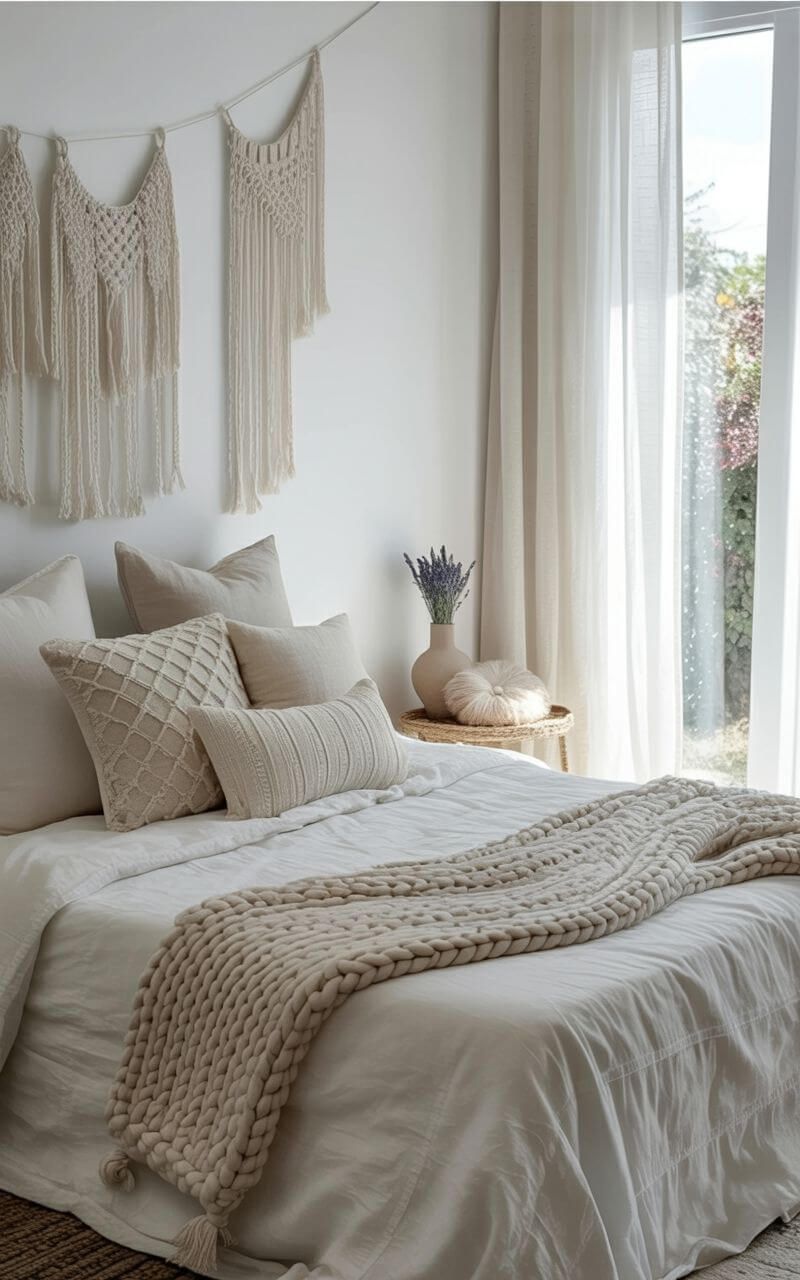
One of the easiest ways to achieve the grey boho bedroom aesthetic is with texture. And the hero of this look? The chunky knit throw. You don’t need a designer price tag to get one—many budget stores offer beautiful options that bring instant warmth and visual interest.
Layer this with other textures: macramé wall hangings, woven rugs, jute baskets, and a mix of throw pillows.
3. Decorate with Natural Materials

Boho is all about connecting with nature. Incorporate elements like:
Wicker light fixtures
Wooden nightstands
Linen bedding
Dried floral arrangements
Even a simple ceramic vase with foraged branches can add a serene, grounded feel to your room. You’ll notice in our photos how these elements elevate the style without adding clutter.
4. Boho Wall Art Doesn’t Have to Be Expensive
Want instant impact? Frame botanical prints, hang a thrifted mirror, or go with minimalist line art. You can even print downloadable art from Etsy or Canva and frame them yourself.
Bonus: Macramé wall hangings or tapestries create a focal point while adding warmth and texture.
5. Mix Modern and Boho for a Balanced Look

If you love the clean lines of a modern bedroom but crave a bit of boho softness, you’re not alone. One of our featured looks blends a crisp white headboard with linen bedding and just a touch of tassels and draped fabric overhead—resulting in an ethereal, calm feel.
The key is contrast: use structure (like clean furniture) and soften it with organic elements (like draped curtains or a woven rug).
6. Ambient Lighting Changes Everything

The glow of string lights, lanterns, or even just a soft bedside lamp can make your space feel magical. A dreamy bedroom isn’t about how much you spend—but how it feels.
We especially love warm-toned fairy lights paired with natural wall textures. It’s romantic, it’s boho, and yes—it’s affordable.
7. Incorporate Thrifted or DIY Decor

Grey boho bedrooms thrive on personality, and nothing adds charm like a one-of-a-kind piece. Visit your local flea market, Facebook Marketplace, or even repurpose items from another room.
Old wooden stools, handmade pottery, or that vintage lamp in your grandma’s attic—these pieces add authenticity and story to your room.
8. Use Pampas Grass and Soft Greens for Natural Elegance

It’s simple, but effective. Pampas grass, dried flowers, olive branches—these soft, muted plants complement neutral tones and add a luxurious feel without the upkeep of fresh flowers.
Place them in oversized ceramic vases or thrifted jars to complete the look.
9. Try an Industrial-Boho Mix if You Love Contrast

Prefer something edgier? Combine concrete-textured walls or darker backdrops with soft boho accessories. In one of our featured bedrooms, concrete meets coziness through knit throws, warm lighting, and pampas-filled vases.
It’s unexpected—but incredibly stylish.
10. Add Glamour Without Losing the Boho Soul

Yes, boho can sparkle too! One of our favourite looks combines sequinned pillows and a shimmering throw with earthy pampas decor and a tufted headboard in soft grey. It’s glam and grounded.
Mixing metallics with woven textures keeps the look elevated, but still warm and approachable.
Your Dreamy Boho Bedroom Starts with You
Creating your perfect grey boho bedroom isn’t about buying more—it’s about layering meaning, comfort, and you can turn your space into a sanctuary with these grey boho bedroom ideas. With natural textures, budget-friendly decor, and a few thoughtful details, you can turn your space into a sanctuary.
Whether you’re drawn to earthy minimalism, romantic neutrals, or a touch of sparkle, let this be your sign: it’s totally possible to have a modern boho bedroom that feels both elevated and personal—without maxing out your credit card.
So light those fairy lights, fluff those tassel pillows, and enjoy every cozy corner of your boho retreat.
Don’t forget to save your favourite ideas and share your own transformations!
Happy Decorating!
")
If you’ve been craving something fresh, satisfying, and just downright DELICIOUS, you’re in for a treat today. I’m sharing my absolute go-to Chicken Caesar Salad with Homemade Croutons — and trust me, it’s not just any Caesar salad. This one is truly the BEST. We’re talking juicy grilled chicken, crispy homemade croutons, and a dreamy dressing that you might actually want to drink. (Not joking.)
Whether it’s a sunny spring lunch or a hectic weeknight dinner, this easy salad is a total game-changer.
What Makes This Chicken Caesar Salad So Special?
Let’s be real: store-bought Caesar salads just don’t cut it. They’re either soggy, bland, or worse – weirdly sweet dressing with sad-looking lettuce. No, thank you. This homemade version is a whole different story.
Grilled Chicken that’s juicy, flavourful, and marinated to perfection
Homemade Croutons made with real ciabatta, crispy on the outside, soft in the middle
A Caesar Dressing that’s creamy without being heavy – and NO raw egg or anchovies here!
Oh, and it comes together in a snap if you prep the chicken and dressing ahead. Hellooo, weeknight win!

Ingredients You’ll Need
Chicken Ingredients
3 tablespoons extra-virgin olive oil
2 tablespoons freshly squeezed lemon juice
2 teaspoons lemon zest
1 garlic clove, grated
Kosher salt and black pepper, to taste
1 ½ pounds boneless, skinless chicken breasts (or thighs, if that’s your jam!
What You Need for the Croutons
3 tablespoons extra-virgin olive oil
2 tablespoons chopped fresh parsley
1 garlic clove, grated
Kosher salt and black pepper, to taste
4 cups ciabatta bread cubes (sub with gluten-free bread if needed)
Creamy Caesar Dressing Ingredients
¼ cup mayonnaise (dairy-free version works too!)
¼ cup buttermilk (or plant-based buttermilk alternative)
3 tablespoons freshly grated Parmesan (or nutritional yeast for dairy-free)
1 garlic clove, grated
1 tablespoon lemon juice
1 ½ teaspoons Dijon mustard
½ teaspoon Worcestershire sauce (make sure it’s anchovy-free if you’re vegetarian)
Kosher salt and black pepper, to taste
Fresh Salad Base Ingredients
2 heads romaine lettuce, roughly chopped
¼ cup grated Parmesan (or again, sub if dairy-free)

How to Make Chicken Caesar Salad Step by Step
Step 1: Marinate Chicken for Caesar Salad
In a bowl (or large Ziploc), combine your olive oil, lemon juice, zest, garlic, salt and pepper. Add in the chicken and let it marinate for at least 2 hours – or overnight if you can plan ahead. (Pro tip: Make a double batch and save the rest for wraps or sandwiches!)
Step 2: Make Homemade Croutons for Chicken Caesar Salad
Preheat your oven to 400°F (200°C).
In a bowl, whisk together the olive oil, parsley, garlic, salt and pepper. Toss it with your bread cubes until everything’s coated. Spread them out on a baking sheet and bake for 13-15 minutes, flipping halfway. They should be golden, crunchy, and smell like heaven.
Gluten-free tip: Just use your favourite GF bread. Sourdough-style works great!
Step 3: Grill Chicken for Caesar Salad Recipe
Heat your cast iron grill pan (or a regular skillet if you don’t have one) over medium-high heat. Grill the marinated chicken for 4-5 minutes per side until it hits an internal temp of 165°F. Let it rest for 5 minutes before slicing. This helps keep it super juicy.
No grill? No problem. Oven-roast at 400°F or use a non-stick skillet. It still turns out awesome!
Step 4: Prepare Creamy Caesar Salad Dressing
Whisk together all your dressing ingredients until smooth and creamy. You can make this a couple days in advance – just store in a jar and give it a good shake before using.
Dairy-free tip: Use vegan mayo and oat or soy buttermilk. Nutritional yeast instead of Parmesan gives it a great cheesy flavour.
Step 5: Toss the Chicken Caesar Salad and Serve Fresh
In a big salad bowl, toss the romaine with the chicken, croutons, and a drizzle of that dreamy dressing. Top with more Parmesan and freshly cracked pepper if you like. Serve immediately!
Extra Tips from Your Salad-Obsessed Friend
Add protein variety: Swap chicken for grilled shrimp, tofu, or even steak.
No soggy salad zone: Always toss the dressing right before serving.
Make it a meal prep star: Store components separately in the fridge and assemble when ready.
Want it heartier? Add avocado slices, roasted chickpeas or a boiled egg (if you’re not egg-sensitive).
Kid-friendly twist: Chop everything smaller, and let little ones dip with dressing on the side.
What to Serve With Chicken Caesar Salad
This salad is so good on its own, but it also pairs beautifully with:
Sheet Pan Steak and Veggies
Spaghetti Carbonara
Easy Pork Chops with Sweet and Sour Glaze
Salmon with Garlic Cream Sauce
Tools That Make It Even Easier
You don’t need a lot, but these help:
Baking sheet (for the croutons)
Cast iron grill pan (for those perfect grill marks)
Mason jar (for shaking up your dressing like a pro)
Instant-read thermometer (ensures perfect chicken every time)
Frequently Asked Qs
Can I use chicken thighs instead of breasts? Yes! Thighs are juicier and cook a bit faster. Just adjust your grilling time.
Is the dressing safe without raw egg? Yes! There are no raw egg yolks or anchovies here. It’s creamy thanks to mayo and buttermilk – but totally adjustable for your needs.
Can I make this gluten-free and dairy-free? Absolutely. Sub gluten-free bread for croutons, and use dairy-free mayo, buttermilk, and cheese swaps in the dressing.
How long does it keep? Keep the dressing in the fridge for 2-3 days. Chicken can be cooked ahead and stored for 3 days. Croutons stay crispy in an airtight container for about a week.
Final Thoughts: Why You’ll Keep Coming Back to This Salad
Honestly? It’s fresh, flavourful, customisable, and way better than any salad kit. You know exactly what’s going in it, and the textures are just perfection – crunchy, juicy, creamy, and crisp in every bite.
Give this Best Ever Chicken Caesar Salad with Homemade Croutons a go and let me know how much you love it. Bonus points if you drizzle a little extra dressing on top.
Happy cooking!

Summer is here, you’re hungry, but don’t feel like eating anything heavy or greasy? That’s exactly how I feel most days when the temperatures rise. In summer, I crave light, fresh, creamy dishes. And you know what has become my absolute favorite lately? A fantastically simple yet flavor-packed Avocado Chicken Salad Bowl. This recipe isn’t just quick to make – it’s loaded with the good stuff: healthy fats, lean protein, crunchy veggies, and fresh flavors in every bite.
If you’re looking for a salad bowl that’s not just nourishing but genuinely enjoyable to eat, this Avocado Chicken Salad Bowl is a must-try. It’s a recipe that’s become a kind of ritual with my girlfriends – something we make again and again with a squeeze of lime and a dollop of Greek yogurt.

Top Reasons to Try This Avocado Chicken Salad Bowl Today
This salad bowl is so much more than just chicken salad:
High in Protein: Lean, filling chicken breast powers you through your day.
Healthy Fats: Creamy, ripe avocado delivers heart-healthy goodness.
Low-Carb & Keto-Friendly: It’s all about clean ingredients – no fluff, just fuel.
Gluten-Free & Dairy-Free Option: Swap the Greek yogurt with coconut or almond yogurt.
Quick & Easy: Ready in just 10 minutes, even on busy summer days.
Ingredients Breakdown & Their Health Benefits
1. Chicken Breast – Your protein powerhouse
Lean, easily digestible, and keeps you full. Also great for using up leftover roast chicken.
2. Avocado – Green gold
Rich in healthy fats and fiber, this creamy superfood keeps your heart and digestion happy.
3. Greek Yogurt – Light creaminess
A healthier, protein-rich alternative to mayo. Can be made dairy-free.
4. Lime Juice – Zesty enhancer
Prevents browning and brightens up the entire salad bowl.
5. Red Onion, Celery, Cherry Tomatoes – The crunch factor
Add bite, vitamins, and fresh flavor to balance the creaminess.
6. Cilantro or Parsley – Herbal freshness
Naturally anti-inflammatory and a burst of brightness.
7. Olive Oil & Spices – The Mediterranean finish
Heart-healthy oil and seasonings like garlic powder, onion powder, pepper, and chili flakes elevate the whole dish.
Full Recipe – Avocado Chicken Salad Bowl
Ingredients (serves 4):
2 cups cooked shredded chicken breast
1 ripe avocado, mashed
1/4 cup Greek yogurt
1 tablespoon fresh lime juice
1/4 tsp garlic powder
1/4 tsp onion powder
1/2 tsp salt
1/4 tsp black pepper
1/4 cup red onion, finely chopped
1/4 cup celery, chopped
1/4 cup cherry tomatoes, halved
2 tbsp fresh parsley or cilantro, chopped
1 tbsp extra virgin olive oil
Optional: 1/4 tsp red pepper flakes
Instructions:
In a large bowl, mash the avocado with a fork.
Stir in the Greek yogurt, lime juice, and seasonings until smooth.
Add in the chicken, then fold in the veggies and herbs.
Drizzle with olive oil and sprinkle with chili flakes if using.
Serve immediately or chill for 30 minutes for enhanced flavor.
How to Serve This Avocado Chicken Salad Bowl
This salad bowl is endlessly versatile:
Lettuce Wraps: Spoon it into romaine or butter lettuce leaves for a low-carb wrap.
Whole-Grain Toast: Serve over toasted bread for a quick snack or breakfast.
Pita Pockets: Make it a sandwich by filling whole grain pitas.
Greens Bowl: Pile onto a bed of greens like arugula or spinach.
Stuffed Avocado: Elegant enough for guests – fill avocado halves for wow-factor presentation.
Pro Tips for the Best Salad Bowl Experience
Use fresh ingredients: The riper the avocado, the smoother the result.
Customize your texture: Mash thoroughly for creamy, or leave chunks for added texture.
Keep it green: Extra lime juice and an airtight container help prevent browning.
Spice it up: Add jalapeños, crushed nuts, or crumbled feta for extra flair.
Storage & Meal Prep Tips
Refrigerate: Keeps well for up to 2 days in an airtight container.
Great for Meal Prep: Make ahead for busy weekdays or take it on the go.
Avoid freezing: Avocados don’t freeze well – this dish is best fresh.
Ready to Make Your Own Avocado Chicken Salad Bowl?
Now it’s your turn! Grab your favorite bowl, a ripe avocado, leftover chicken, and make your very own salad bowl. Feel free to play around with the ingredients – add spices, herbs, or toppings you love. One bite and you’ll be hooked.
Don’t forget to share it with a friend – because this is the kind of recipe that’s just too good to keep to yourself!

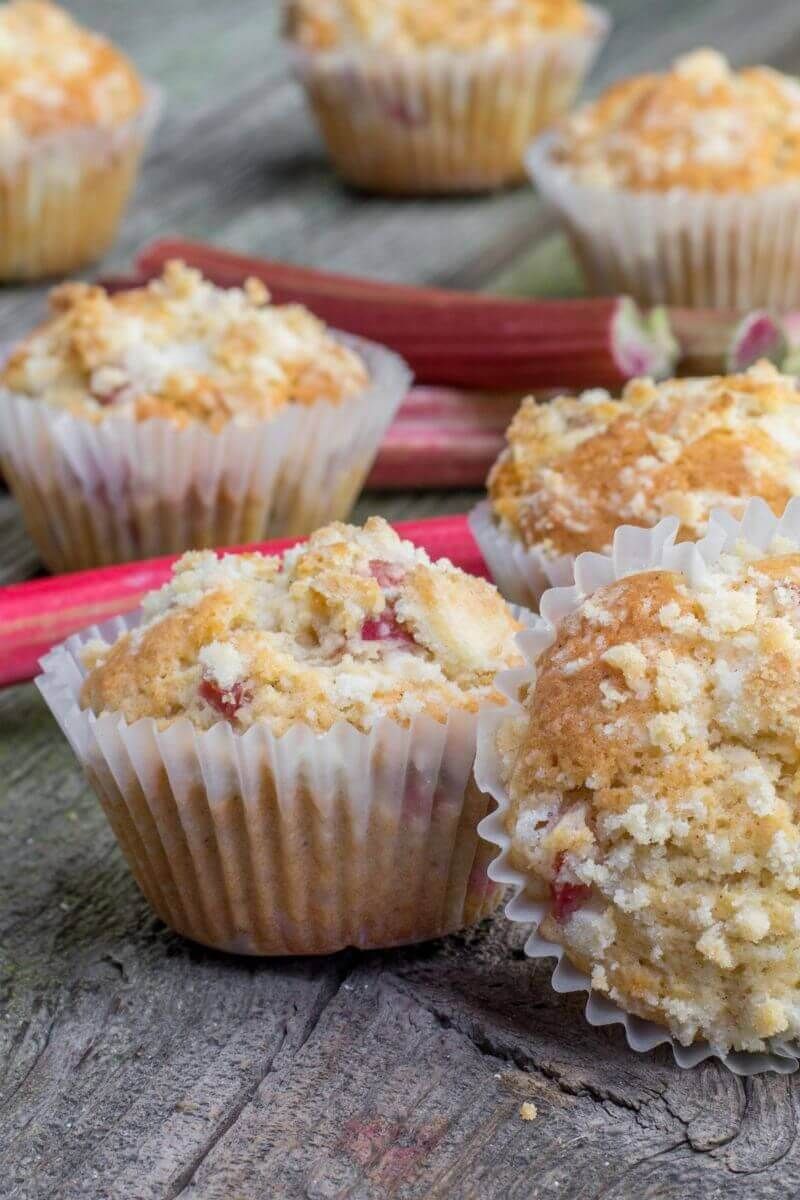
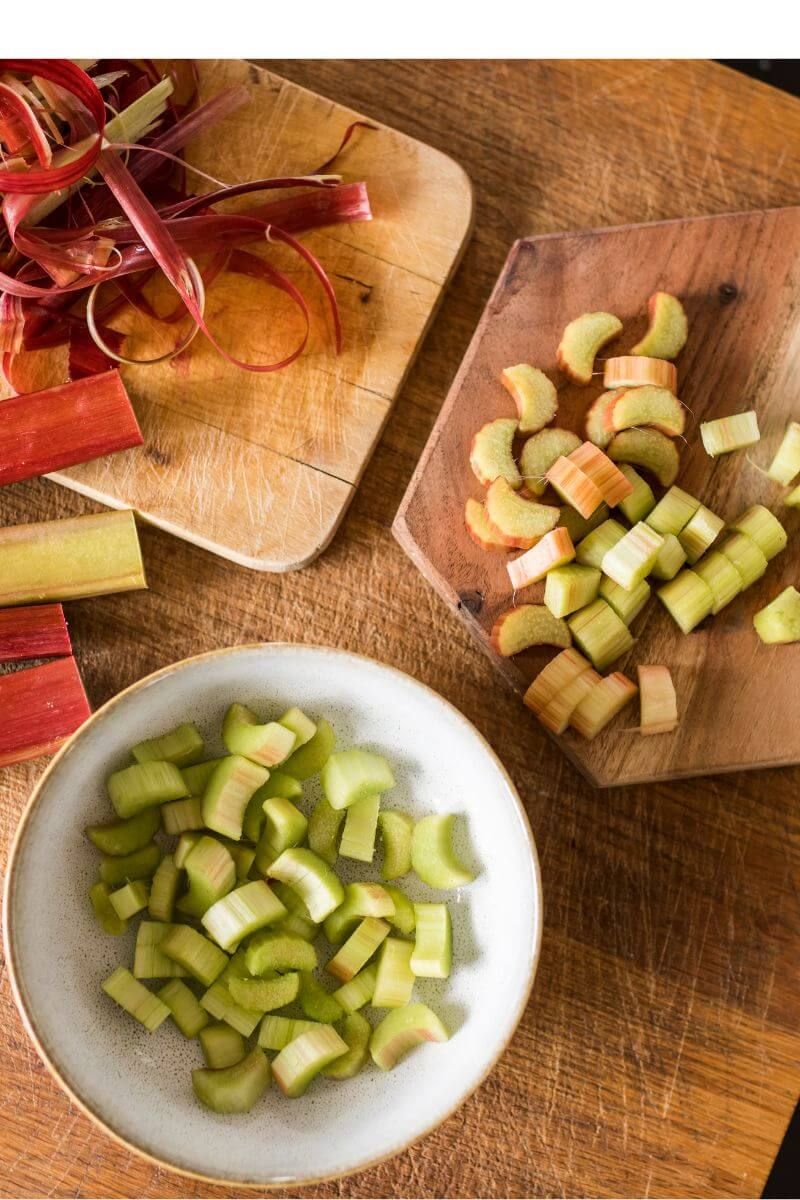
Every spring, like clockwork, the first tender stalks of rhubarb appear in our weekly produce box, and it feels like nature’s way of saying, “It’s time to bake.” If you’ve ever found yourself wondering what to do with those pretty pink stems, let me share my secret: Rhubarb Muffins with Greek Yogurt—the most delightful way to greet the season.
Now, I don’t mean just any muffin. I’m talking about moist rhubarb muffins with yogurt that are light, fresh, and kissed with a hint of cinnamon sugar on top. These healthy rhubarb muffins are my go-to treat the moment the weather hints at warmth and the rhubarb starts popping up in gardens and markets.
Let me tell you why you’re going to absolutely fall in love with this recipe—just like I did.
The First Time I Baked These Rhubarb Muffins
I remembered seeing a note on a baking blog about muffins with fresh rhubarb and cinnamon, and decided to give it a try. But instead of sour cream, I reached for the Greek yogurt I had in the fridge. Not only did it make the muffins beautifully moist, but it added a lovely tang and made me feel just a little better about grabbing a second one.
That first batch disappeared by the end of the day. The next morning, I baked more.
And just like that, a tradition was born.
Why These Muffins Deserve a Spot in Your Recipe Box
They’re perfectly moist. The combination of melted butter and 2% Greek yogurt gives the crumb a soft, tender texture that’s never dry.
They use simple, real ingredients. Nothing fancy or hard to find—just wholesome pantry staples.
They’re versatile. Swap rhubarb for blackberries, apples, or raspberries if you like!
They feel special. The cinnamon sugar topping gives them that bakery-style finish that makes them irresistible.
They’re actually a bit healthier. Thanks to the yogurt, they’re lower in fat than traditional muffins, and they even offer a little protein boost.
In short: these Greek yogurt muffins for spring baking are what I make when I want something sweet that still feels nourishing.
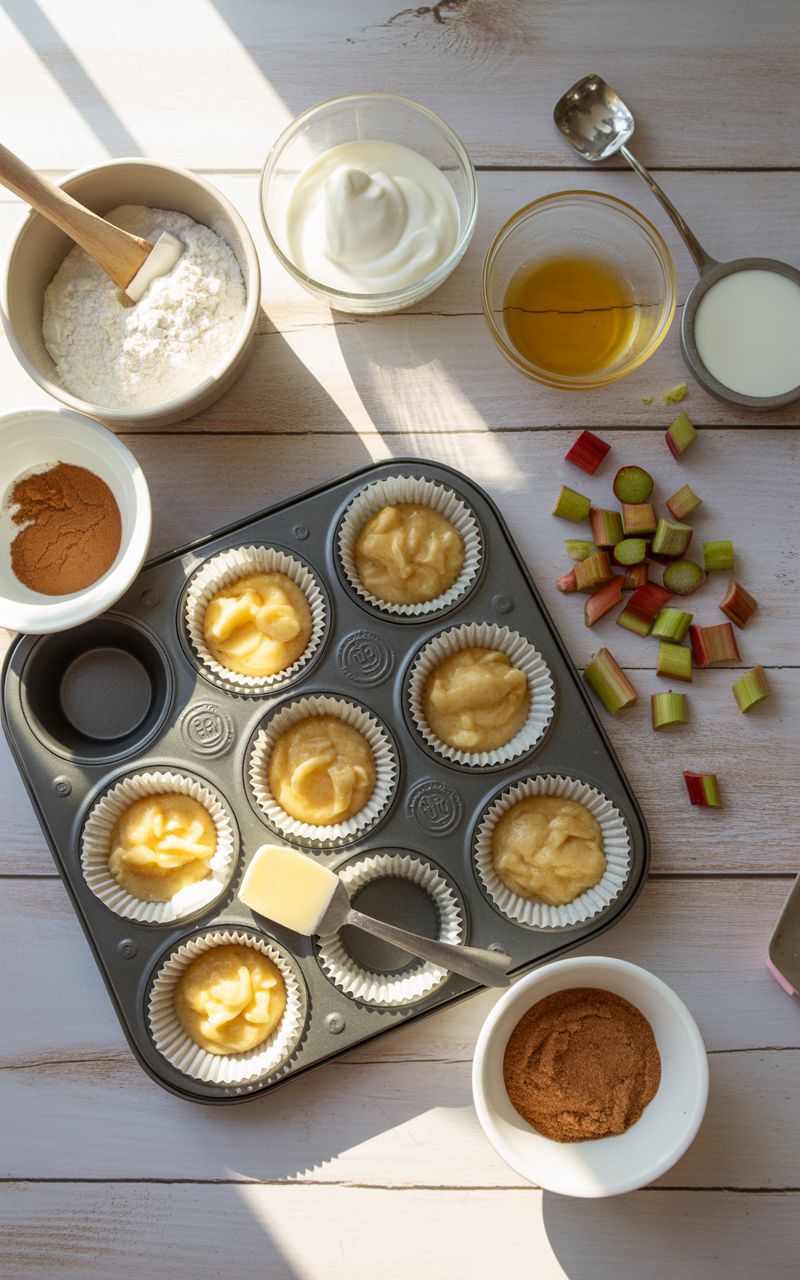
Ingredients You’ll Need
Before you preheat your oven, here’s what you’ll want to gather:
Dry Ingredients:
1 cup all-purpose flour
1 cup whole wheat flour (adds heartiness!)
3/4 cup granulated sugar
2 1/2 teaspoons baking powder
1 teaspoon ground cinnamon
1/2 teaspoon baking soda
1/2 teaspoon kosher salt
Wet Ingredients:
1 cup 2% plain Greek yogurt (or use regular sour cream if preferred)
8 tablespoons (1 stick) unsalted butter, melted and cooled slightly
2 large eggs
1 teaspoon vanilla extract
Add-ins:
1 1/2 cups finely chopped fresh rhubarb
Topping:
3 tablespoons sugar + 1/2 teaspoon cinnamon
These pantry-friendly ingredients come together in one big beautiful batter that’s easy to work with—even on a busy weekday morning.
Step-by-Step: How to Make Healthy Rhubarb Muffins
Preheat the oven to 400°F (200°C). Line a 12-cup muffin tin with paper liners or lightly grease it.
Mix your dry ingredients. In a medium bowl, whisk together the flours, sugar, baking powder, baking soda, cinnamon, and salt.
Whisk your wet ingredients. In a separate large bowl, whisk together the Greek yogurt, melted butter, eggs, and vanilla extract until smooth and creamy.
Combine wet and dry. Gently fold the dry ingredients into the wet until just combined. Be careful not to overmix—this helps keep the muffins tender.
Add the rhubarb. Fold in the chopped rhubarb evenly.
Scoop the batter. Divide the batter among your muffin cups. It should mound slightly over the tops.
Add the cinnamon sugar topping. Mix the sugar and cinnamon in a small bowl, then sprinkle generously over each muffin. Use your fingers to pat it in slightly for that signature sweet crunch.
Bake for 20–22 minutes, or until the tops are golden and a toothpick inserted in the center comes out clean.
Cool slightly before devouring. Trust me—they’re divine warm.
Tips from My Kitchen
Want extra moist rhubarb muffins with yogurt? Stick with 2% or full-fat Greek yogurt for the best texture.
Mini muffins: Bake for 8–10 minutes instead of 20.
Freezing tip: Let them cool completely, then freeze in a zip-top bag for up to 2 months. Reheat gently in the microwave for a fresh-from-the-oven feel.
Batch-friendly: Double the recipe and freeze half. You’ll thank yourself later.
Variations to Try
This is such a reliable muffin base that you can easily adapt it with whatever fruit you’ve got:
Raspberry Rhubarb Muffins: Cut the rhubarb to 3/4 cup and add 3/4 cup fresh raspberries.
Blackberry Cinnamon Muffins: Skip the rhubarb and fold in chopped blackberries for a juicy twist.
Apple Cranberry Muffins: Swap in apples and dried cranberries for a cozy fall version.
The options are endless. But honestly? These classic rhubarb muffins topped with cinnamon sugar might always be my favourite.
Why Greek Yogurt Makes These Muffins So Special
If you’ve never tried baking muffins with Greek yogurt, this is your sign. Greek yogurt acts like a lighter version of sour cream—it reacts with the baking soda to add lift, while keeping everything beautifully moist.
It also adds a gentle tang that complements the tart rhubarb and cozy cinnamon. And did I mention the extra protein boost?
For best results, stick with 2% or higher. Fat-free yogurt can make the muffins slightly drier.
So yes, these low fat rhubarb muffin recipe dreams really do come true—without sacrificing any flavour.
How to Store and Serve
These muffins are best enjoyed warm (with coffee, please!). But if you have leftovers:
Room temp: Store in a covered container for up to 2 days.
Fridge: Store up to 4 days—but bring to room temp before serving.
Freezer: Freeze in a single layer in a zip bag for up to 2 months.
To reheat, wrap in a paper towel and microwave for 20–30 seconds.
Pro tip? Split them in half, toast lightly, and slather with a little butter.
Happy baking!
")
Table of Contents
Summer 2025 nail trends are shaping up to be vibrant, artistic, and expressive. Whether you love soft pastels, bold neons, or earthy tones, this year’s summer nail trends are all about celebrating individuality and fun. I’ve curated ten must-try categories that are dominating the 2025 nail design scene—all while keeping your mani fresh, fierce, and photo-ready. Let’s dive into the ultimate guide to summer nail trends you need to try this year!
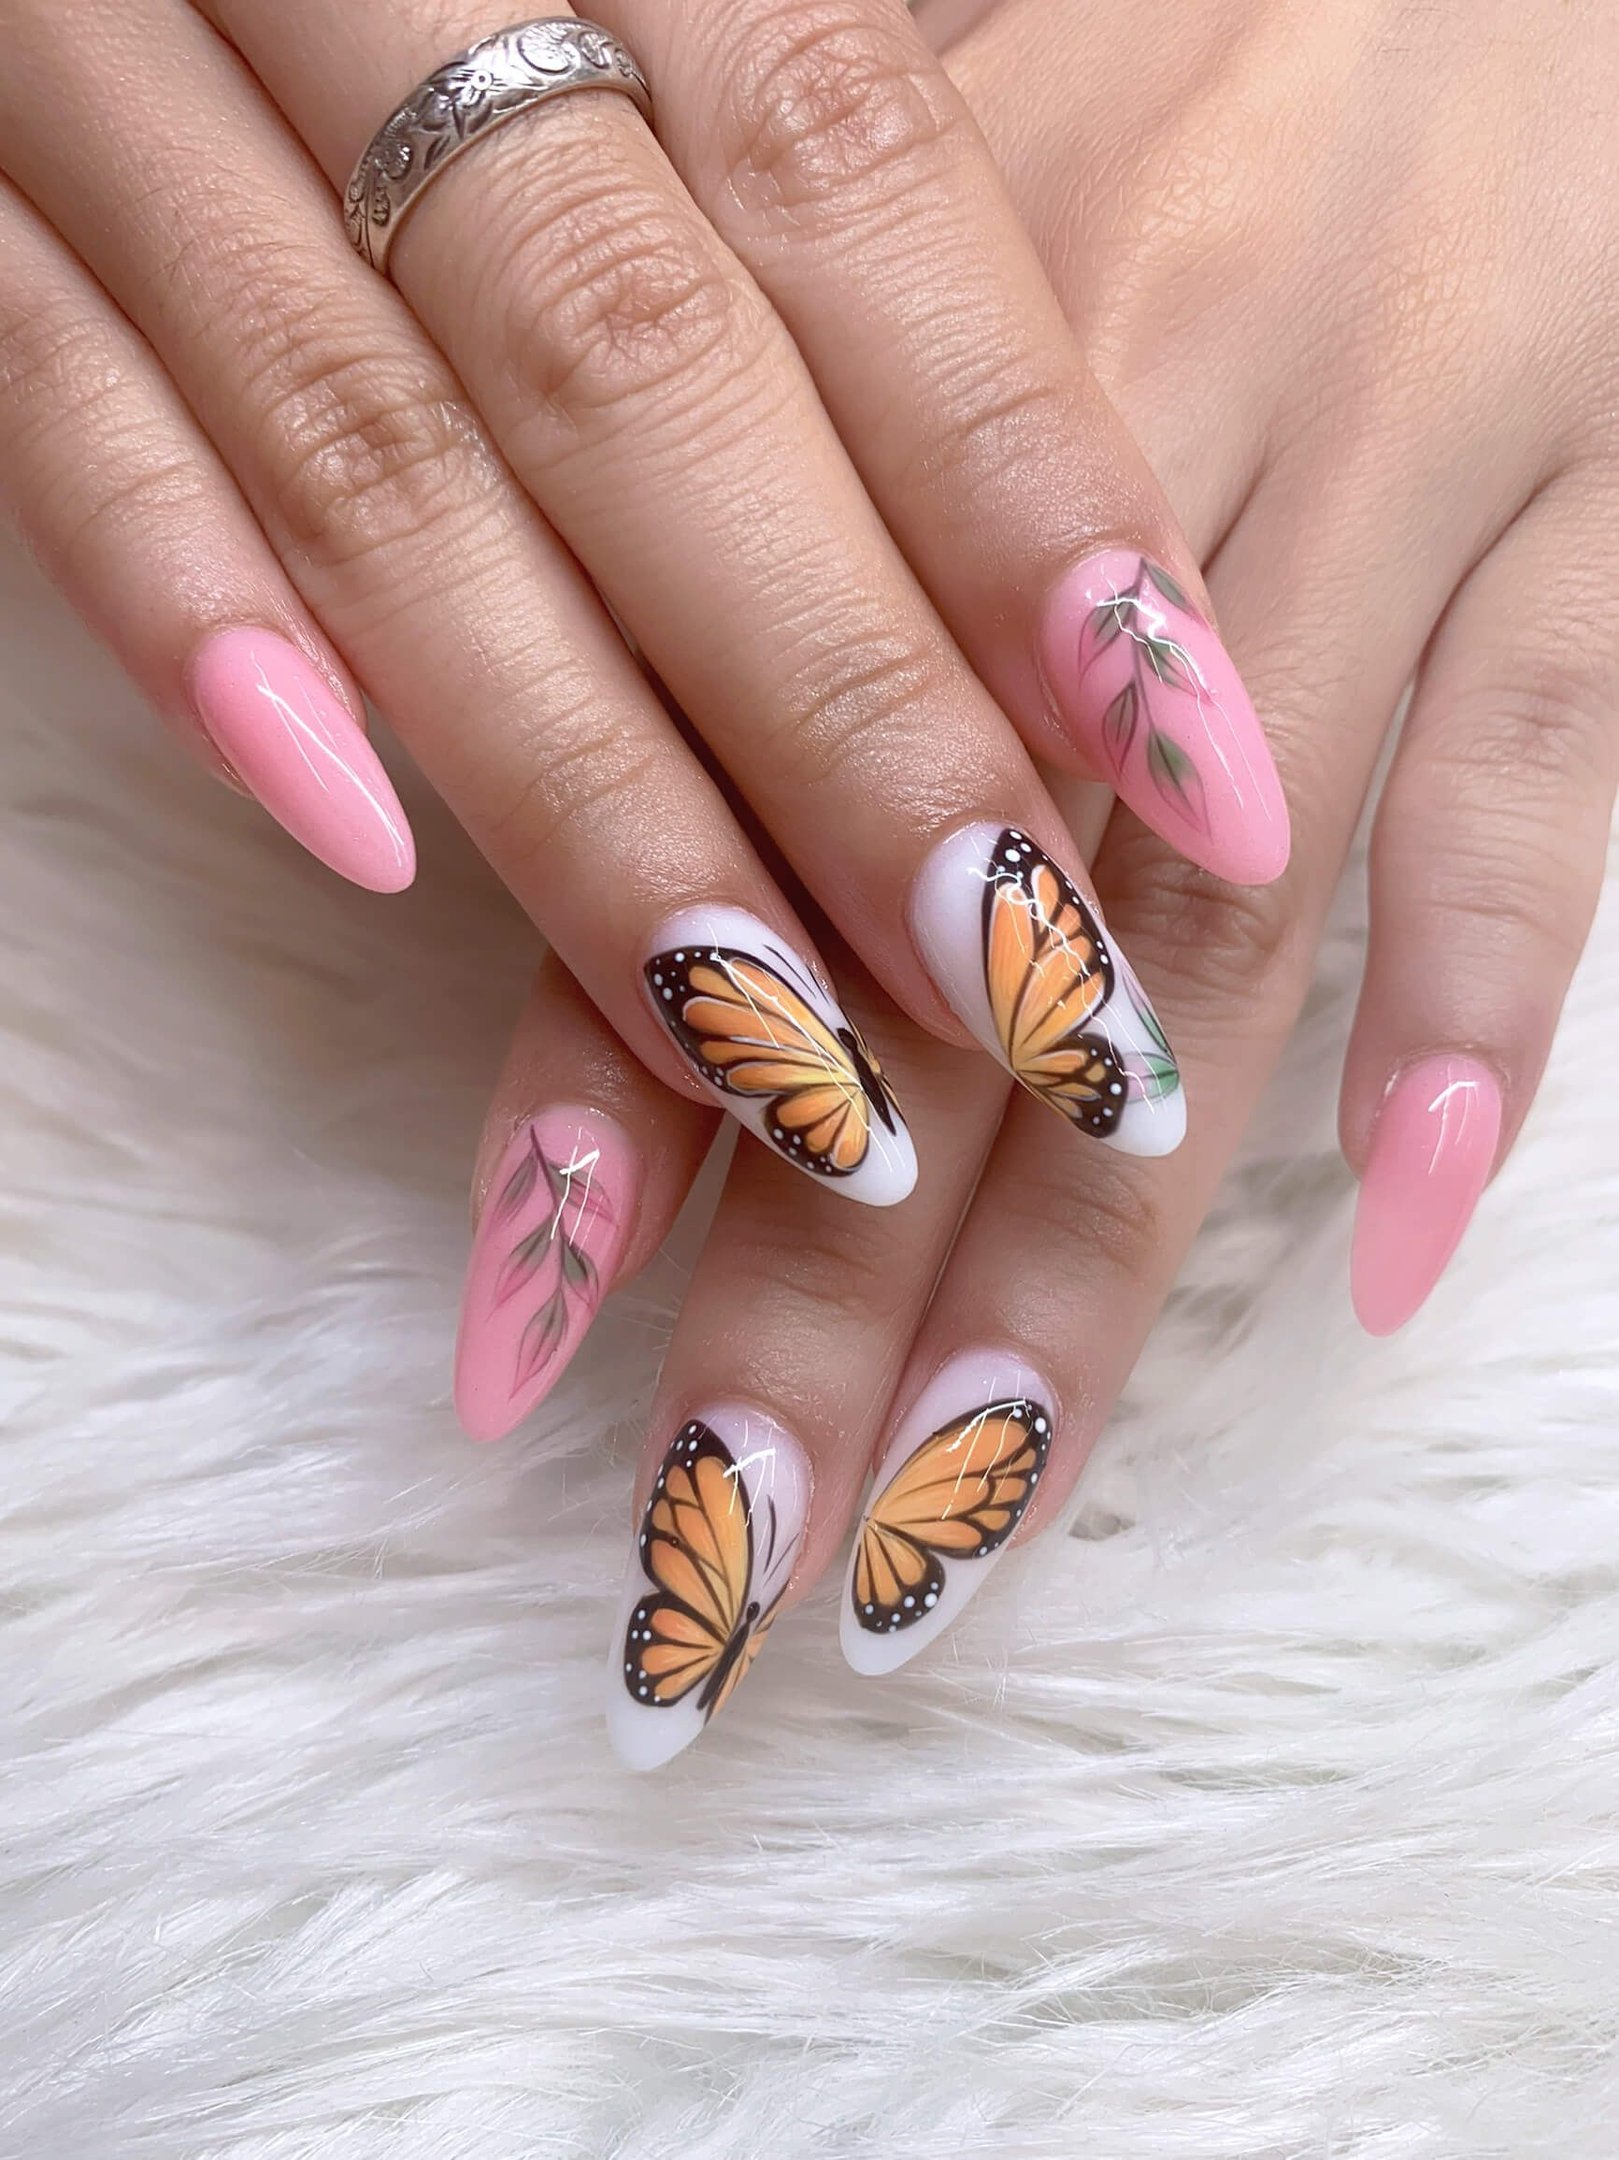
1. Butterfly Nail Art – A Playful Summer Nail Trend
Butterflies continue to flutter into summer 2025 as one of the most enchanting nail trends. With monarch wings, delicate details, and ombré bases, butterfly nail art is perfect for both almond and stiletto shapes. Pair it with floral nail decals or soft pinks for a feminine vibe.
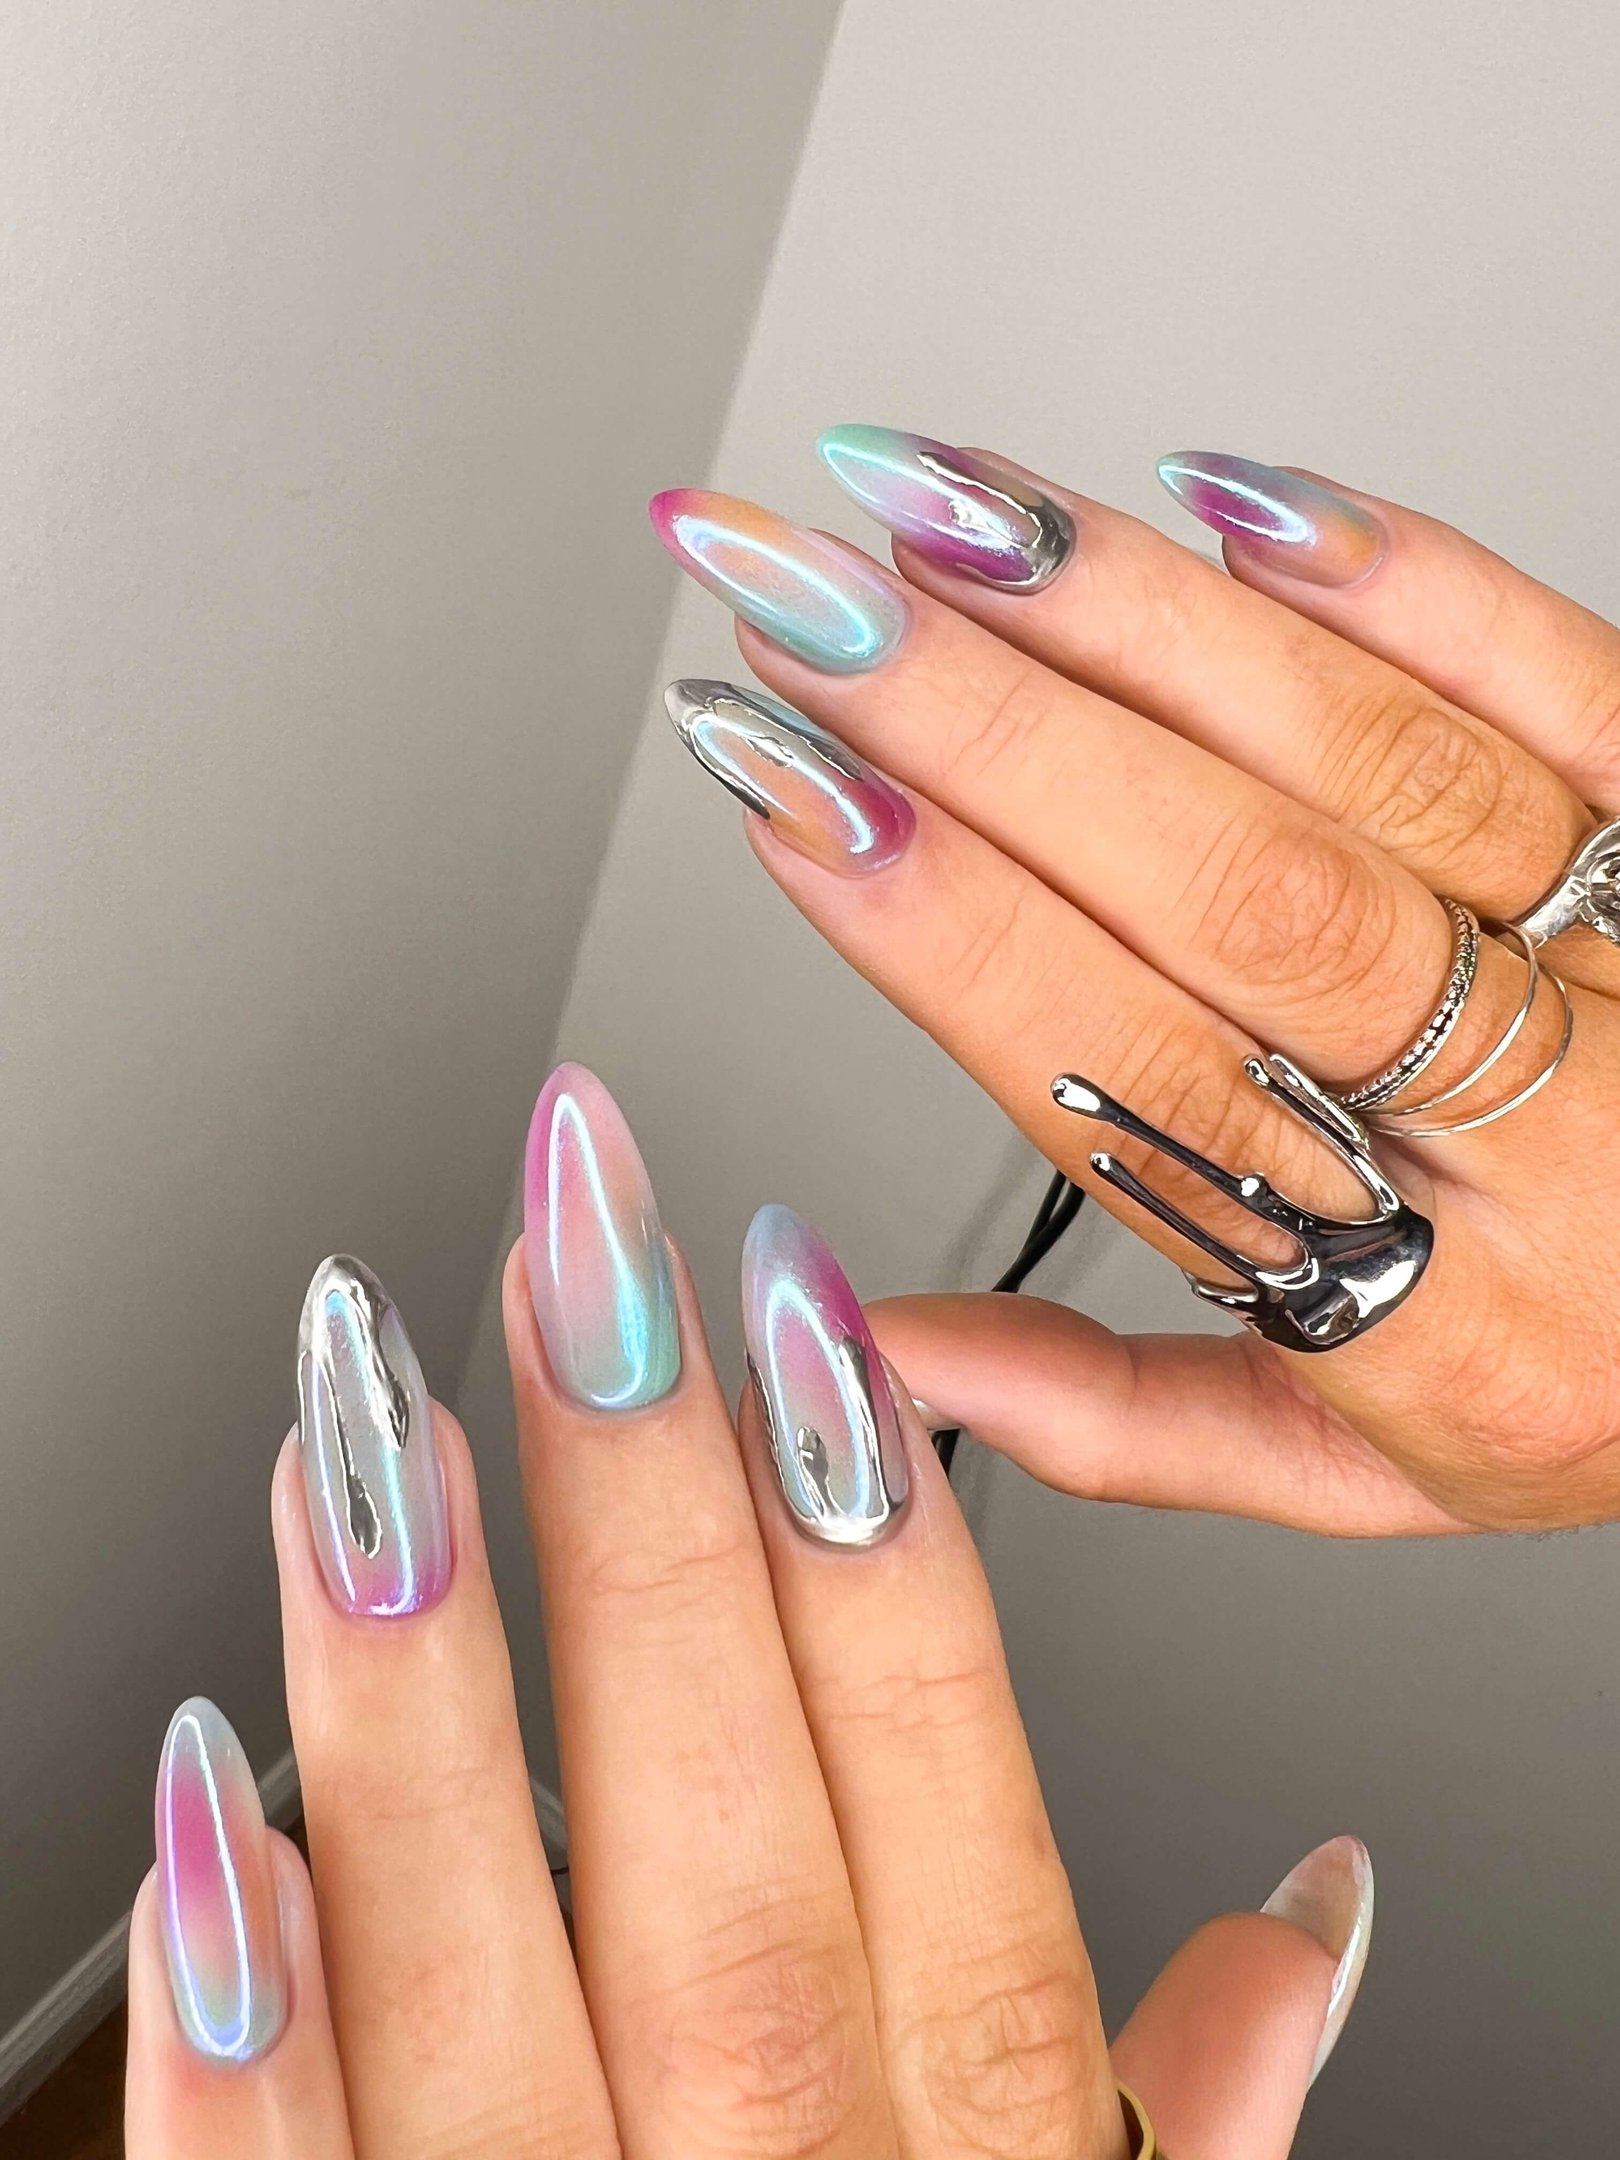
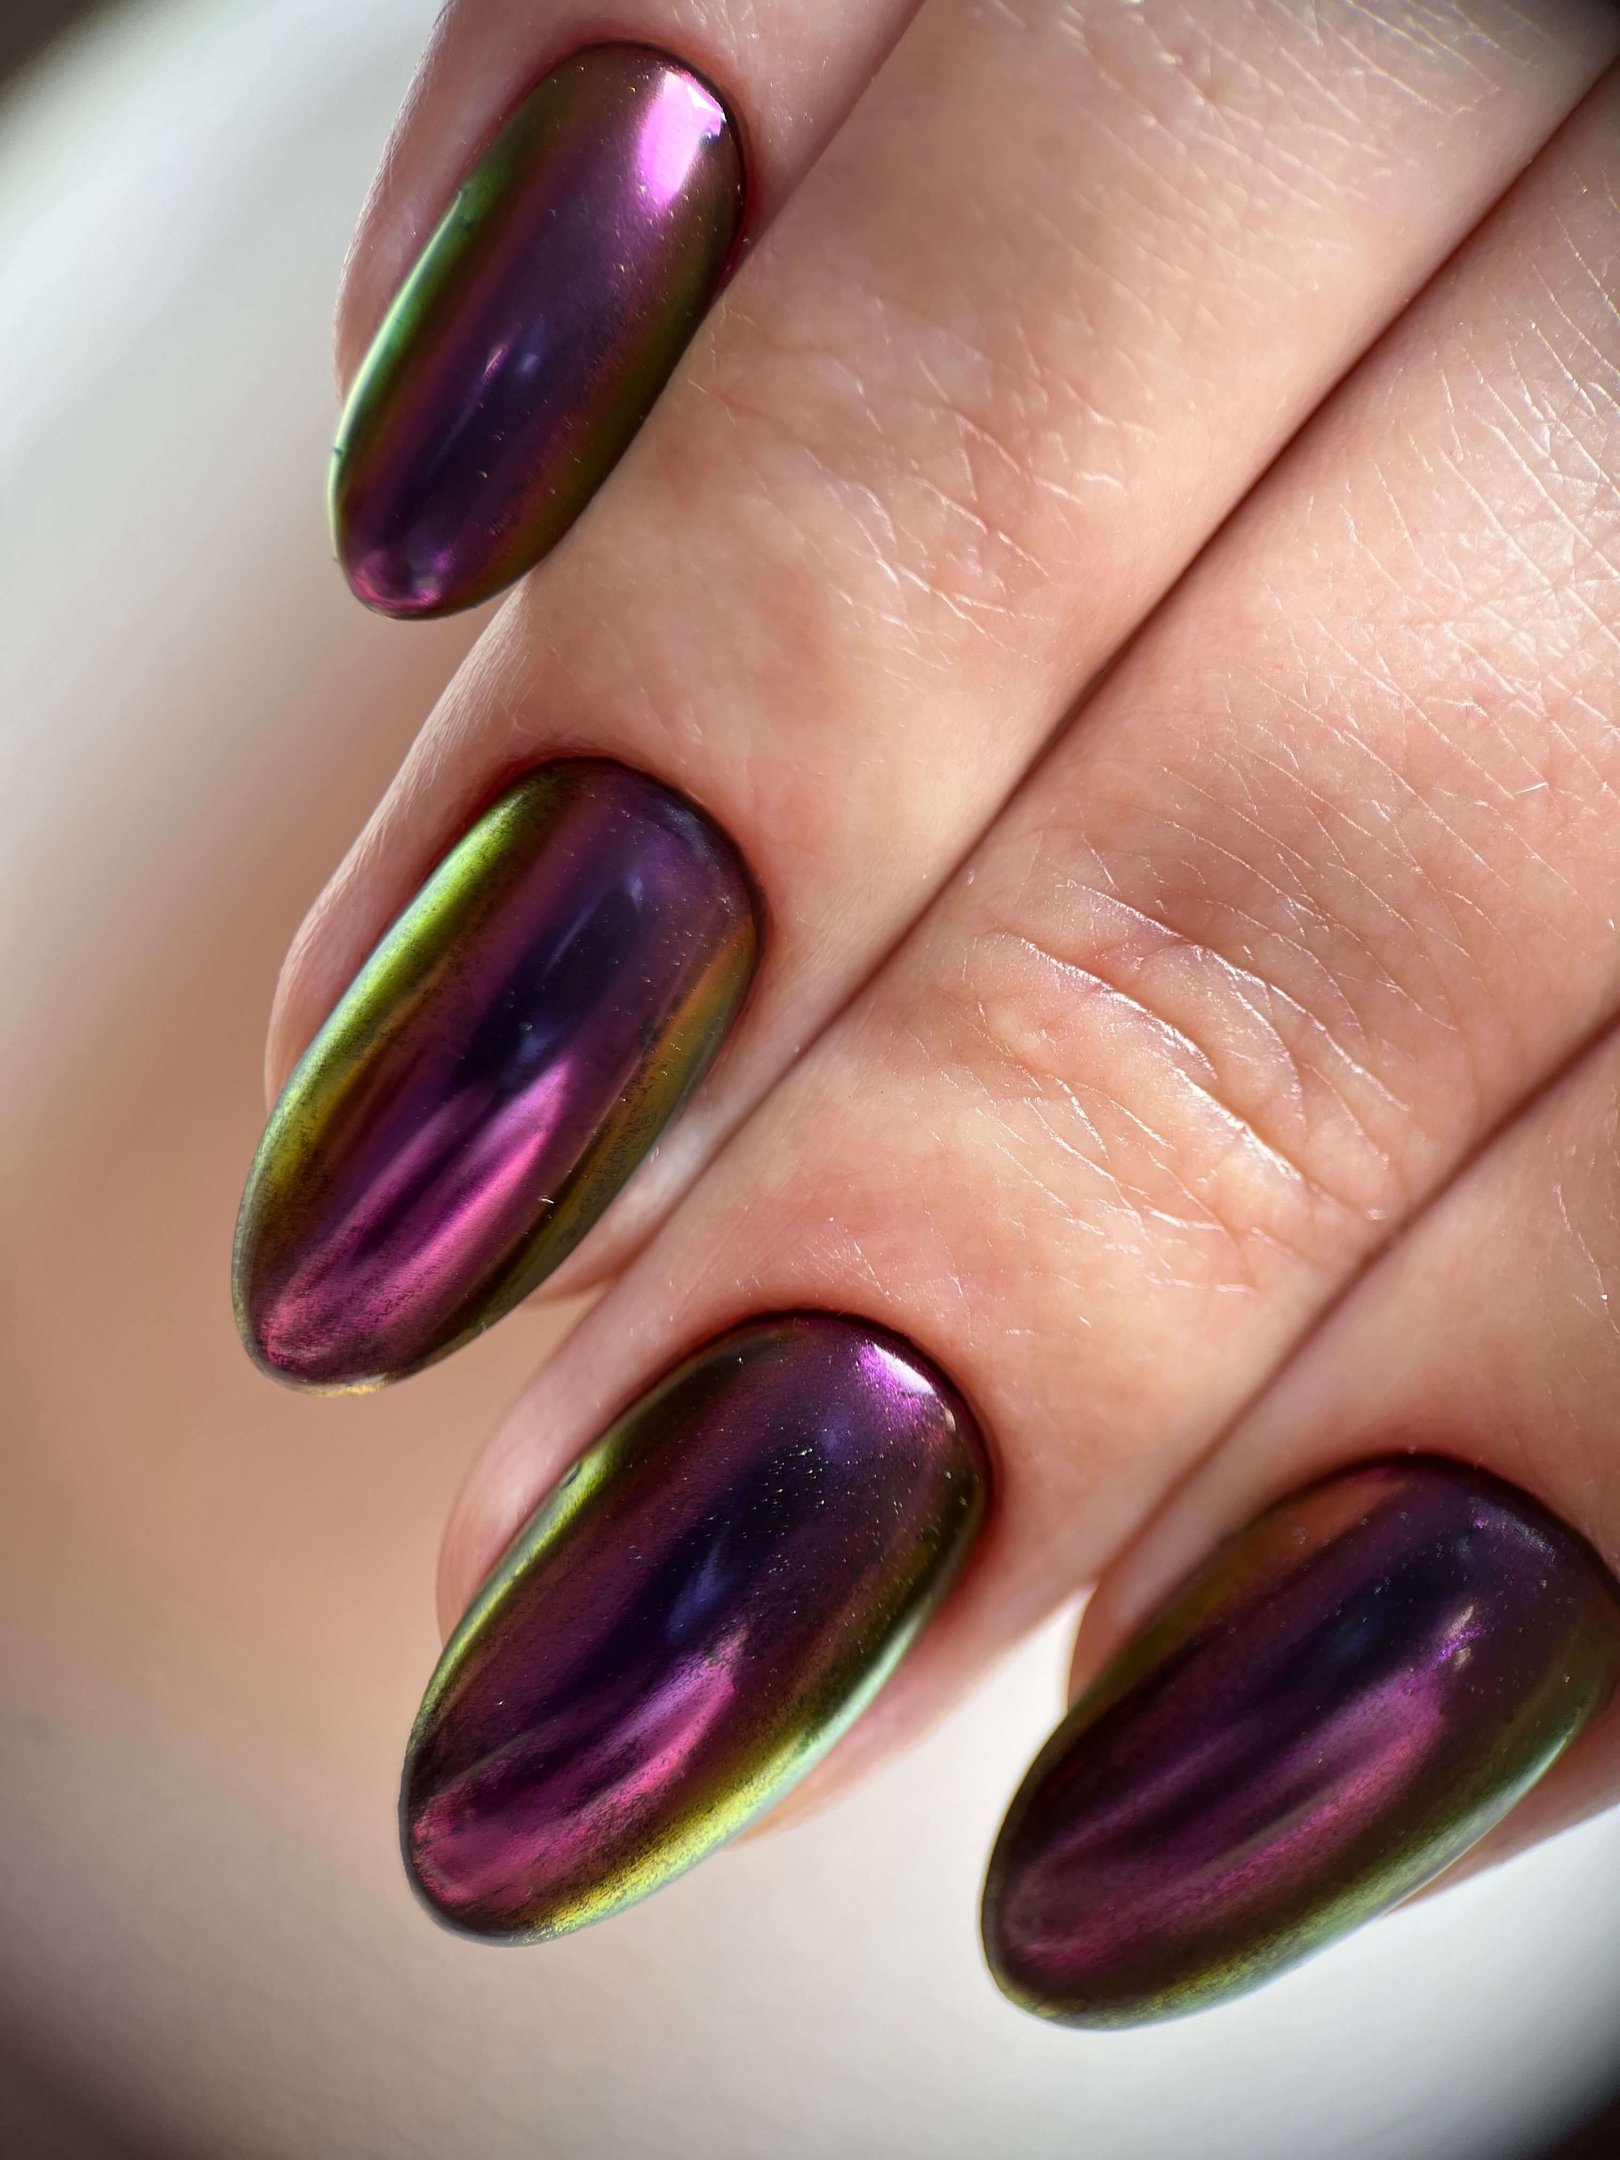
2. Chrome & Mirror Nails – A Bold Summer Nail Trend
Glazed chrome nails are here to stay—but this year, they come with a twist. Think iridescent swirls, rainbow finishes, and multidimensional effects. Chrome nail polish is trending for everything from party-ready sets to futuristic nail art. Don’t forget to top it off with a high-shine top coat for that mirror-glass effect.
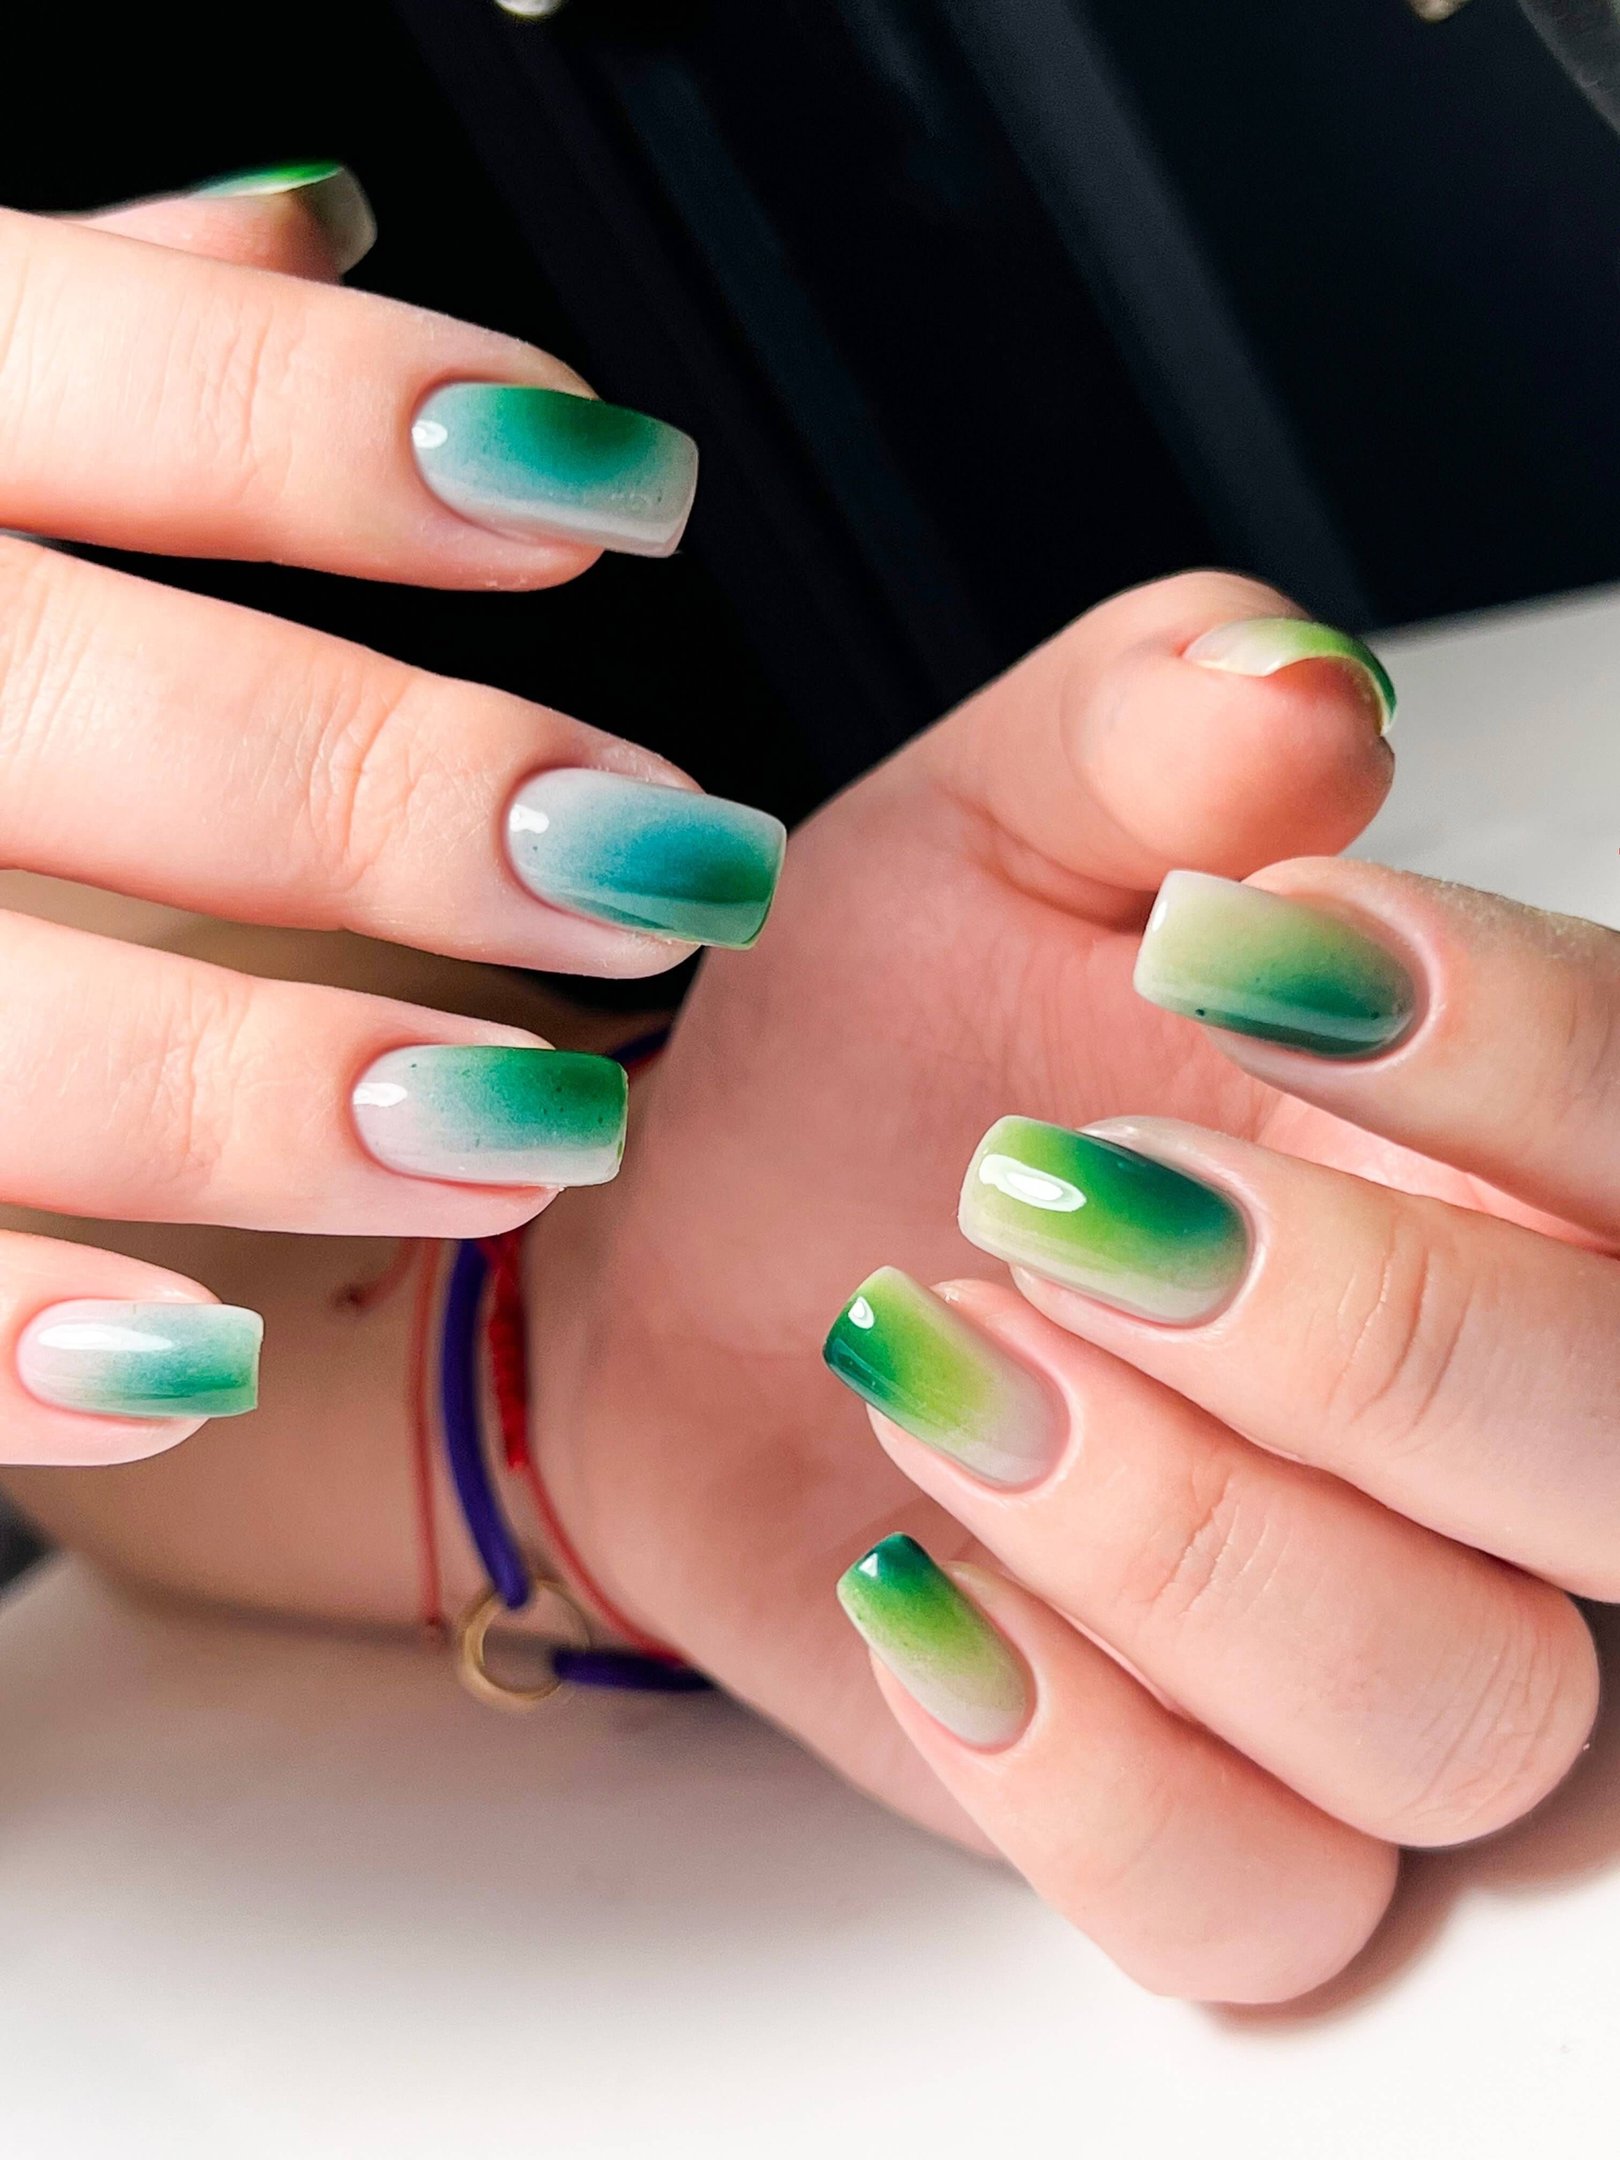
3. Green Gradient Summer Nail Trends
Green is the unexpected hero of this summer. From lime ombré to deep forest green gradients, this look is all about freshness and nature. It pairs beautifully with short square nails and minimalist styles. Green ombré is also a great way to make a statement while staying on the clean-girl aesthetic.
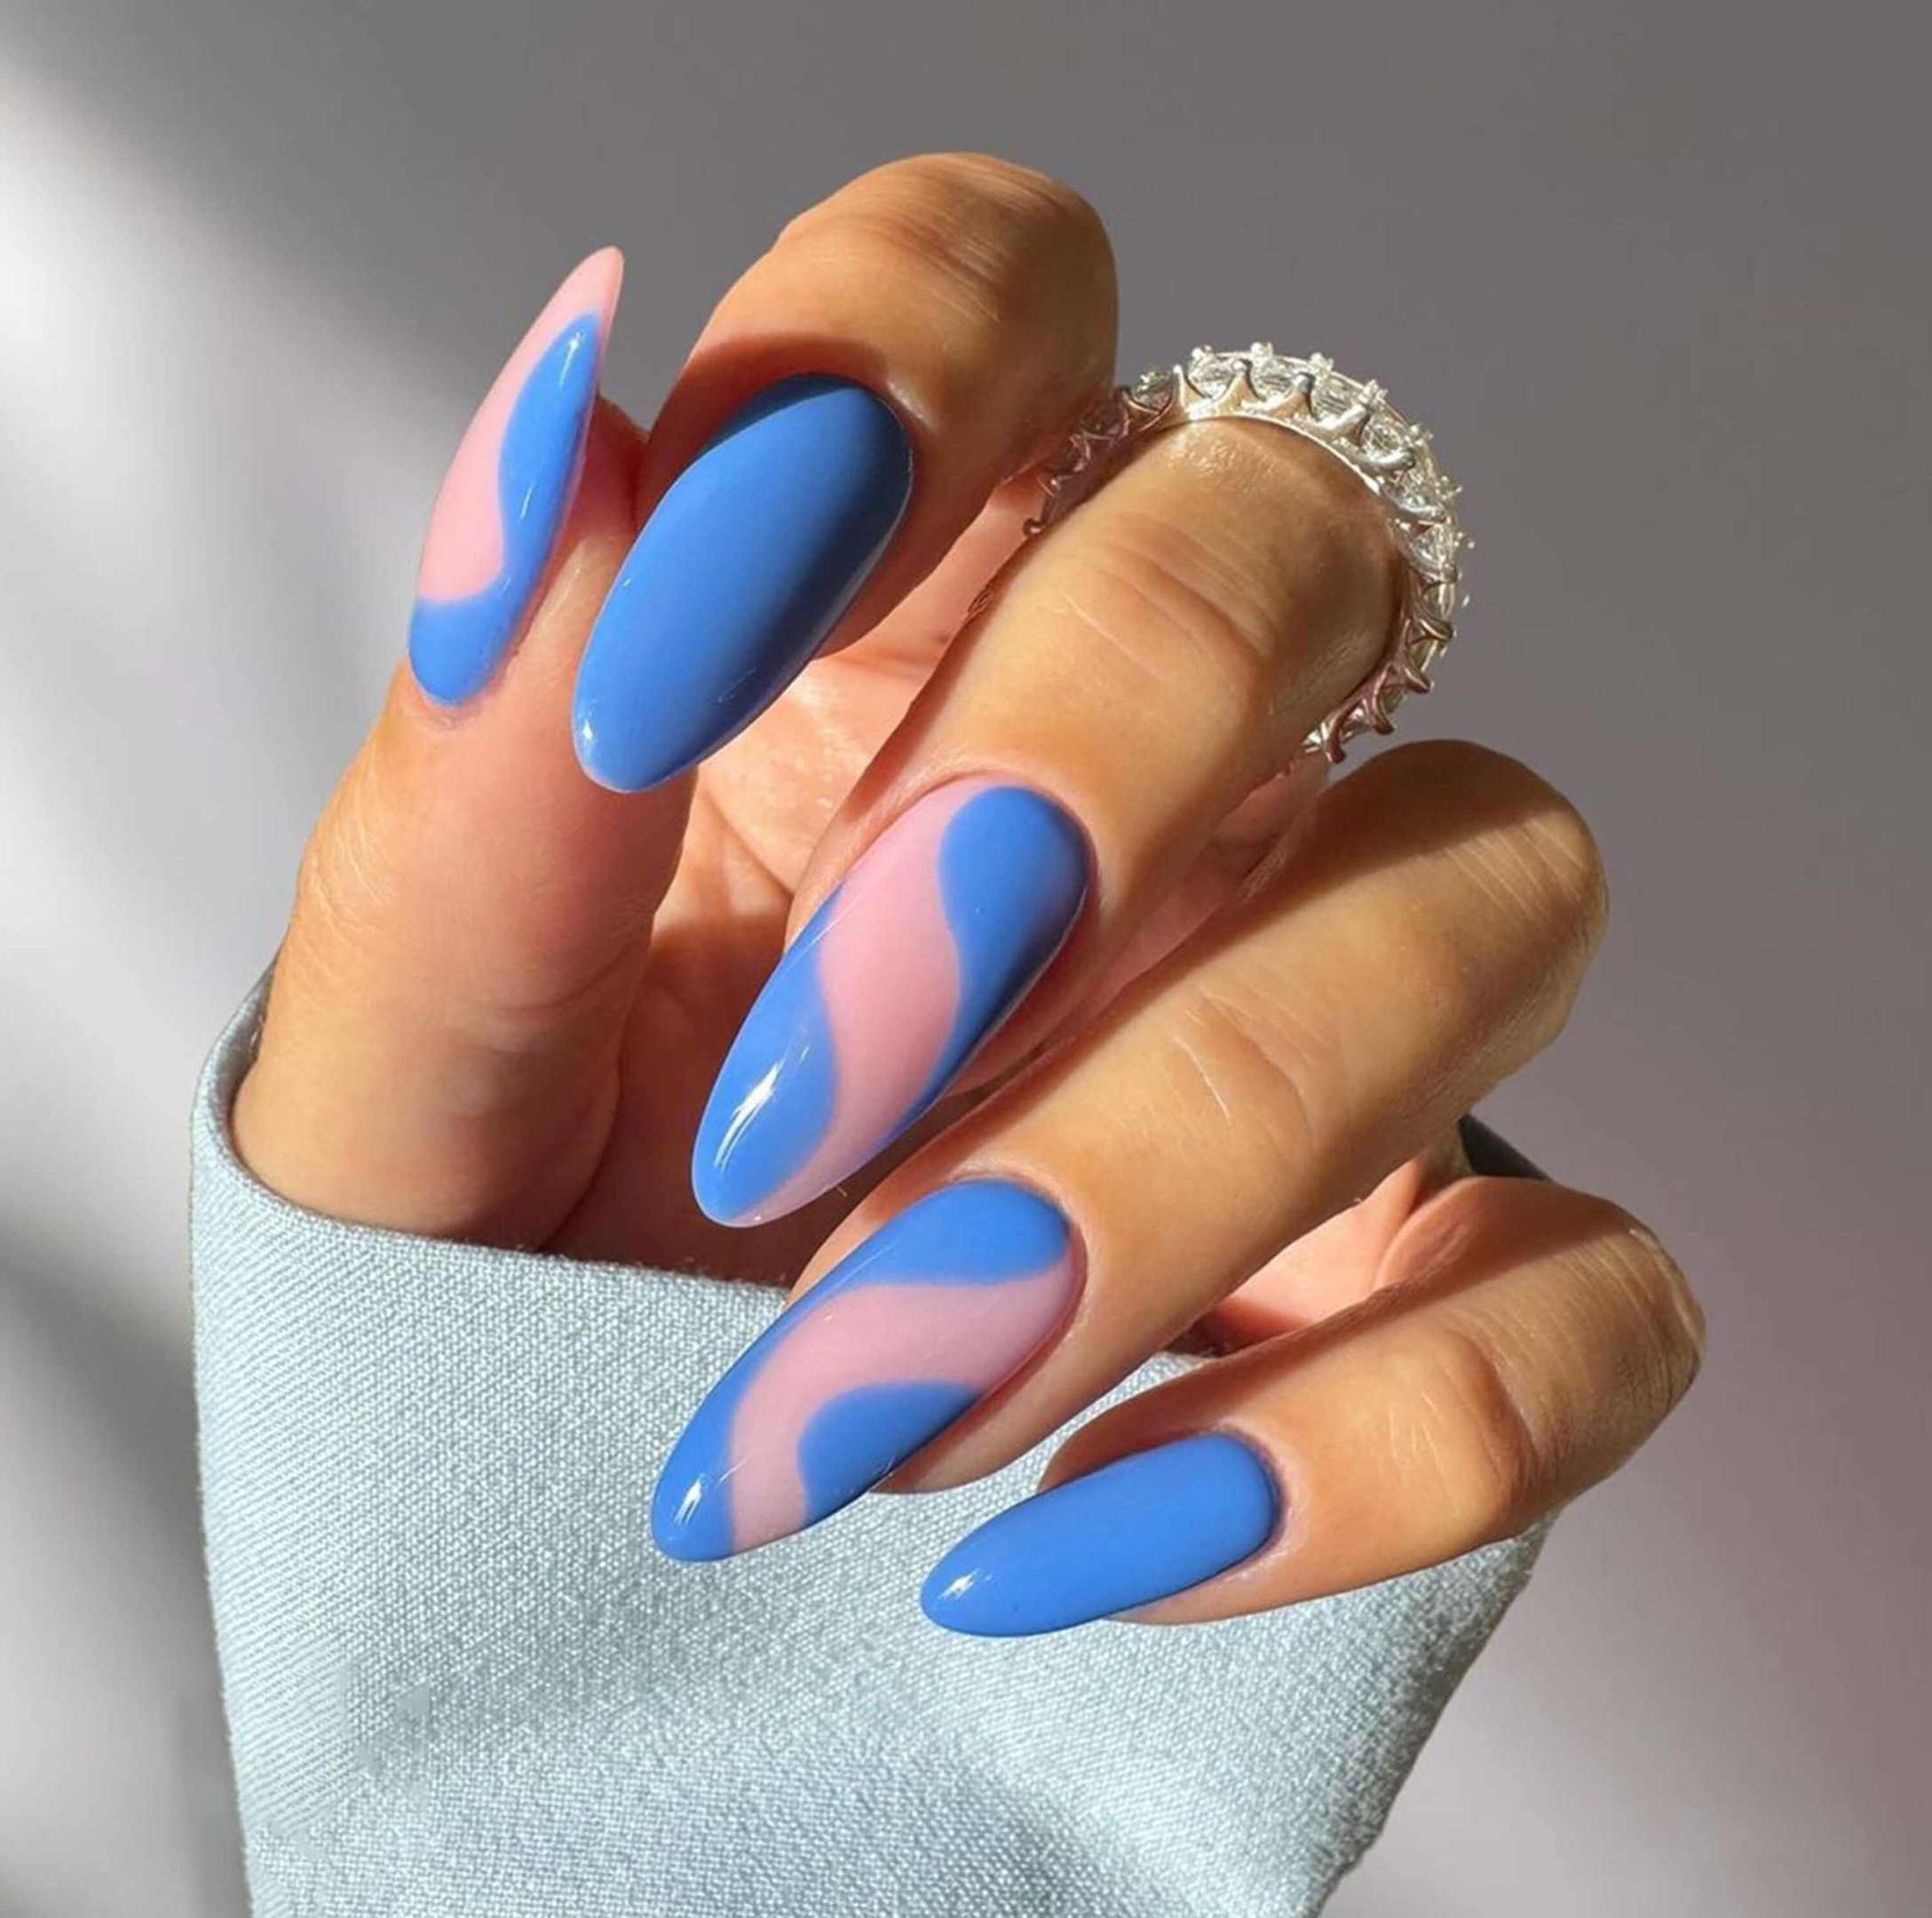
4. Retro Blue & Pink Abstract Nails
Abstract nail art meets retro vibes in this playful combination of blue and blush pink. Think bold curves, color blocking, and negative space. This nail design trend looks especially good on almond nails with a glossy finish. It’s modern, yet nostalgic—perfect for summer festivals or weekend getaways.
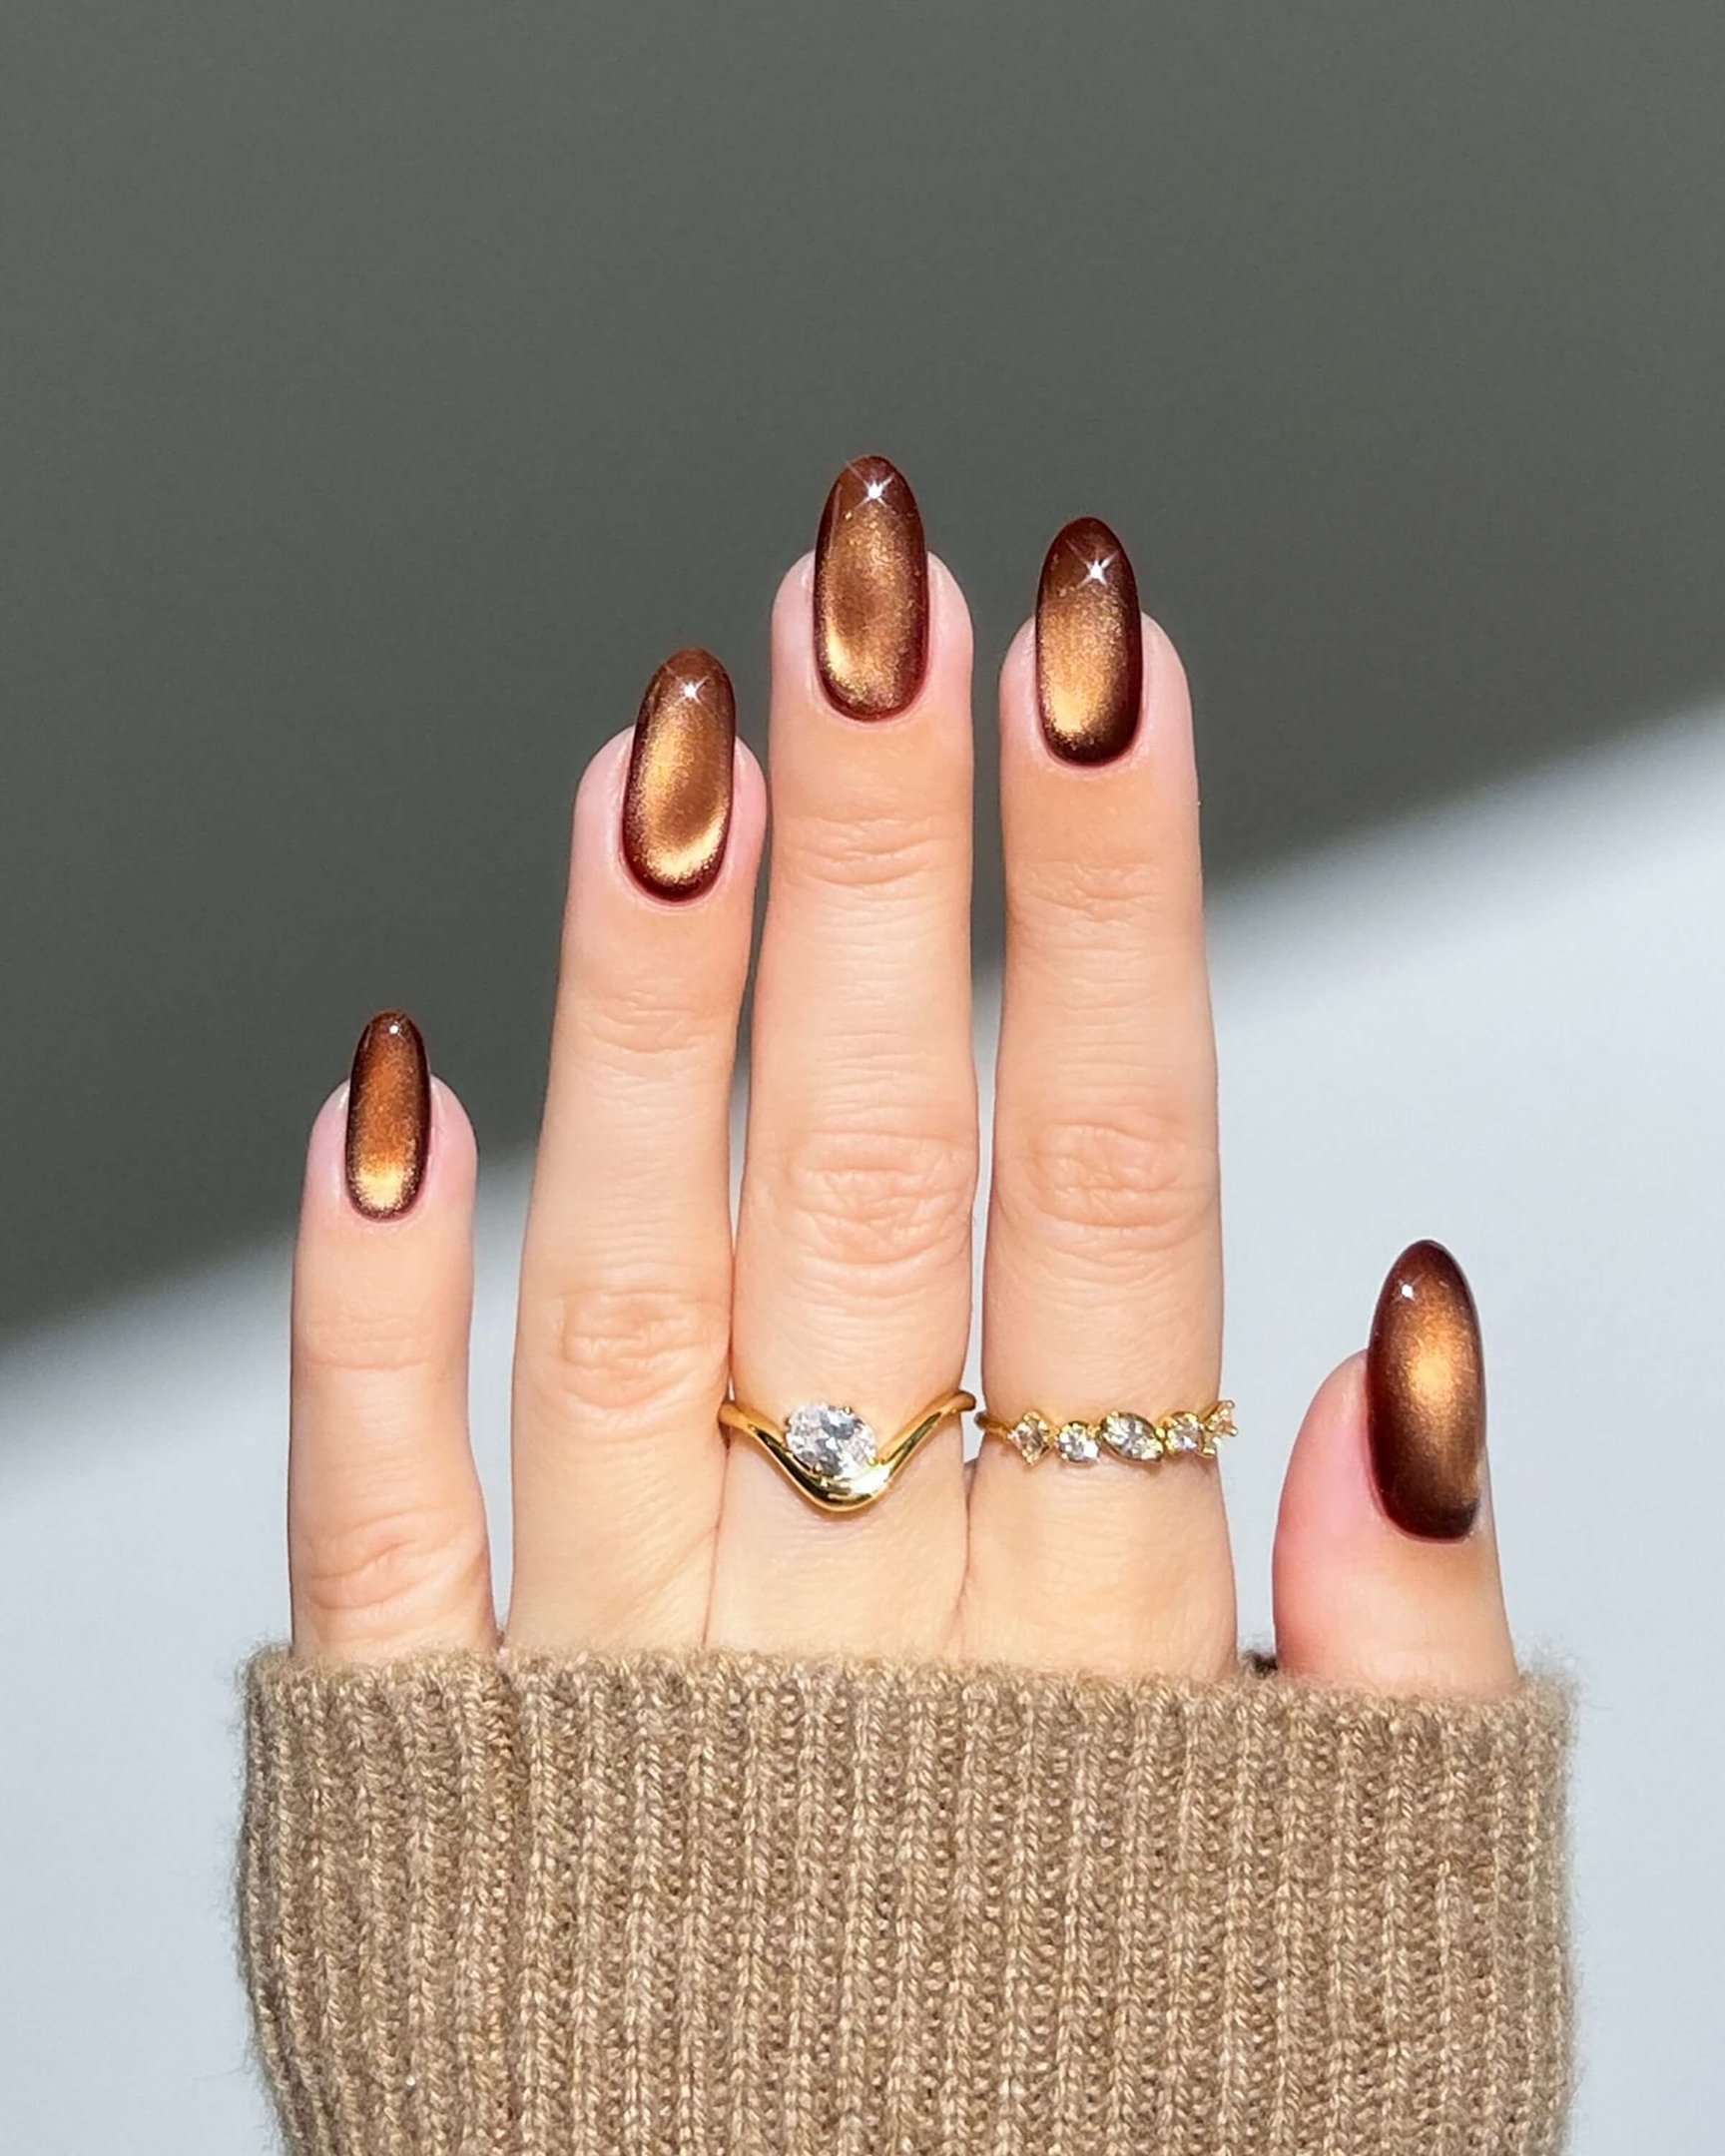
5. Metallic Cat-Eye Summer Nail Trends
Inspired by galaxy glows and molten metal, cat-eye nails are back with dramatic flair. Rust, bronze, and copper tones with magnetic polish give your manicure an elegant, dimensional finish. Ideal for evening wear, this is one of the more luxurious summer nail ideas for 2025.
6. Jelly Nails (Watercolor Look)
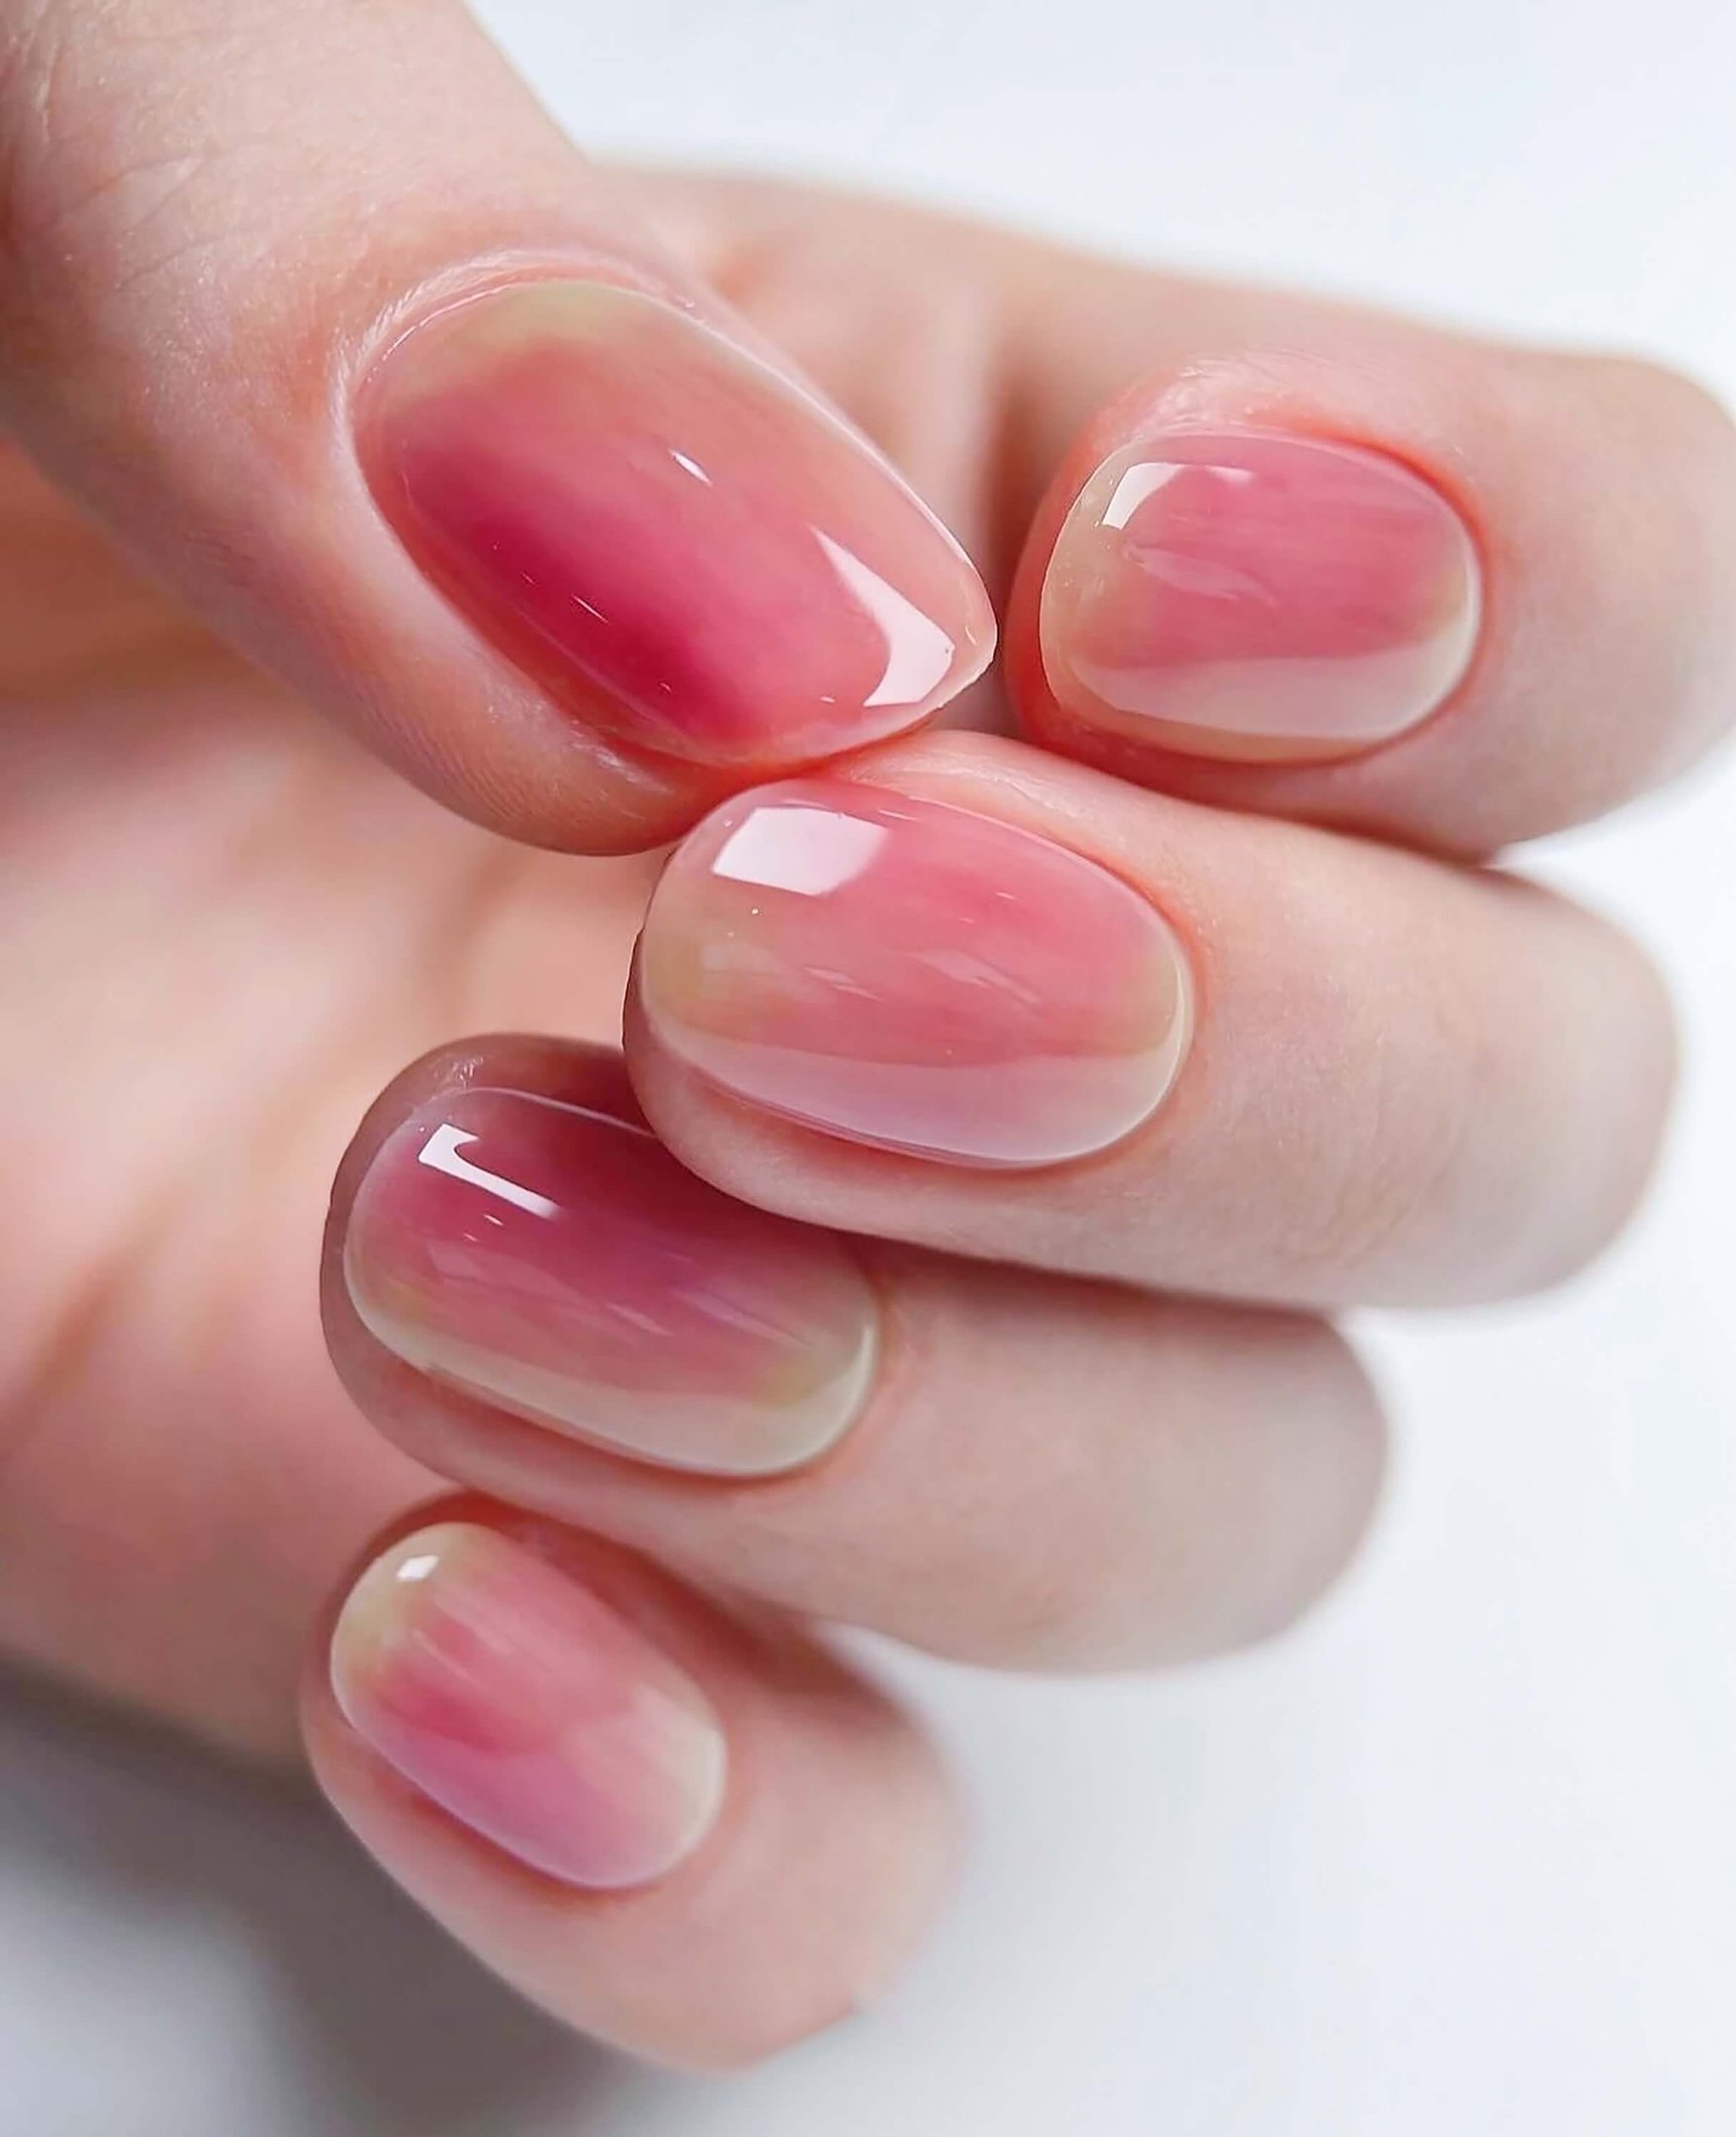
Jelly nails are making a soft comeback in 2025 with translucent layers and a watercolor effect. Pink jelly nails, in particular, are trending for their natural, glossy look. They work beautifully on short round nails and are ideal for a clean and polished summer vibe.
7. Shadow French Tips
A modern twist on the classic French manicure, shadow tips feature a soft ombré base that fades into a colored outline. This look is clean, sophisticated, and perfect for a summer work-to-weekend look. Pair with lilac or grey for an understated edge.

8. Summer Florals & Dainty Daisies
Florals will never go out of style—especially in summer. This year, dainty daisy nail art, floral overlays, and pastel blooms are all the rage. These designs pop best on nude or sheer pink bases and look charming on both square and oval nail shapes.
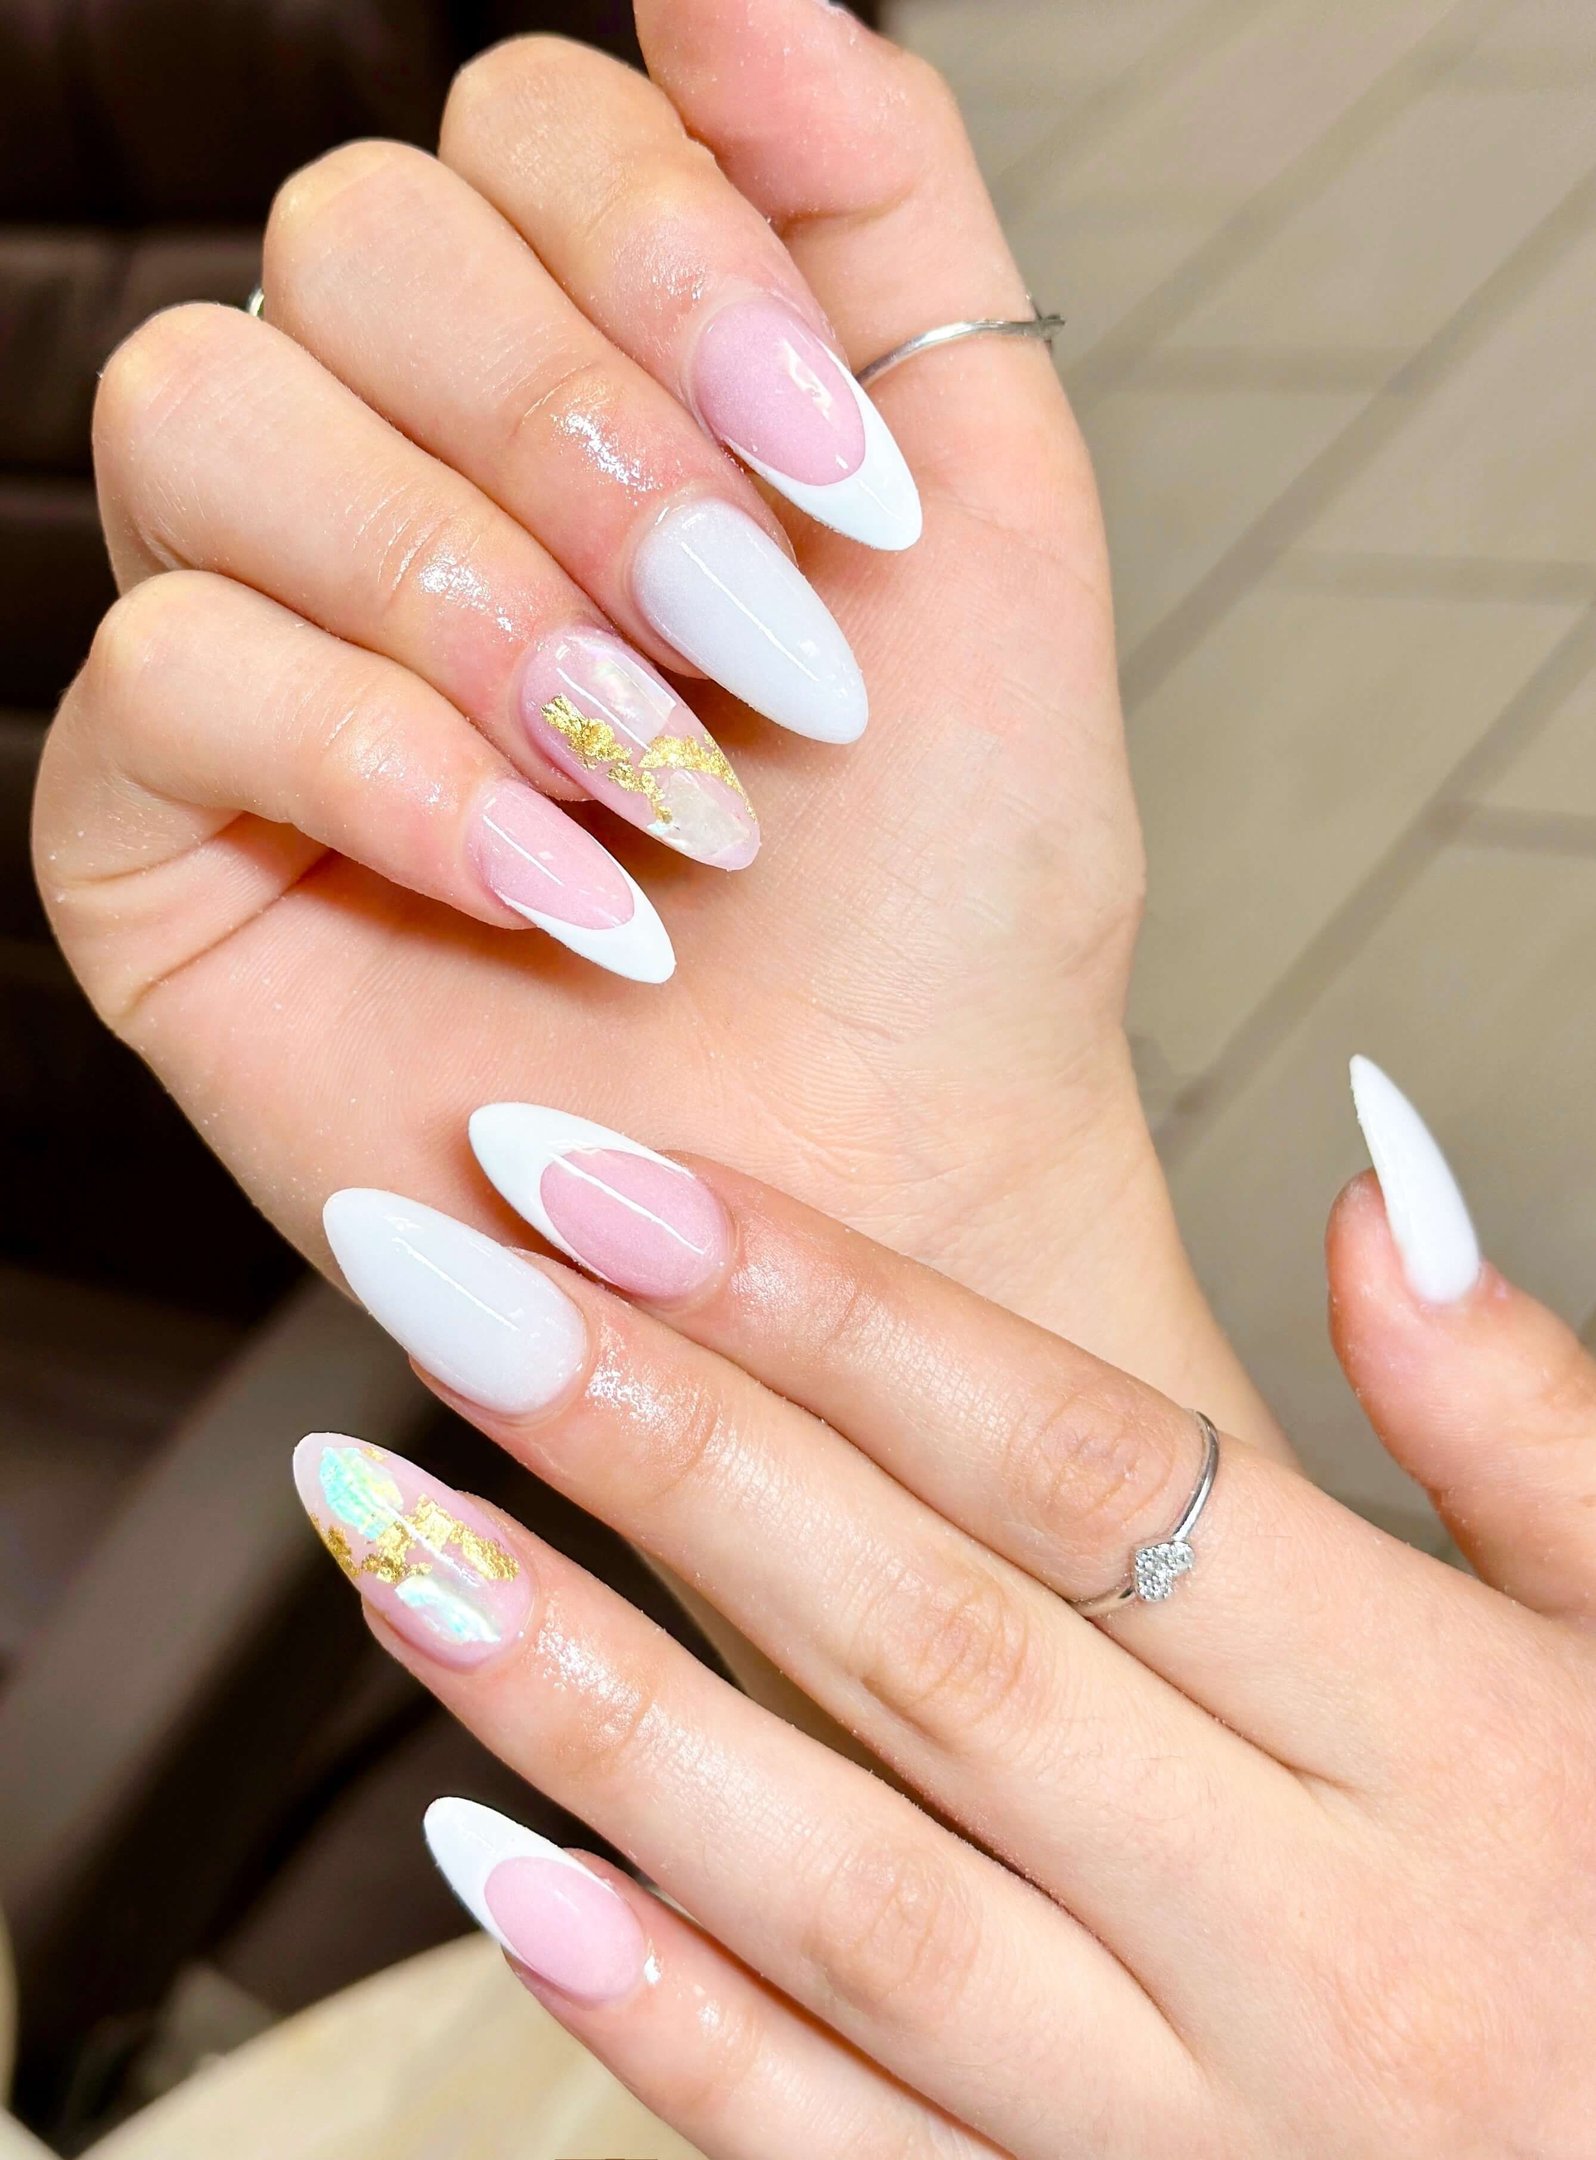
9. White & Gold Luxe Nails
Crisp white nails paired with gold foil or marble accents make for a polished and luxurious manicure. This style is perfect for bridal nails, beach holidays, or chic summer events. White and gold is a timeless combo that never fails.
10. Neon & Pop Art Nails
Bright, unapologetic colour is trending hard this summer. Neon pink, orange, and electric yellow pop even more with geometric patterns or playful accents. Great for summer parties, these nails scream confidence and creativity.

Tips for Your 2025 Summer Manicure
Always use a gel top coat for extra shine and durability.
Play with textures: matte, gloss, chrome, and glitter are all fair game.
Don’t be afraid to mix styles—ombre + florals or chrome + neons can look amazing!
Take care of your cuticles and apply nail oil regularly.
Whether you love a simple gradient manicure or an intricate butterfly nail art design, this summer is all about letting your nails reflect your personality. From elegant chrome nails to playful florals and neons, 2025 nail trends give you endless ways to shine. Grab your favourite summer polish shades, and let your creativity run wild! If you’re also looking for seasonal inspiration, check out our guide to Christmas Nails 2025 and Fall Nail Designs 2025 for year-round ideas.
For more nail inspo and technique tips, visit Nails Magazine and browse professional nail art trends, or check out Cosmopolitan’s Summer Nail Guide for even more ideas.
Stay polished!

Are you tired of reaching for processed potato chips every time a craving strikes? Let us introduce you to your new favorite snack: crispy zucchini chips. These light, oven-baked delights offer that satisfying crunch without the guilt. Whether you’re living a clean eating lifestyle or simply love a tasty, homemade chip alternative, this is one healthy snack idea you’ll come back to over and over again.

Why Zucchini Chips Are Your Next Obsession
Zucchini may be humble, but when it comes to nutritious snack potential, it absolutely delivers. These thin-sliced chips are low in calories, keto-friendly, gluten-free, and packed with nutrients like vitamin C, potassium, and fiber. And when baked to golden perfection, they rival any bag of traditional chips. No deep fryer, no excess oil, just wholesome, crunchy goodness straight from your oven.
Want an even better reason to love them? You can easily customise your own batch of seasoned vegetable chips to suit any craving. Think parmesan zucchini chips, smoky paprika, or even a pinch of chili heat – the options are endless.
Ingredients You’ll Need
To make these healthy zucchini chips at home, grab these simple ingredients:
2 medium zucchinis
1–2 tablespoons of olive oil (or avocado oil for a lighter option)
½ teaspoon sea salt
½ teaspoon garlic powder
½ teaspoon smoked paprika (optional)
¼ teaspoon black pepper
Grated parmesan (optional but highly recommended)
Kitchen Tools That Help
Benriner Mandoline Slicer – For those ultra-thin, even cuts.
Nordic Ware Baking Sheet – For perfectly even roasting.
Pre-Cut Parchment Paper Sheets – Because no one loves scrubbing pans.
OXO Silicone Pastry Brush – To lightly coat every slice.
Olive Oil Spray Bottle – For the perfect light mist.
Step-by-Step: How to Make Zucchini Chips Crispy in the Oven

Step 1: Preheat the OvenSet your oven to 250°F (120°C). The magic of crispy chips lies in the low and slow baking method.Step 2: Slice Your Zucchinis ThinWash and dry the zucchinis, then use a mandoline slicer to get slices around 1/8 inch thick. Thinner = crispier.Step 3: Salt and RestLay the slices out on paper towels, sprinkle lightly with salt, and let them rest for 10 minutes to draw out moisture. Pat dry thoroughly.Step 4: Season and TossIn a bowl, gently toss the zucchini slices with olive or avocado oil, then sprinkle on your seasonings: sea salt, garlic powder, black pepper, and optional smoked paprika or parmesan.Step 5: Line and BakeLine your baking sheet with parchment paper. Place the slices in a single, non-overlapping layer. Bake for 1.5 to 2 hours, flipping halfway through.Step 6: Cool and CrispOnce golden and crisp to the touch, remove from the oven and let cool for 5 minutes. This helps them firm up even more.
Tips for the Best Homemade Zucchini Chips
Use a mandoline for even thickness.
Don’t overcrowd the baking sheet – air flow is key!
Patience pays off: resist the urge to increase the oven temp.
Experiment with flavors: try nutritional yeast for a cheesy, vegan-friendly twist.
Serving Ideas
These baked zucchini chips are snackable on their own, but they also pair beautifully with dips like:
Creamy hummus
Guacamole
Greek yogurt-based tzatziki
Serve them up as healthy party appetizers, or as a crunchy side to burgers, sandwiches, or wraps.

Storage Tips
Store your leftover chips in an airtight container at room temperature for up to 3 days. Avoid the fridge – moisture is the enemy of crunch! If they lose their crisp, simply pop them back in the oven for a few minutes.
Zucchini chips in the oven are more than just a snack – they’re a lifestyle upgrade. If you’re on the hunt for low carb zucchini chips, healthy chip alternatives, or just want to try your hand at DIY baked chips at home, this recipe checks all the boxes.
Next time the crunch craving hits, skip the store-bought and go straight for this homemade zucchini chips recipe. Your tastebuds (and your body) will thank you.
Pin it now so you never forget where you found your new favourite healthy snack!

Summer is here – and what better way to welcome the new season than with a fresh manicure? If you’re searching for stunning summer nail ideas, this list will inspire you with the prettiest trends of 2025. Whether you’re into pastels, florals, or bold designs, these looks are your go-to guide for a fresh, stylish mani.
Let’s explore the 23 most beautiful summer nail styles of 2025!
1. Pastel Ombre Summer Nail Ideas
Soft transitions between mint, lilac or blush pink never go out of style. Pastel ombré nails are the go-to look for a fresh, feminine summer vibe.
2. Floral Designs
Nothing says summer like flowers. Whether it’s daisies, roses or dainty petals, floral nail art is a timeless and cheerful choice.

3. Nature-Inspired Daisy Nails
Green tones, leaf motifs, rose prints – these nails celebrate the calming power of nature.
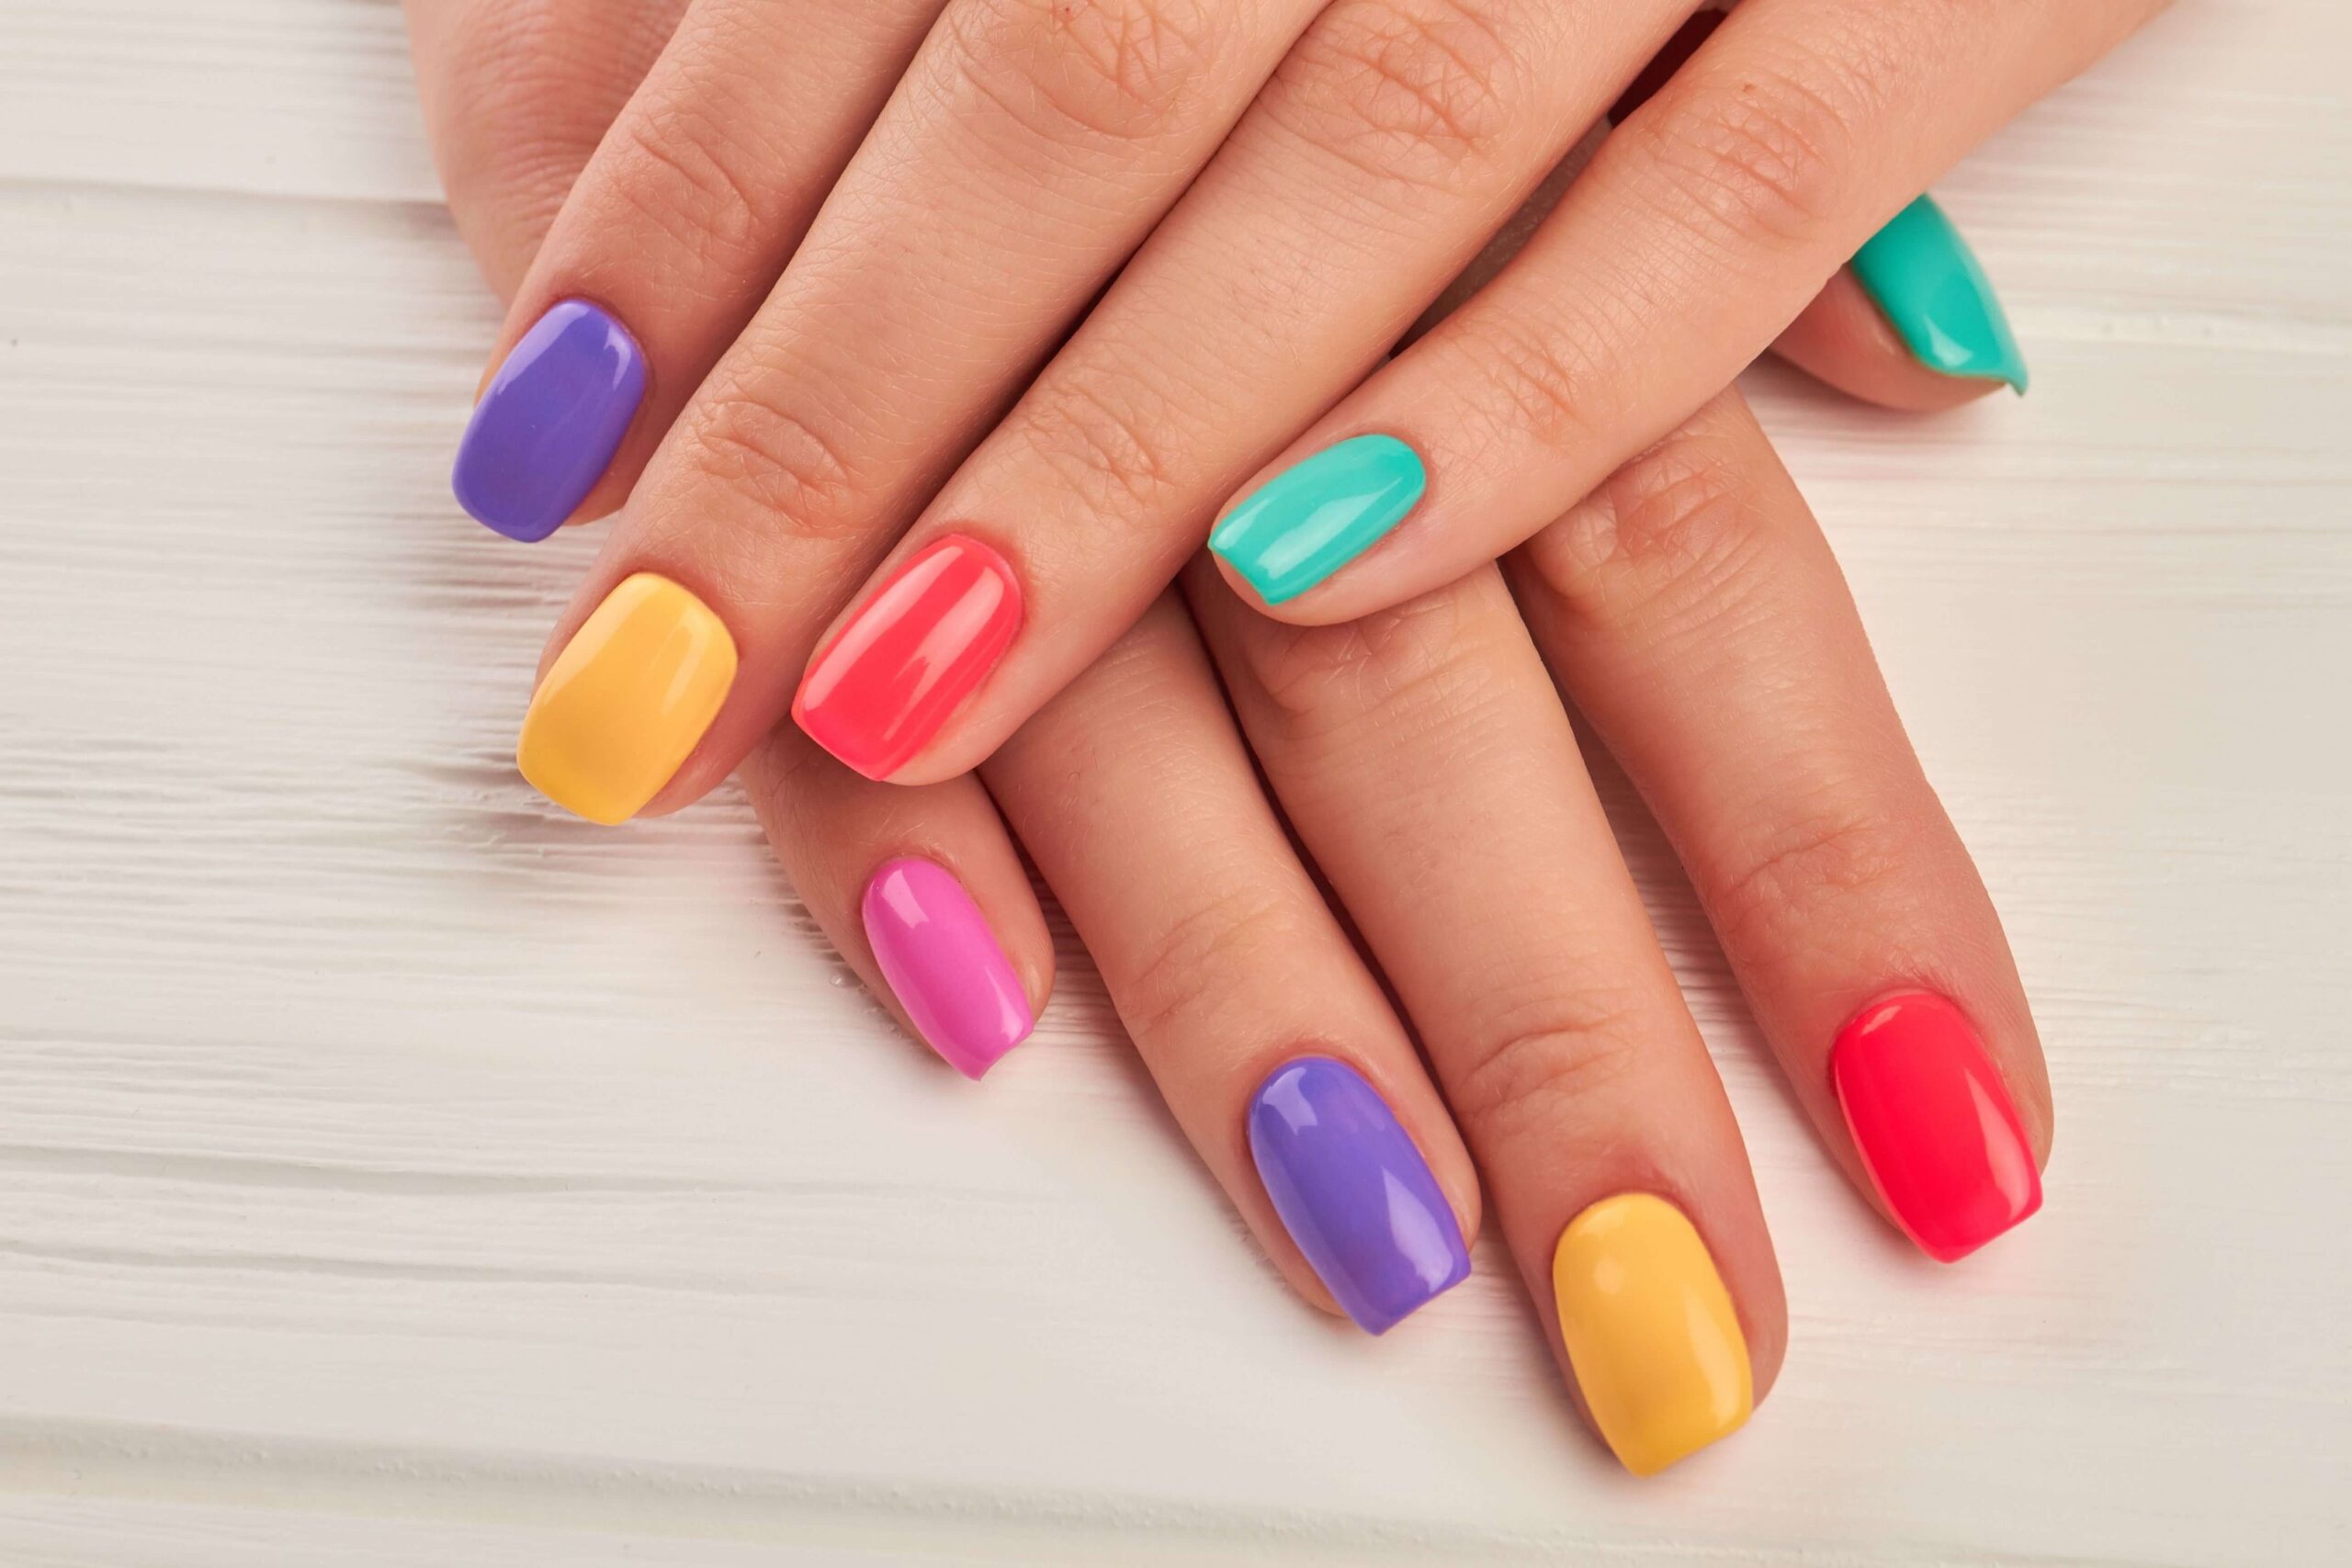
4. Colorful Mix
Playful and full of life. Try mixing bold, bright colours like yellow, pink, and purple for a vivid summer look.
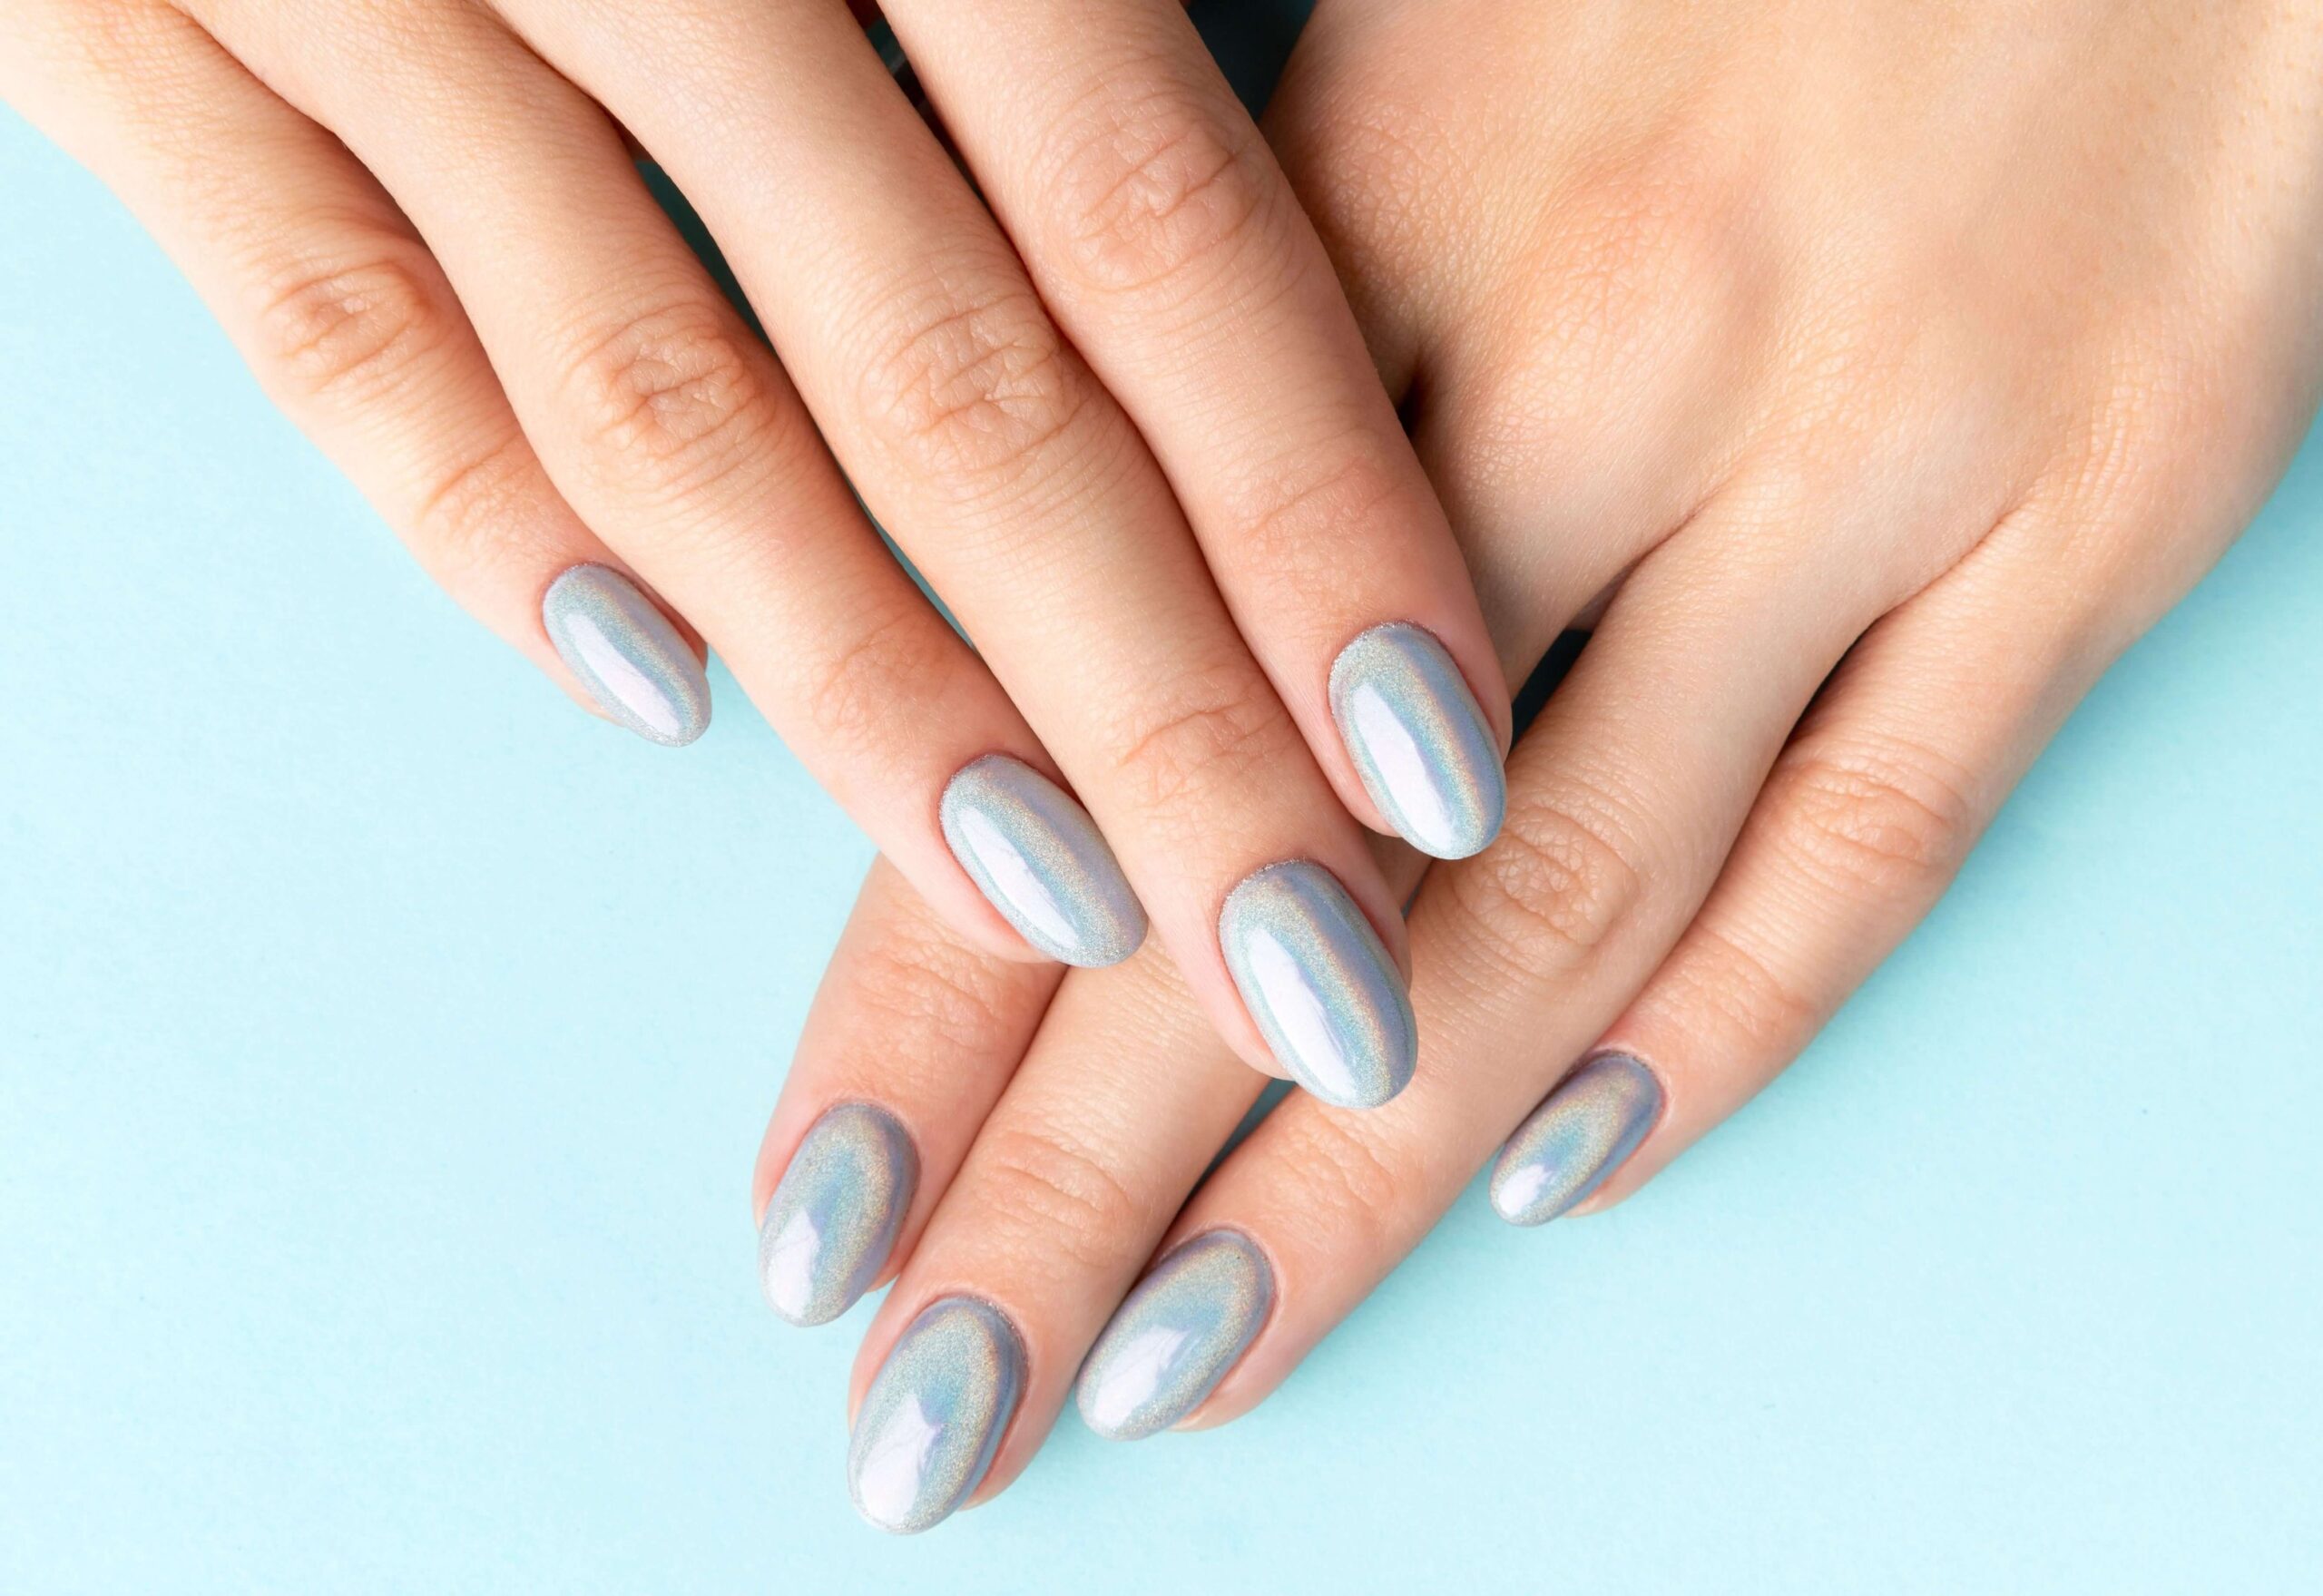
5. Holographic Shine
These futuristic, rainbow-reflective nails shimmer beautifully in the summer sunlight.
6. 3D Flower Nails
Intricate raised floral designs make your nails bloom – literally. Romantic, eye-catching and unique.
7. Geometric Accents
Modern, minimal, yet full of personality – clean lines and bold shapes offer an artsy twist on summer beauty.
8. Glitter Details
A bit of sparkle goes a long way. Glittery nails are perfect for summer weddings, birthdays, or just everyday glam.
9. French Tip with a Twist
Update the classic French manicure with pastels, floral tips or a hint of shimmer.
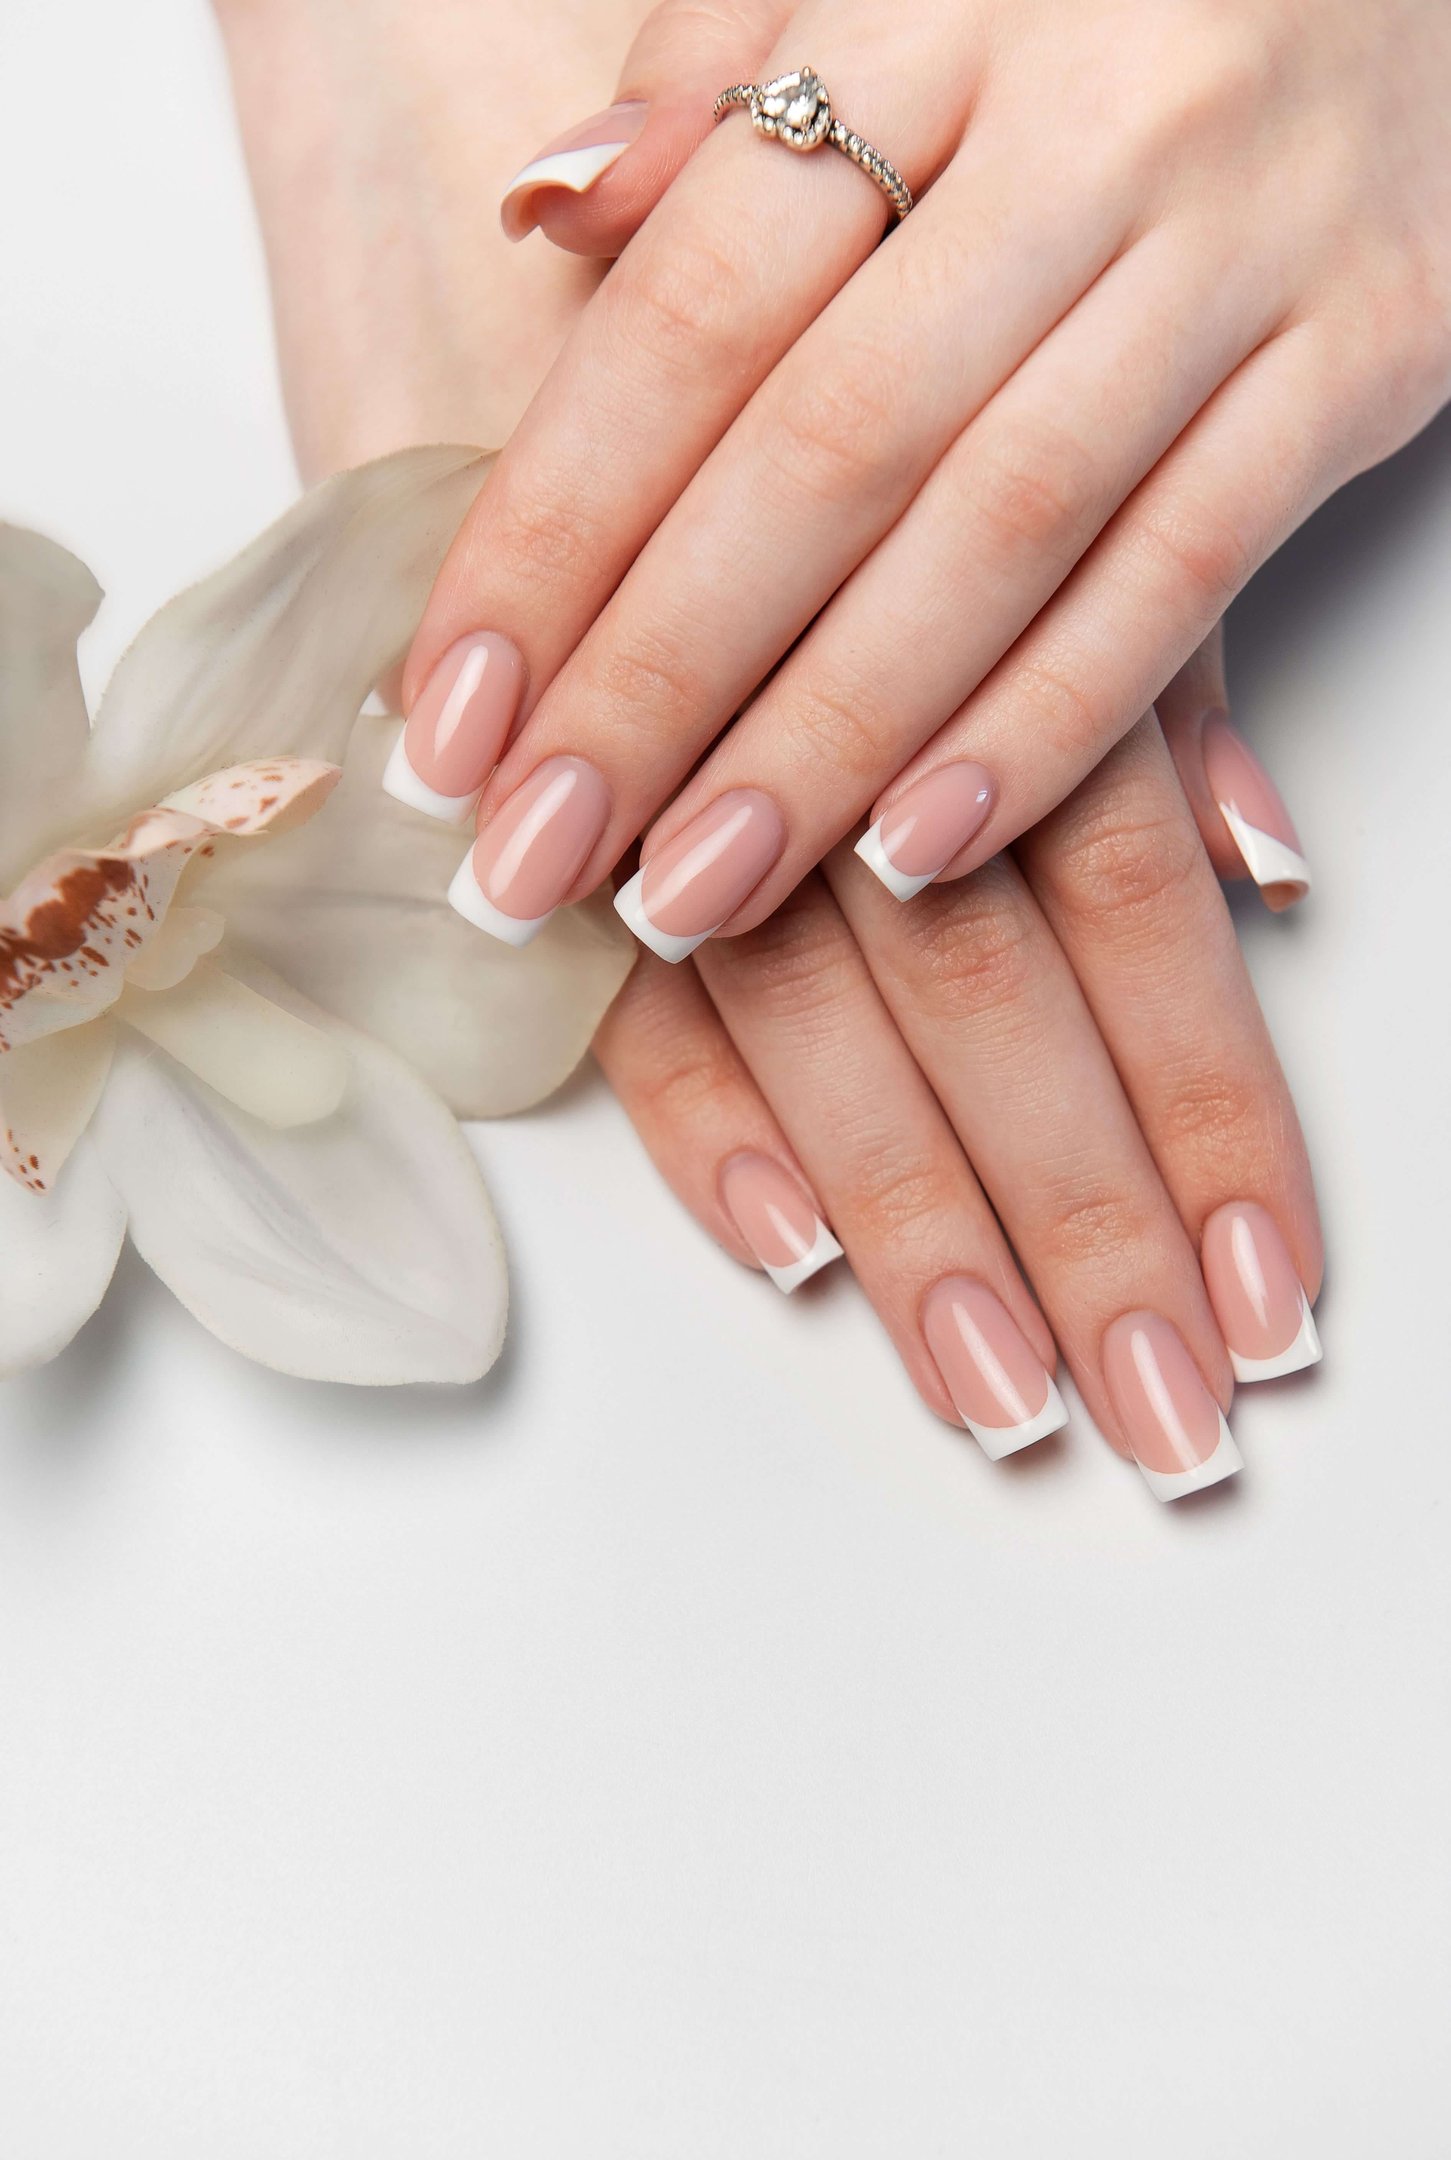

10. Minimal Nude Look

Let your fingertips celebrate summer. Whether you go soft and floral or bold and bright, your nails can be a joyful extension of the season. Happy summer and happy styling!
Simple nude tones with delicate details create an elegant, never-fail look.
For more nail art inspiration, check out the latest nail trends on Allure.

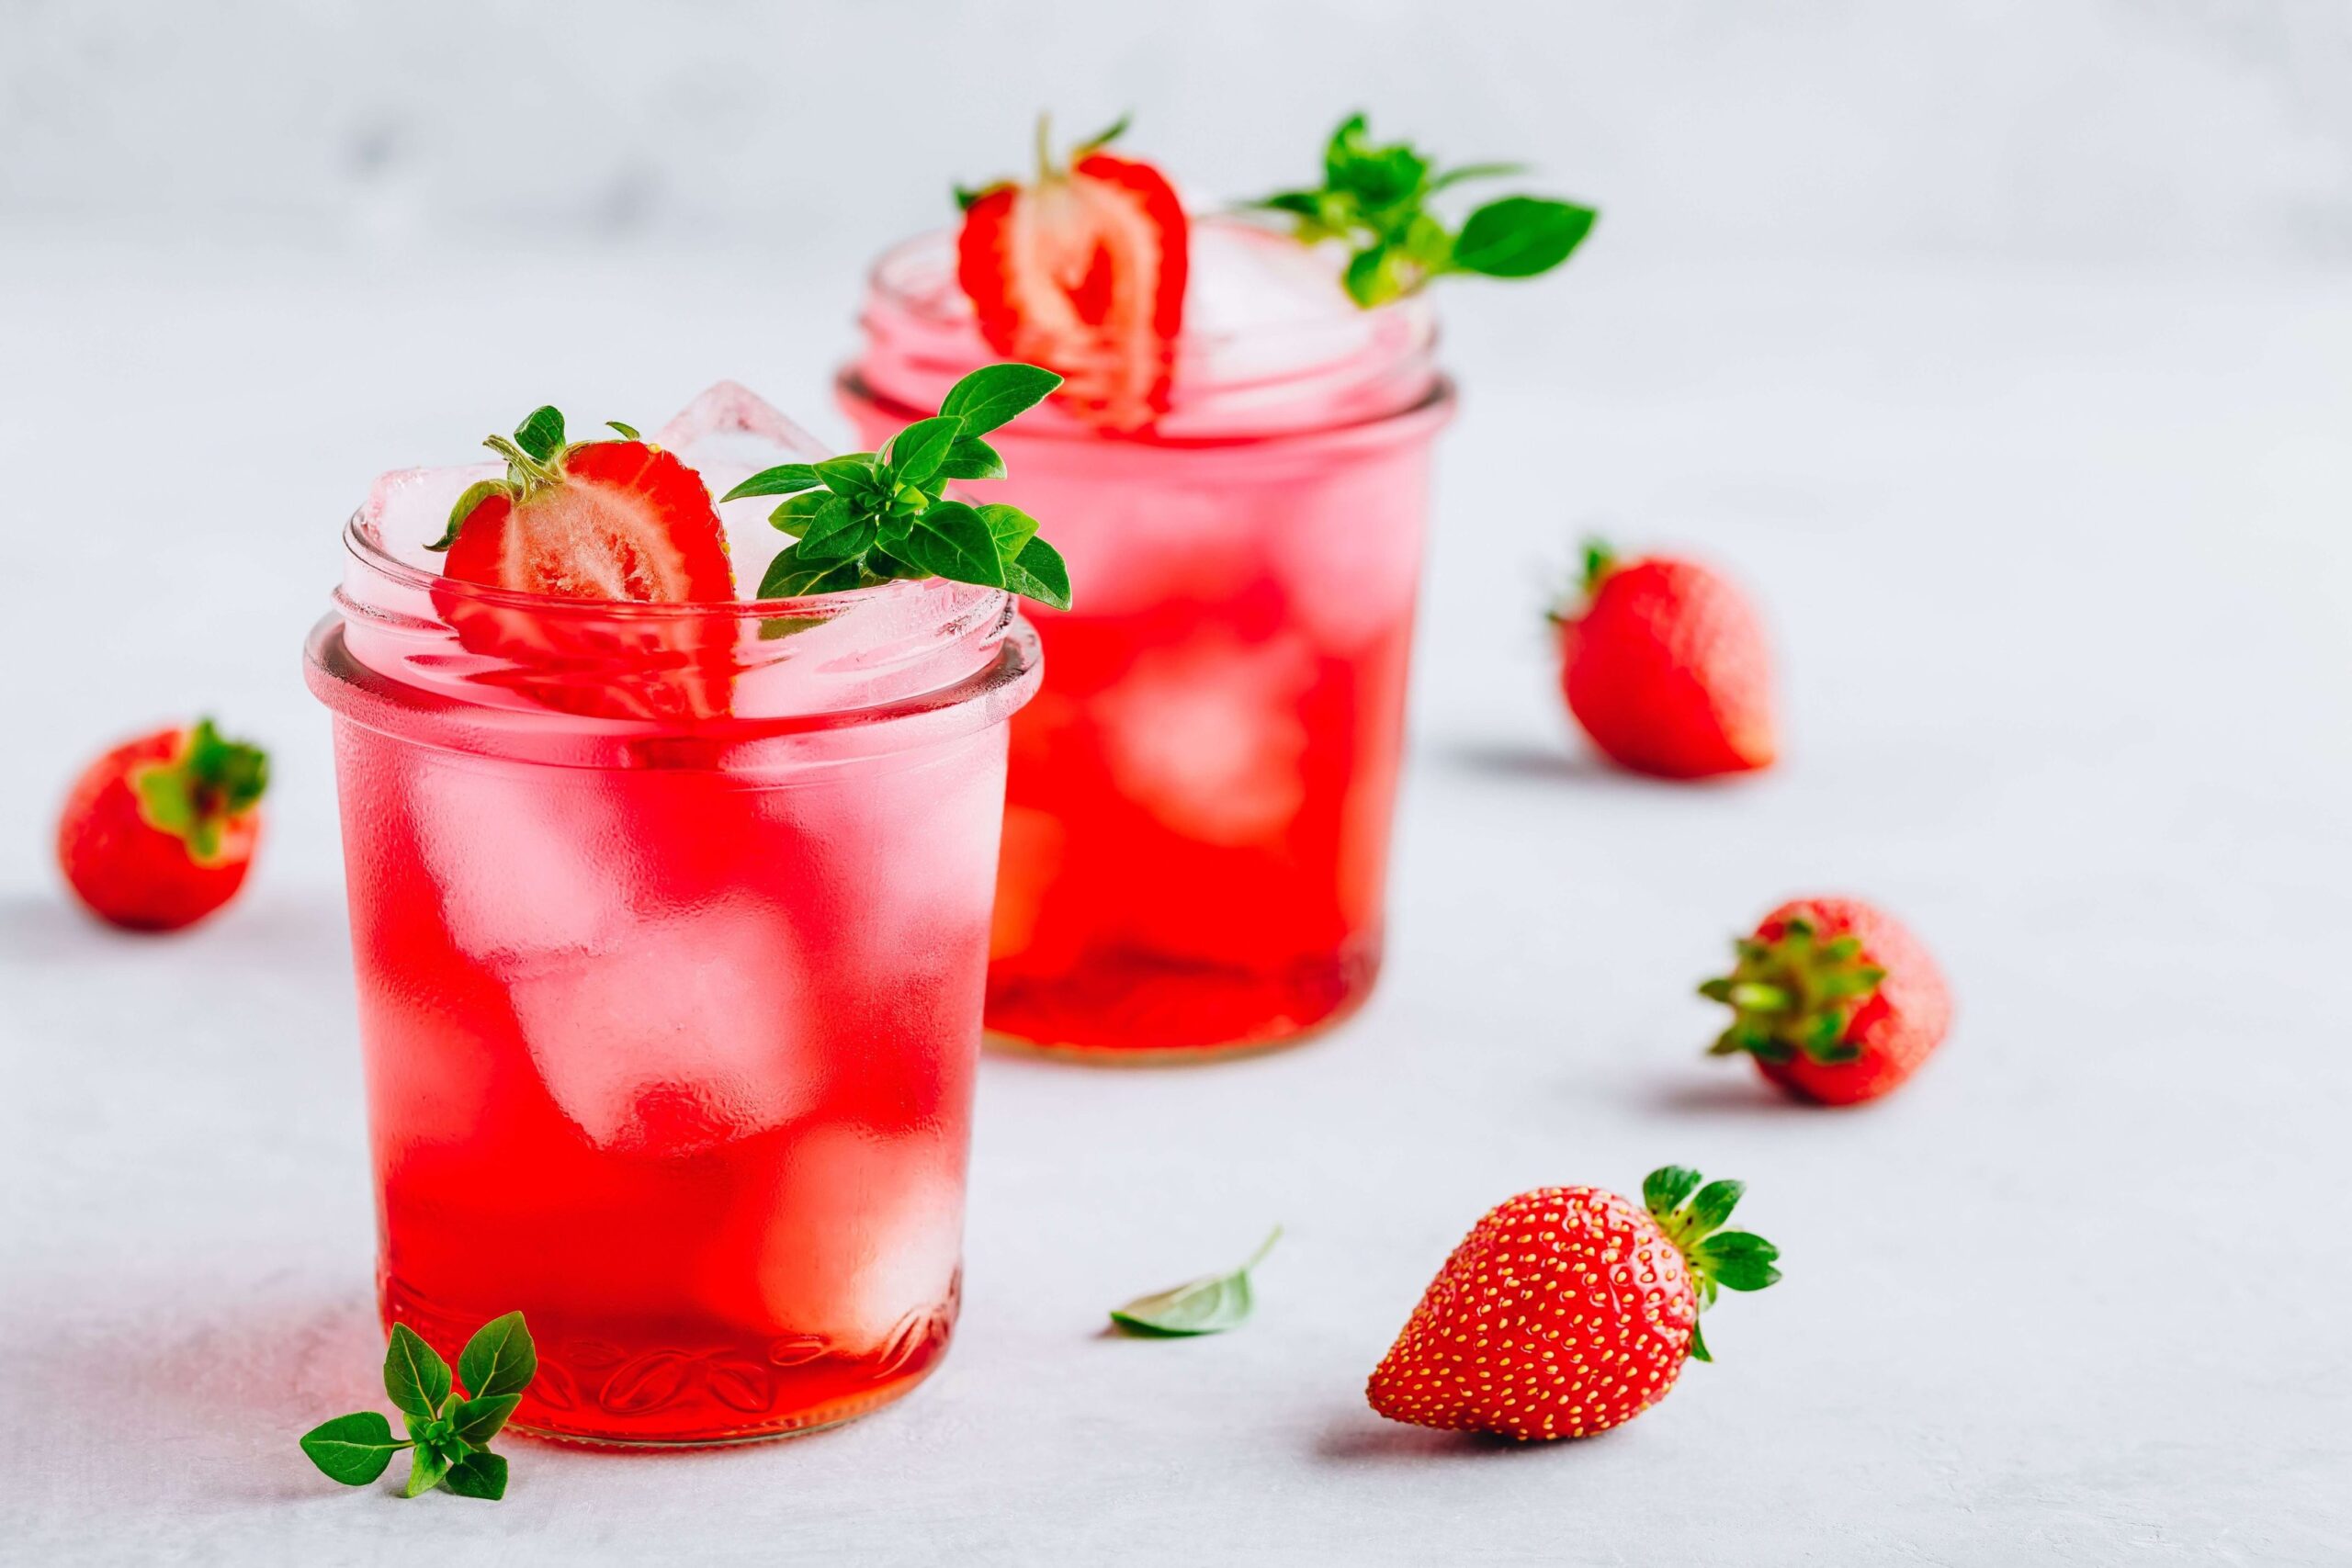
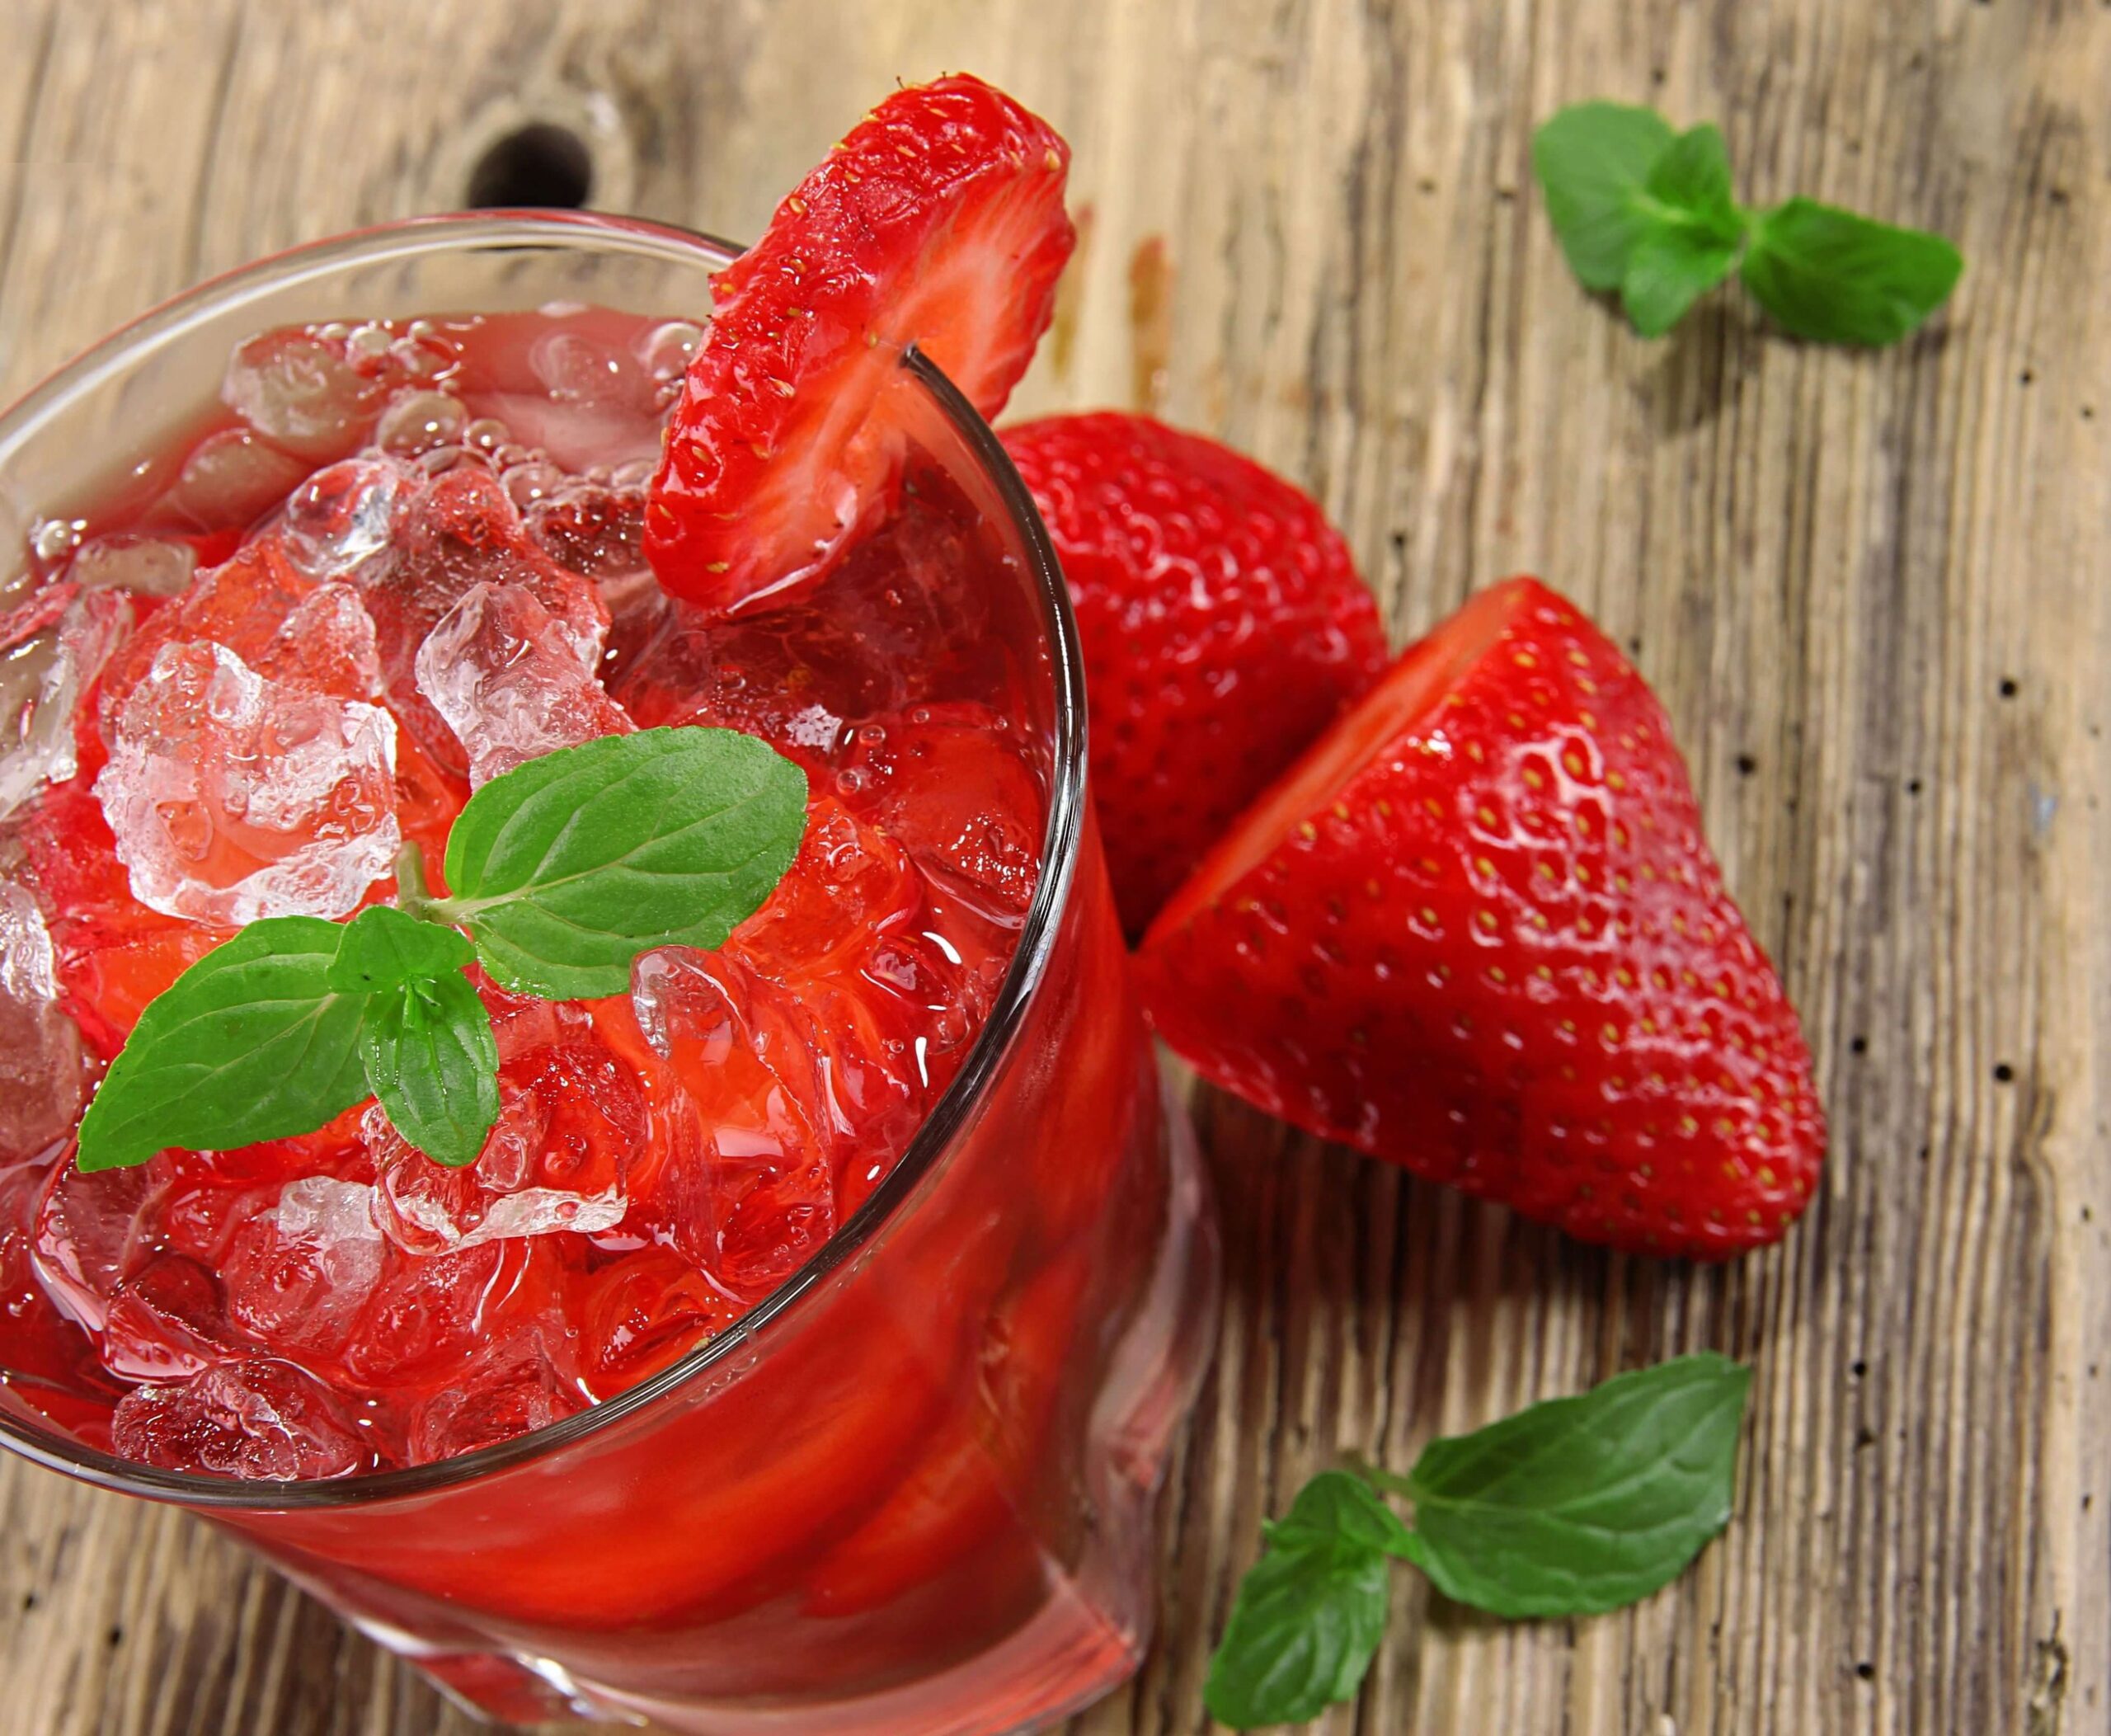
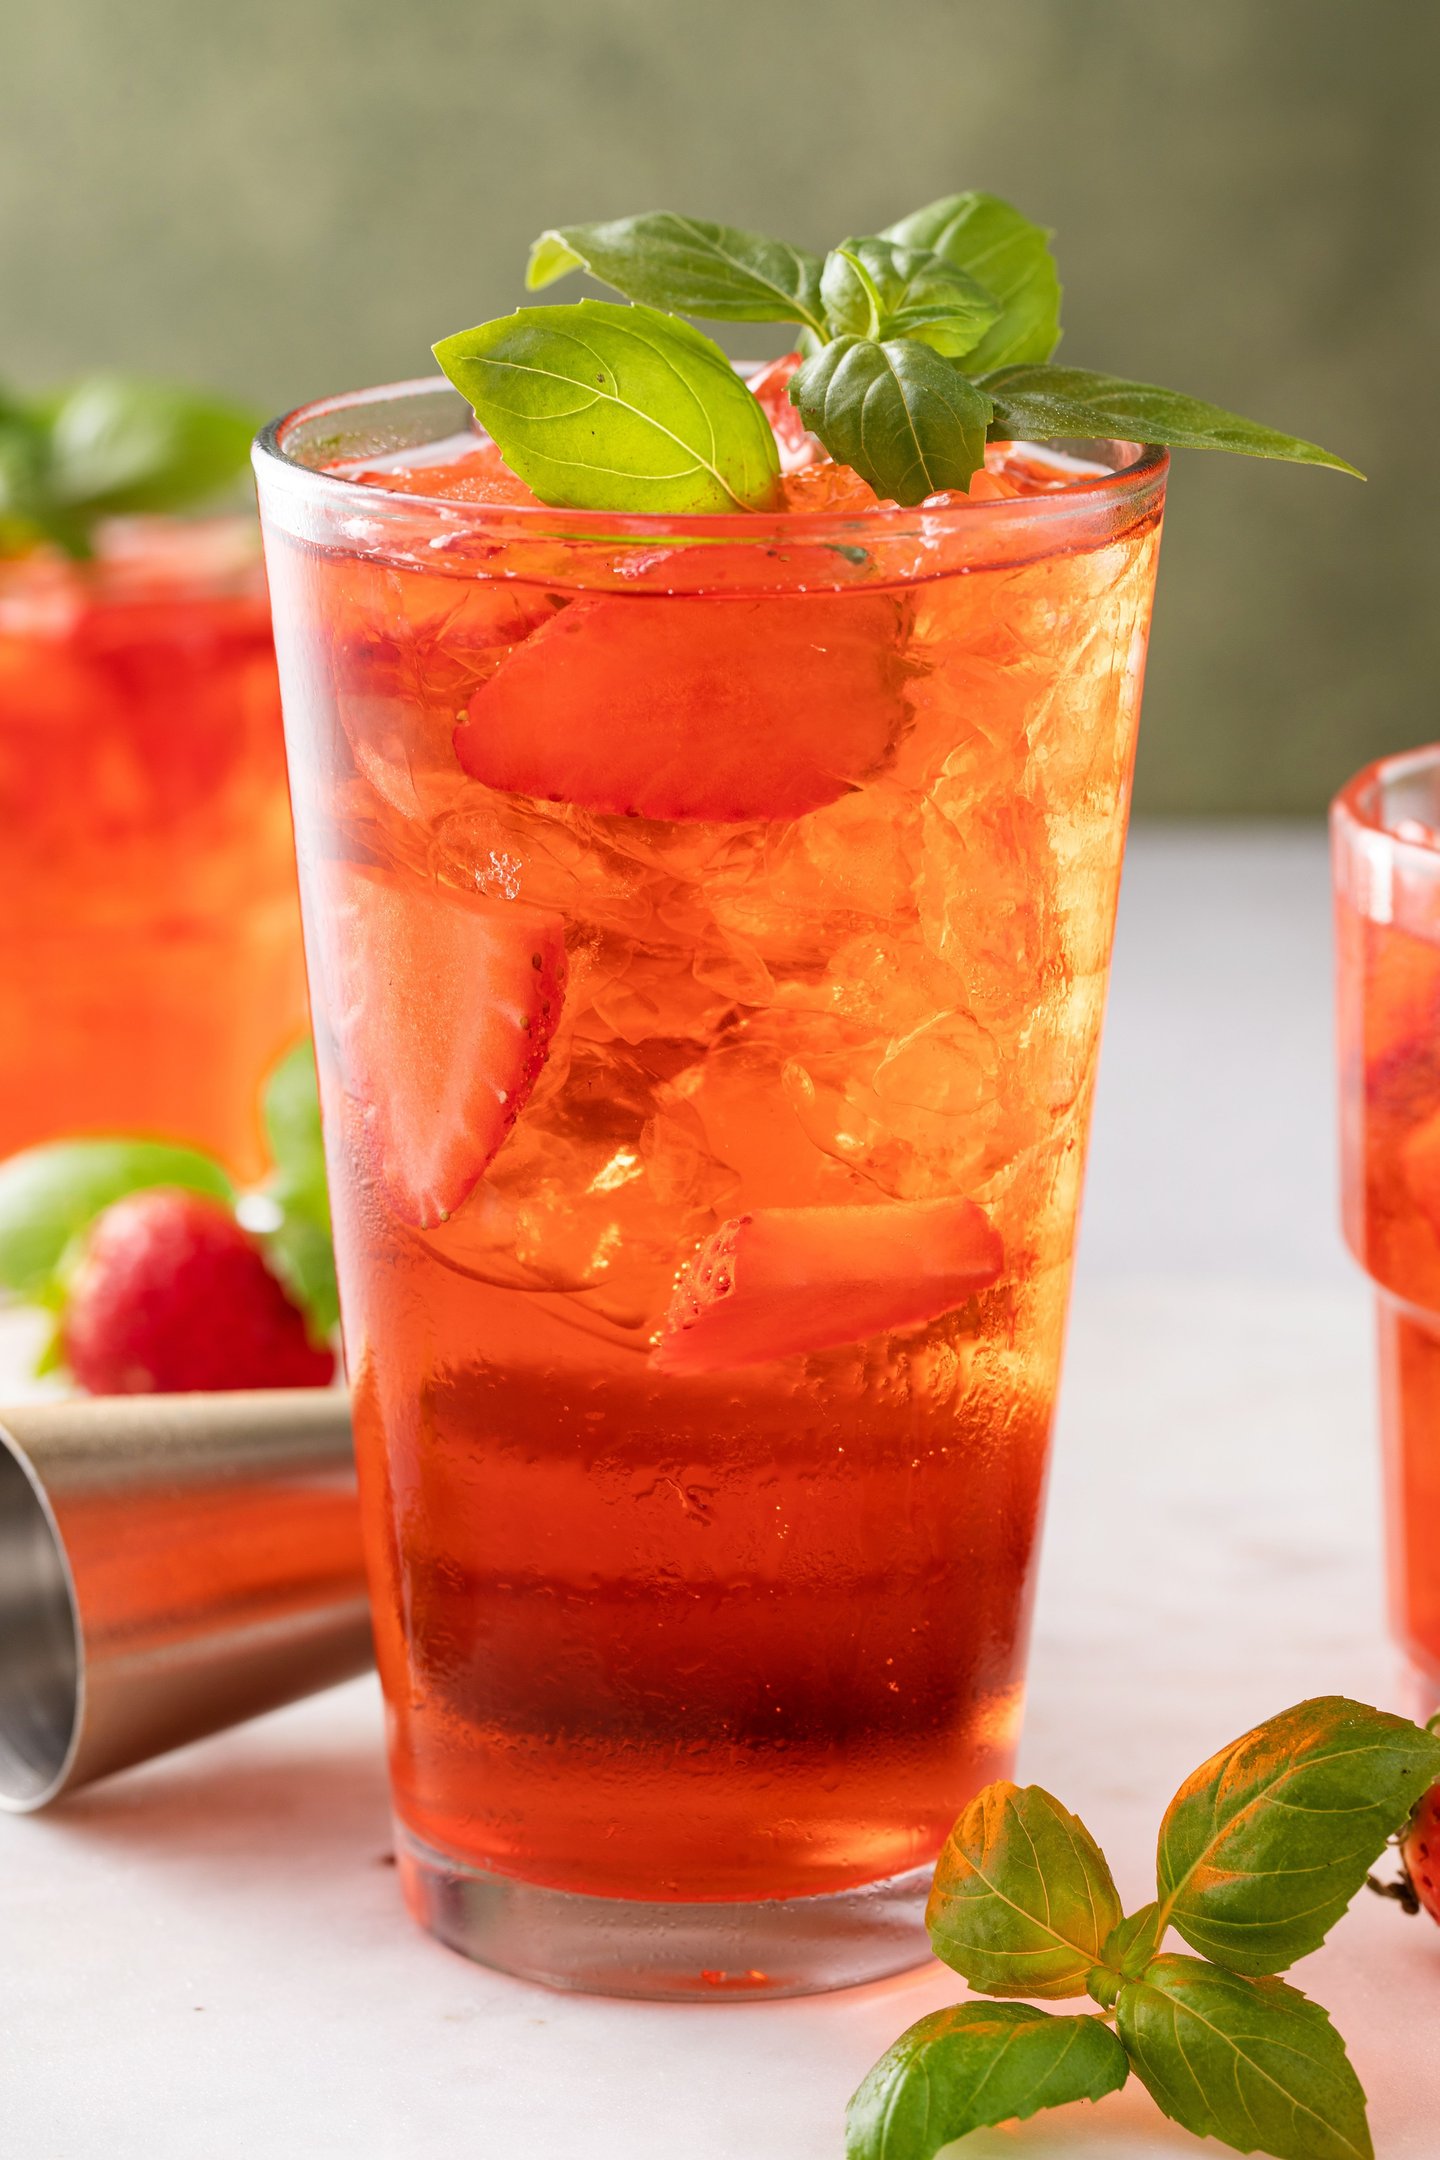
Picture this: it’s warm outside, you’re tired of the usual drinks, and you crave something special. Not sugary. Not boring. Just… refreshing. That’s exactly why this Strawberry Hibiscus Lemonade Recipe is a summer mocktail you’ll love – something beautiful, light, and good for your body and soul.
What I Love Most About This Drink (and You Will Too)
Honestly, this hibiscus tea strawberry-lemonade refresher is the kind of drink that makes you feel like you have your life together. It’s…
Naturally energising, without caffeine crashes.
Full of good stuff like vitamin C and antioxidants.
Pretty enough for a party, but simple enough for a Tuesday.
And totally customisable to whatever mood you’re in.
And the best part? It’s kid-friendly, gut-friendly, and way cheaper than anything you’ll find at a trendy café.
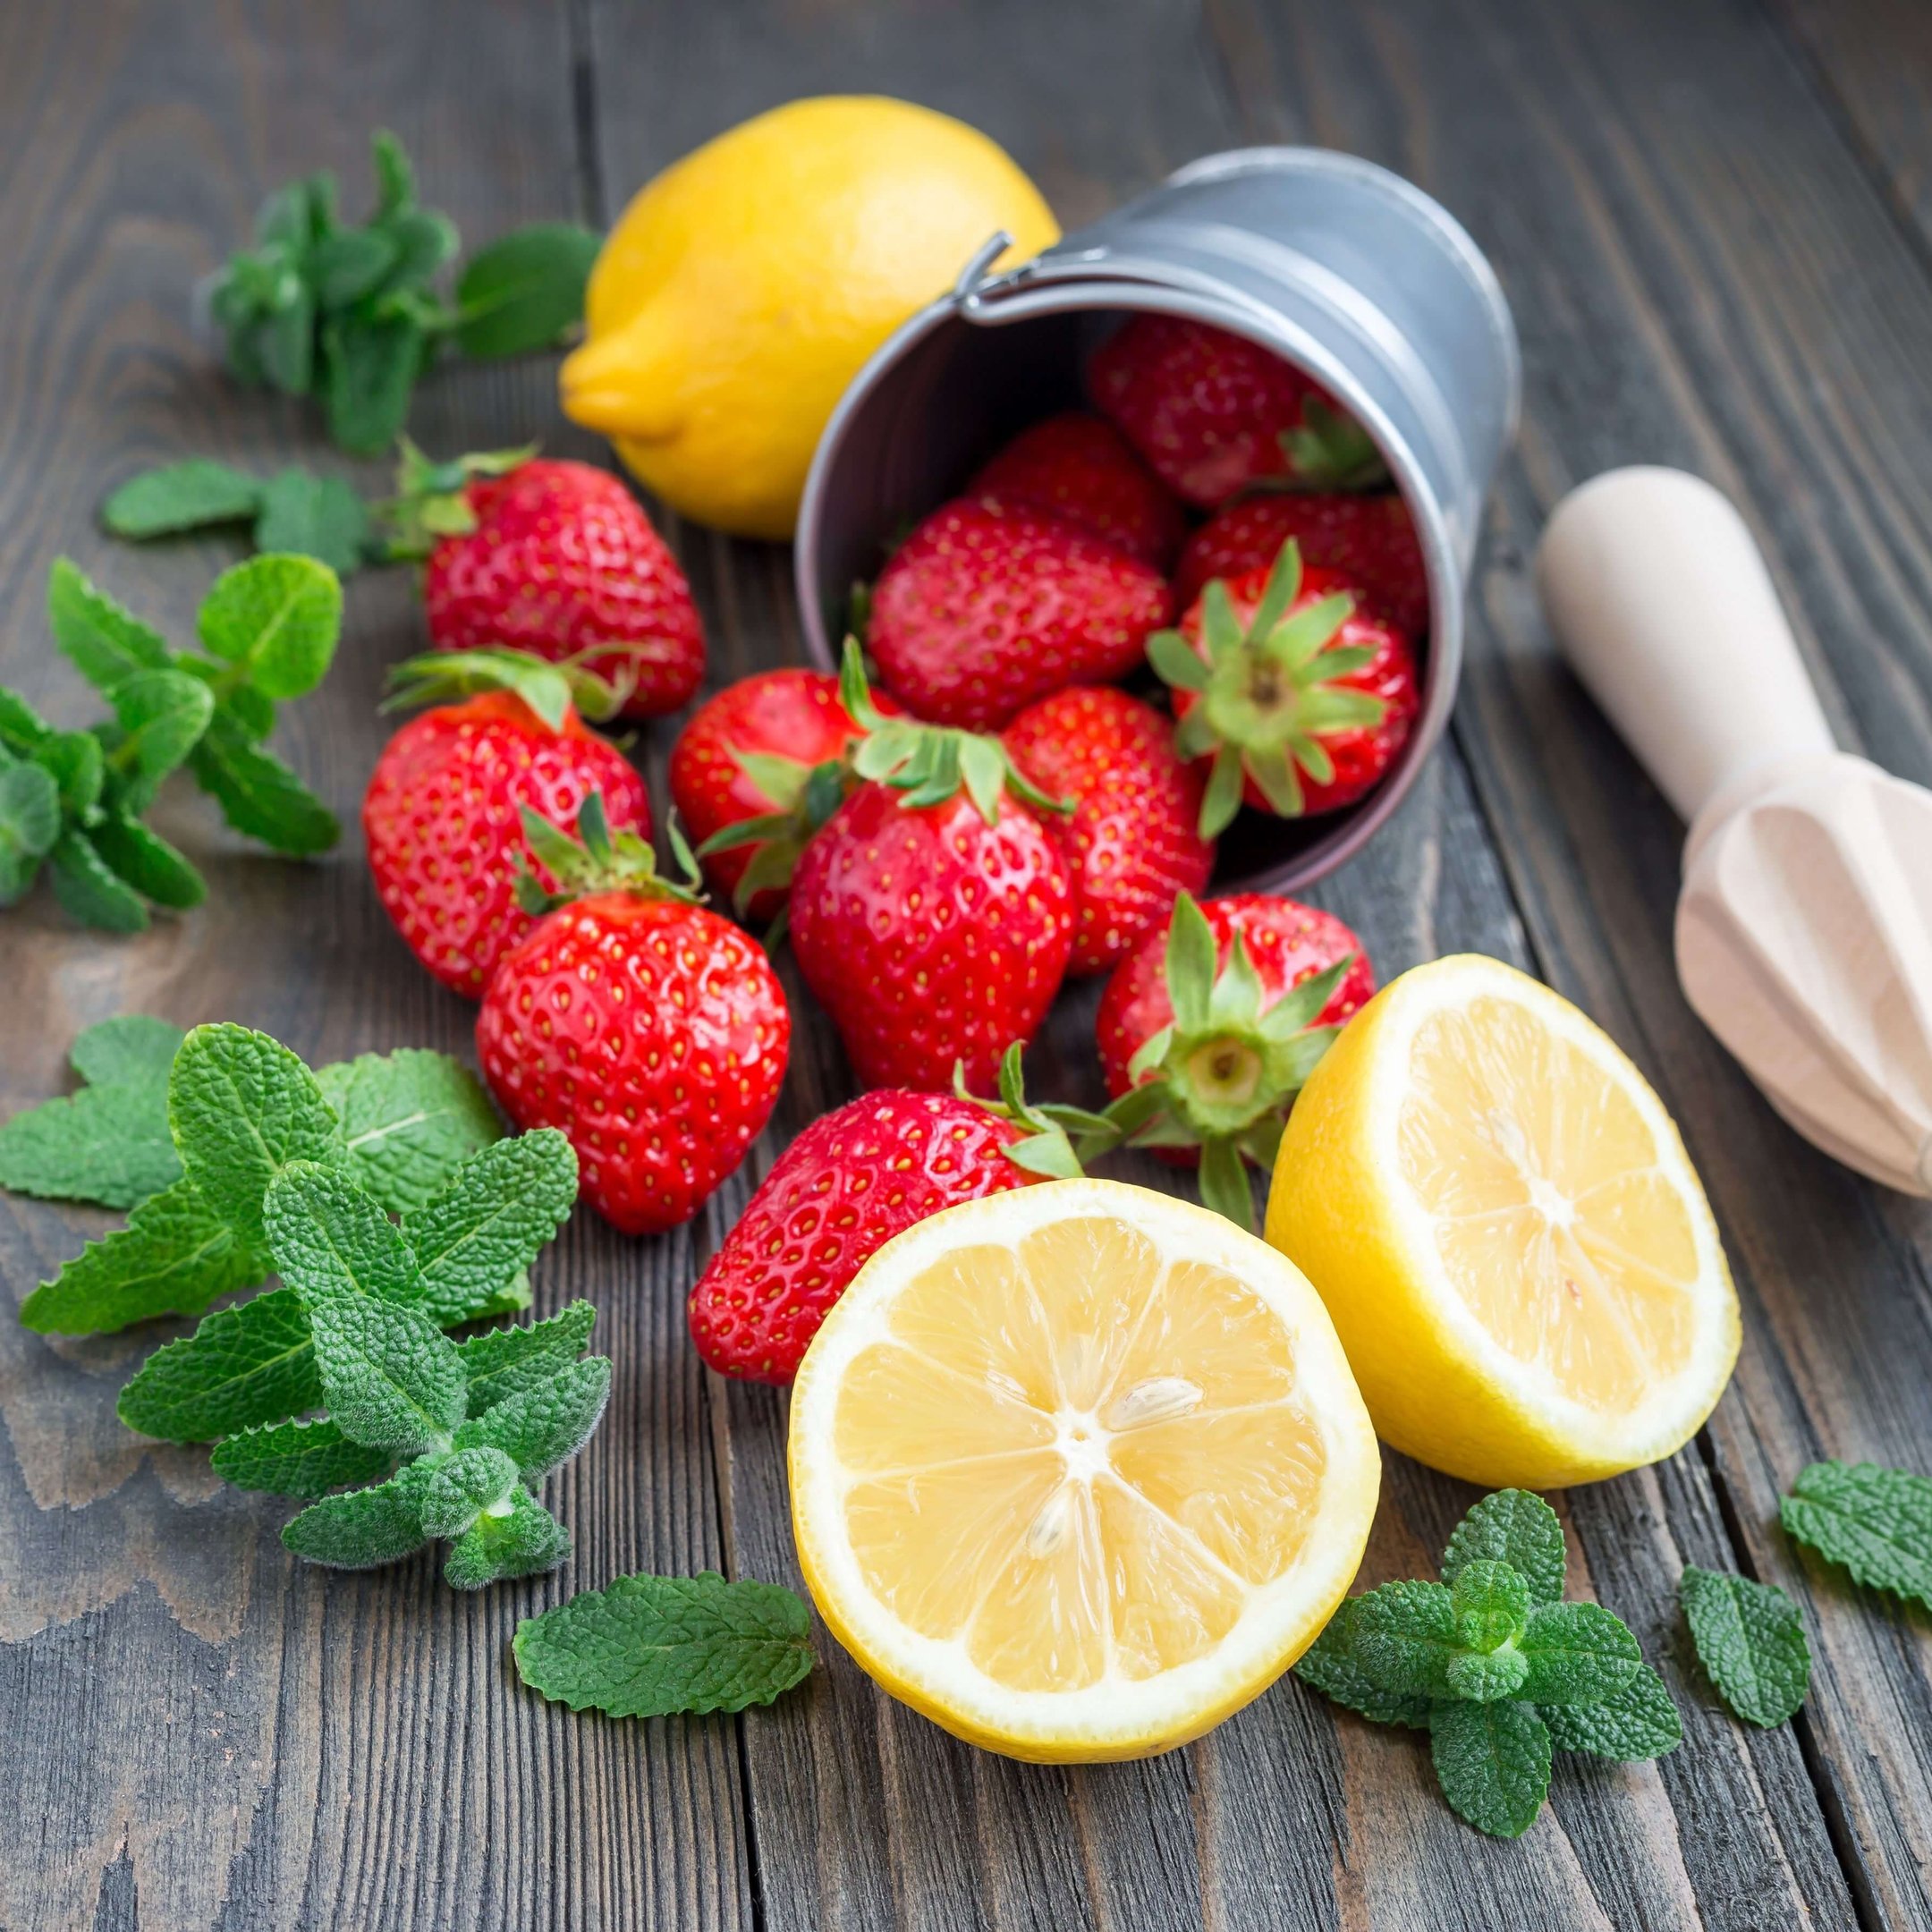
Here’s What You’ll Need to Make the Magic Happen
This drink is all about combining a few simple ingredients into something genuinely wow-worthy:
4 cups water – plain or half replaced with sparkling water for fizz
2 tbsp dried hibiscus flowers (aka Flor de Jamaica) or 2 hibiscus tea bags
1 cup fresh or frozen strawberries – frozen makes it extra slushy
1/2 cup lemon juice – fresh is best
1/4 cup maple syrup – adjust to taste
Ice, mint, lemon slices – for serving and that Pinterest-perfect look
You can find dried hibiscus at natural food stores or online. I always keep a small jar in my pantry.
How I Put It All Together (and How You Can Too)
This isn’t just a “mix and sip” moment — it’s a little self-care ritual you’ll look forward to:
1. Start with the tea base
Boil the water, toss in your hibiscus flowers or tea bags, and let it steep for 7–10 minutes. You want a deep ruby red. Then cool it down (or toss it in the fridge if you’re impatient like me).
On lazy summer days, I make this as a sun tea: just leave the hibiscus in a clear pitcher in direct sunlight for 2–3 hours. Magical.
2. Blend the sweet and the tangy
In a blender, mix the strawberries, lemon juice, and maple syrup until smooth. Taste it. Smile.
Strain the strawberry mix (optional), then stir it into the chilled hibiscus tea. At this point, it’s already beautiful — but we’re not done yet.
4. Serve it like it matters
Strain the strawberry mix (optional), then stir it into the chilled hibiscus tea. At this point, it’s already beautiful — but we’re not done yet.
Pour over ice in your cutest glass, top with sparkling water if desired, and finish with a mint sprig, lemon wheel, and a few floating strawberry slices.
My Little Tricks That Make a Big Difference
Brew the hibiscus ahead of time and keep it chilled — perfect for spontaneous “I-need-something-refreshing” moments.
Add a splash of rum or vodka for a party-ready cocktail version.
Try it with raspberries or peaches for fun fruity twists.
Make it extra slushy by blending with ice.
Store leftovers in a glass bottle in the fridge — it stays fresh for 2–3 days (if it lasts that long!).
What’s Actually In This (And Why It Feels So Good)
Lowers blood pressure, supports liver health, rich in antioxidants
Help regulate blood sugar, support heart health, and boost immunity
Cleanses, hydrates, and gives you that glow-from-within vitamin C
Naturally sweet with trace minerals like zinc and manganese
A Few FAQs Before You Grab Your Glass
Can I make it ahead?Yes! The hibiscus tea can be made 2–3 days in advance.Can I use frozen strawberries?Absolutely. I actually love the icy texture they add.Is it safe for kids?Yep. No caffeine, no weird stuff—just plants and fruit.Will it interfere with meds?Hibiscus can lower blood pressure, so if you’re on medication, just check with your doc first.
I hope this drink brings you that same little joy it brings me—when something good-for-you also feels like a treat.
Pin it. Try it. Snap it. Tag it. Make it your new summer favourite.And don’t forget to let me know how you made it your own.